-
×
 Afro flag rhinestone
1 × $5.99
Afro flag rhinestone
1 × $5.99 -
×
 Survivor Quote Pink Ribbon Rhinestone SVG
1 × $5.99
Survivor Quote Pink Ribbon Rhinestone SVG
1 × $5.99 -
×
 LSU tigers Rhinestone SVG
1 × $5.99
LSU tigers Rhinestone SVG
1 × $5.99 -
×
 Love Asu hornets Rhinestone
1 × $5.99
Love Asu hornets Rhinestone
1 × $5.99 -
×
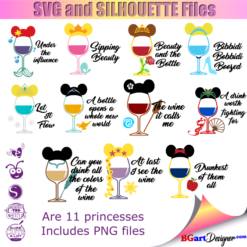 Princess Disney wine glass
1 × $7.49
Princess Disney wine glass
1 × $7.49 -
×
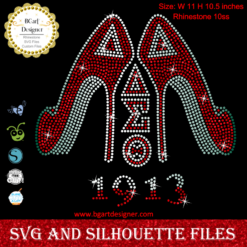 Delta sigma theta high heel
1 × $5.99
Delta sigma theta high heel
1 × $5.99 -
×
 logo Alabama AAMU University Rhinestone
1 × $3.99
logo Alabama AAMU University Rhinestone
1 × $3.99 -
×
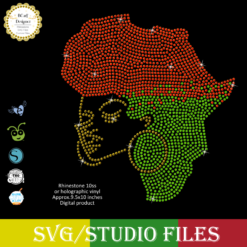 Jamaican woman SVG file
1 × $5.99
Jamaican woman SVG file
1 × $5.99 -
×
 Birthday Queen
1 × $2.49
Birthday Queen
1 × $2.49 -
×
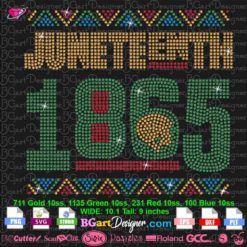 Juneteenth 1865 Woman Face Rhinestone SVG
1 × $5.99
Juneteenth 1865 Woman Face Rhinestone SVG
1 × $5.99 -
×
 Christmas wine glass svg
1 × $5.99
Christmas wine glass svg
1 × $5.99 -
×
 Black Nurses Rock
1 × $5.99
Black Nurses Rock
1 × $5.99 -
×
 Broken Chain Rhinestone
1 × $4.99
Broken Chain Rhinestone
1 × $4.99 -
×
 Christmas Wine glass svg
1 × $3.99
Christmas Wine glass svg
1 × $3.99 -
×
 Rolling stones vintage distressed
1 × $2.99
Rolling stones vintage distressed
1 × $2.99 -
×
 Beauty afro black girl
1 × $2.99
Beauty afro black girl
1 × $2.99 -
×
 Gangster under crown Rhinestone SVG
1 × $5.99
Gangster under crown Rhinestone SVG
1 × $5.99 -
×
 I love my HBCU
1 × $5.99
I love my HBCU
1 × $5.99 -
×
 Little Bear Riding on Her Mama Bear SVG
1 × $2.99
Little Bear Riding on Her Mama Bear SVG
1 × $2.99 -
×
 Mickey Balloon Rhinestone SVG
1 × $3.99
Mickey Balloon Rhinestone SVG
1 × $3.99 -
×
 Dripping lips Cleveland Browns
1 × $3.91
Dripping lips Cleveland Browns
1 × $3.91 -
×
 Unicorn natural hair
1 × $2.99
Unicorn natural hair
1 × $2.99 -
×
 Living My Best life
1 × $2.99
Living My Best life
1 × $2.99 -
×
 Afro Puffs Little Girl
1 × $5.99
Afro Puffs Little Girl
1 × $5.99 -
×
 Birthday diva rhinestone
1 × $5.99
Birthday diva rhinestone
1 × $5.99 -
×
 MSU Spartans Digital Rhinestone SVG
1 × $5.99
MSU Spartans Digital Rhinestone SVG
1 × $5.99 -
×
 Spider Web Minnie Mouse Rhinestone SVG
1 × $3.99
Spider Web Minnie Mouse Rhinestone SVG
1 × $3.99 -
×
 Queens are born
1 × $3.49
Queens are born
1 × $3.49 -
×
 New Orleans Saints vinyl
1 × $3.99
New Orleans Saints vinyl
1 × $3.99 -
×
 Alabama AAMU University Bulldogs heel rhinestone
1 × $5.99
Alabama AAMU University Bulldogs heel rhinestone
1 × $5.99 -
×
 Olaf Frozen svg and printable
1 × $2.45
Olaf Frozen svg and printable
1 × $2.45 -
×
 Pray On It Over It Through It Rhinestone SVG
1 × $4.99
Pray On It Over It Through It Rhinestone SVG
1 × $4.99 -
×
 Pray until something happens
1 × $5.99
Pray until something happens
1 × $5.99 -
×
 Standing on his promises heel Rhinestone file
1 × $5.99
Standing on his promises heel Rhinestone file
1 × $5.99 -
×
 J16 Zeta Phi Beta Rhinestone SVG
1 × $5.99
J16 Zeta Phi Beta Rhinestone SVG
1 × $5.99 -
×
 Nail Tech Rhinestone Design
1 × $5.99
Nail Tech Rhinestone Design
1 × $5.99 -
×
 Merida princess wine glass
1 × $2.45
Merida princess wine glass
1 × $2.45 -
×
 Lips svg bundle
1 × $1.99
Lips svg bundle
1 × $1.99 -
×
 Minnie mouse wine glass svg
1 × $2.49
Minnie mouse wine glass svg
1 × $2.49 -
×
 Sigma Wife Ring Rhinestone
1 × $5.99
Sigma Wife Ring Rhinestone
1 × $5.99 -
×
 Santa Hat Wine glass svg
1 × $5.99
Santa Hat Wine glass svg
1 × $5.99 -
×
 St Patrick's Day Rhinestone Love Clover svg
1 × $5.99
St Patrick's Day Rhinestone Love Clover svg
1 × $5.99 -
×
 Woman With High Heels and Military Boots SVG
1 × $2.99
Woman With High Heels and Military Boots SVG
1 × $2.99 -
×
 Won't he do it
1 × $5.99
Won't he do it
1 × $5.99 -
×
 Princess Tiana wine glass
1 × $2.79
Princess Tiana wine glass
1 × $2.79 -
×
 Prince Naveen beer mug
1 × $2.79
Prince Naveen beer mug
1 × $2.79 -
×
 Auburn Rhinestone High Heel
1 × $5.99
Auburn Rhinestone High Heel
1 × $5.99 -
×
 Dodge Challenger SRT SVG
1 × $2.99
Dodge Challenger SRT SVG
1 × $2.99 -
×
 Sitting girl cake topper download
1 × $7.49
Sitting girl cake topper download
1 × $7.49 -
×
 Template for use slice in design space app
1 × $3.91
Template for use slice in design space app
1 × $3.91 -
×
 Christmas diva bling
1 × $5.99
Christmas diva bling
1 × $5.99 -
×
 He Is Risen Indeed Small Rhinestone SVG
1 × $4.99
He Is Risen Indeed Small Rhinestone SVG
1 × $4.99 -
×
 Love rhinestone emoji
1 × $3.99
Love rhinestone emoji
1 × $3.99 -
×
 Lips NFL teams SVG
1 × $7.49
Lips NFL teams SVG
1 × $7.49 -
×
 Waterslide Pen Wraps Template PNG
1 × $1.99
Waterslide Pen Wraps Template PNG
1 × $1.99 -
×
 Love valentines day svg
1 × $1.49
Love valentines day svg
1 × $1.49 -
×
 Shelby Cobra vector svg
1 × $5.99
Shelby Cobra vector svg
1 × $5.99 -
×
 Pretty Girls Go To Spelman Rhinestone SVG
1 × $5.99
Pretty Girls Go To Spelman Rhinestone SVG
1 × $5.99 -
×
 God is the Plug Rhinestone svg
1 × $5.99
God is the Plug Rhinestone svg
1 × $5.99 -
×
 Alabama State university ASU Hornets Rhinestone
1 × $5.99
Alabama State university ASU Hornets Rhinestone
1 × $5.99 -
×
 Diva heel template
1 × $5.99
Diva heel template
1 × $5.99 -
×
 Pineapple with tropical flower split
1 × $1.49
Pineapple with tropical flower split
1 × $1.49 -
×
 Dodge Challenger SRT8 Logo SVG
1 × $2.49
Dodge Challenger SRT8 Logo SVG
1 × $2.49 -
×
 Legs in sexy high heels shoes
1 × $2.49
Legs in sexy high heels shoes
1 × $2.49 -
×
 Minnie Sparkle Rhinestone SVG
1 × $5.99
Minnie Sparkle Rhinestone SVG
1 × $5.99 -
×
 Love Alabama Bulldogs Rhinestone
1 × $5.99
Love Alabama Bulldogs Rhinestone
1 × $5.99 -
×
 Anna Princess wine glass SVG
1 × $2.45
Anna Princess wine glass SVG
1 × $2.45
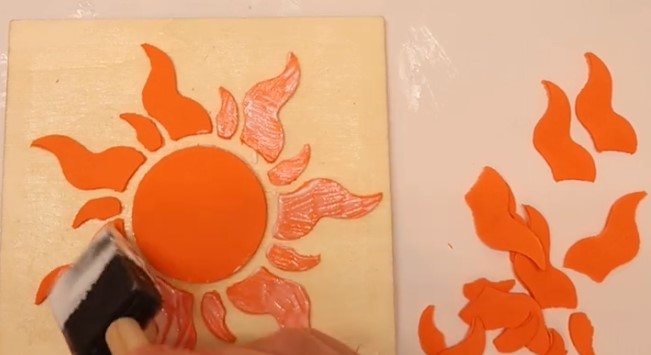
Cutting and Crafting
How to make stamps with a Cricut
Learn how to make stamps with a Cricut machine! A super easy and fun way to personalize! With this project it is possible to use the stamps on envelopes, notebooks, cards, fabrics and more! It is certainly a very inexpensive craft to make.
Supplies needed
- Wood blanks
- X-Acto knife
- Foam
- Cutting machine
- Ink pads
- Deep point blade
- Purple Strong Grip mat
- Mod podge glue
The first step is to create the wooden base for the stamp. Since we are going to use foam, the images can’t be too small. But try to make them to a size that will fit on the ink pad. It is possible to cut the wood with an X-acto knife in case it is larger.
Make a line with a pencil and start passing the knife several times. Finally bend the wood to break it. With the X-acto knife clean it up a bit and then use some sandpaper to give the wood a smooth edge.
Design process
To make the design for stamps, Open Cricut Design space and look for images that do not have too many details or thin letters. That is Because we are going to cut them into foam sheets. Measure the blank wood, and insert that size into a shape to create a template. At BGArtDesignre.com it is possible to find awesome designs with the best prizes!
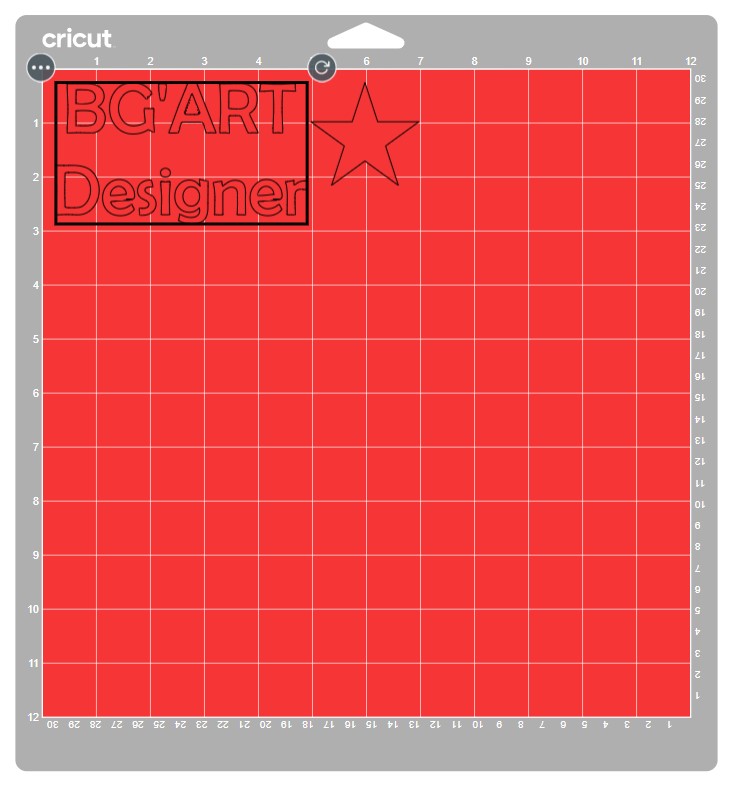
As a recommendation, since we are going to use only one color of foam, change the color of the designs to have all the pieces on the same grip mat.
Cutting the foam
To make stamps with a Cricut, we have to cut each design three times to make the stamp thicker. Here you have two options, you can copy and paste as many times as you want. Or an easier way is to click “make it” and then change the amount of “project copies” in the upper left corner.
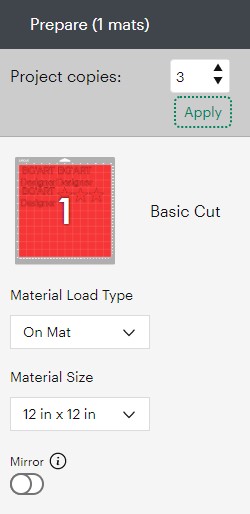
Select the material, browse all of them and select “craft foam”. Above all, selecting the “use more pressure” could tear the foam, so less pressure will work. The most important thing is to move the star wheels to the right. If we do not do this the wheels will leave indentations in the foam.
Place the foam on a strong purple grip mat and, using the brayer, make sure the material adheres properly to the grip mat. In case of placing only a piece of foam on the mat; make sure to align the design in the exact same place on Cricut Design Space.
Finally, clean the cuts with an X-Acto knife. To clarify, sometimes the machine does not cut the foam all the way through, but it is easy to peel it off.
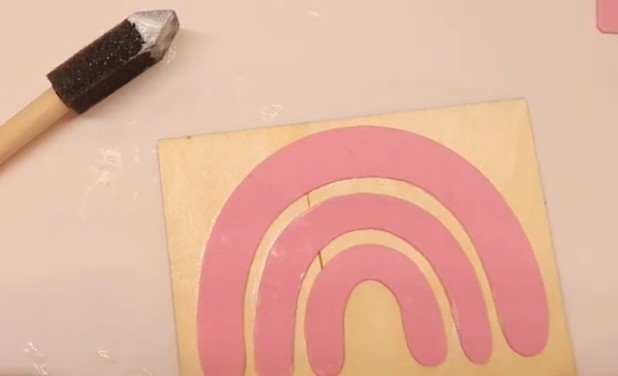
Assembling the stamp
Now it’s time to glue the foam to the wood. Use some mod podge glue and a brush, to avoid putting too much glue because when you press it will come out around the edges making a mess.
Above all, make sure you put the glue on the same side of all the foam layers, so to align the whole design well. Let it set and place something heavy on top of the glued foam. Also, cut and place the vinyl design on the back of the wood to identify each stamp.
Intrincate stamp tips
Above all, detailed images take more time, but they are worth it. The recommendation is not to cut them too small. To properly adhere the design, leave the first layer of foam on the mat and peel off the excess. Then use transfer tape to peel the design off the mat and adhere it to the piece of wood.
While the design is on the transfer tape add glue and finally adhere it to the wood. This is just in case the design doesn’t have a word on it! Then gluing the second layer on top will be easier. Just follow the first layer.