-
×
 Soror Gamma Phi Delta Rhinestone SVG
1 × $5.99
Soror Gamma Phi Delta Rhinestone SVG
1 × $5.99 -
×
 Ohio state buckeyes lips
1 × $3.91
Ohio state buckeyes lips
1 × $3.91 -
×
 Birthday entourage girls
1 × $5.99
Birthday entourage girls
1 × $5.99 -
×
 Download Rhinestone alphabet BGART7
1 × $9.99
Download Rhinestone alphabet BGART7
1 × $9.99 -
×
 LSU tigers Rhinestone SVG
1 × $5.99
LSU tigers Rhinestone SVG
1 × $5.99 -
×
 Queens are born
1 × $3.49
Queens are born
1 × $3.49 -
×
 Nail Tech Rhinestone Design
1 × $5.99
Nail Tech Rhinestone Design
1 × $5.99 -
×
 Birthday diva rhinestone
1 × $5.99
Birthday diva rhinestone
1 × $5.99 -
×
 Dripping lips NY Giants
1 × $3.91
Dripping lips NY Giants
1 × $3.91 -
×
 I love my HBCU
1 × $5.99
I love my HBCU
1 × $5.99 -
×
 Custom cake topper
2 × $9.99
Custom cake topper
2 × $9.99 -
×
 OES sistar lips vector
1 × $3.91
OES sistar lips vector
1 × $3.91 -
×
 Danger proud basketball mom
1 × $5.99
Danger proud basketball mom
1 × $5.99 -
×
 Saints Girl Heels
1 × $3.99
Saints Girl Heels
1 × $3.99 -
×
 Diva afro girl rhinestone svg
1 × $5.99
Diva afro girl rhinestone svg
1 × $5.99 -
×
 Tennessee titans lips svg
1 × $3.91
Tennessee titans lips svg
1 × $3.91 -
×
 Christmas diva bling
1 × $5.99
Christmas diva bling
1 × $5.99 -
×
 Jamaican woman SVG file
1 × $5.99
Jamaican woman SVG file
1 × $5.99 -
×
 Merry Grinchmas Truck SVG
1 × $2.99
Merry Grinchmas Truck SVG
1 × $2.99 -
×
 Santa Hat Wine glass svg
1 × $5.99
Santa Hat Wine glass svg
1 × $5.99 -
×
 Princess Tiana wine glass
1 × $2.79
Princess Tiana wine glass
1 × $2.79 -
×
 Trust me I am a Dogtor
1 × $2.49
Trust me I am a Dogtor
1 × $2.49 -
×
 Auburn Rhinestone High Heel
1 × $5.99
Auburn Rhinestone High Heel
1 × $5.99 -
×
 Blessed Princess Unstoppable Rhinestone
1 × $5.99
Blessed Princess Unstoppable Rhinestone
1 × $5.99 -
×
 logo Alabama AAMU University Rhinestone
1 × $3.99
logo Alabama AAMU University Rhinestone
1 × $3.99 -
×
 Pray until something happens
1 × $5.99
Pray until something happens
1 × $5.99 -
×
 St Patrick's Day Rhinestone Love Clover svg
1 × $5.99
St Patrick's Day Rhinestone Love Clover svg
1 × $5.99 -
×
 Birthday Queen
1 × $2.49
Birthday Queen
1 × $2.49 -
×
 Girl leopard lips svg
1 × $3.99
Girl leopard lips svg
1 × $3.99 -
×
 Spider Web Vector svg
1 × $0.99
Spider Web Vector svg
1 × $0.99 -
×
 We are all in this together
1 × $1.99
We are all in this together
1 × $1.99 -
×
 Legs in sexy high heels shoes
1 × $2.49
Legs in sexy high heels shoes
1 × $2.49 -
×
 Frida Kahlo quotes SVG
1 × $2.49
Frida Kahlo quotes SVG
1 × $2.49 -
×
 Dabbing unicorn
1 × $1.99
Dabbing unicorn
1 × $1.99 -
×
 Birthday girl slay svg
1 × $3.49
Birthday girl slay svg
1 × $3.49 -
×
 Rhinestone ttf font bgart4
1 × $7.99
Rhinestone ttf font bgart4
1 × $7.99 -
×
 Olaf Frozen svg and printable
1 × $2.45
Olaf Frozen svg and printable
1 × $2.45 -
×
 Christmas wine glass svg
1 × $5.99
Christmas wine glass svg
1 × $5.99 -
×
 Black woman queen
1 × $2.99
Black woman queen
1 × $2.99 -
×
 Living My Best life
1 × $2.99
Living My Best life
1 × $2.99 -
×
 Regular Svg file convert
1 × $5.99
Regular Svg file convert
1 × $5.99 -
×
 Cheer mom bow lips
1 × $3.91
Cheer mom bow lips
1 × $3.91 -
×
 Alabama State university ASU Hornets Rhinestone
1 × $5.99
Alabama State university ASU Hornets Rhinestone
1 × $5.99 -
×
 Believe hairstylist salon quote
1 × $2.49
Believe hairstylist salon quote
1 × $2.49 -
×
 BGART2 Rhinestone Alphabet
1 × $7.99
BGART2 Rhinestone Alphabet
1 × $7.99 -
×
 Prince Naveen beer mug
1 × $2.79
Prince Naveen beer mug
1 × $2.79 -
×
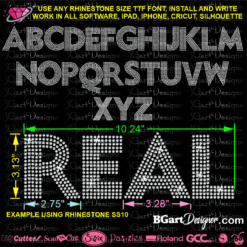 Round rhinestone alphabet BGART5
1 × $5.99
Round rhinestone alphabet BGART5
1 × $5.99 -
×
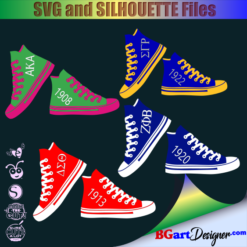 Sorority shoes bundle
1 × $5.99
Sorority shoes bundle
1 × $5.99 -
×
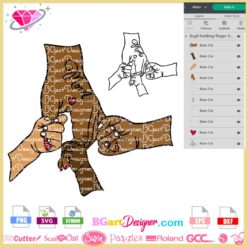 Child Holding Mother Finger SVG
1 × $2.99
Child Holding Mother Finger SVG
1 × $2.99
Cutting and Crafting, Graphic Design Software
How to apply Waterslide / glitter on Epoxy Pen
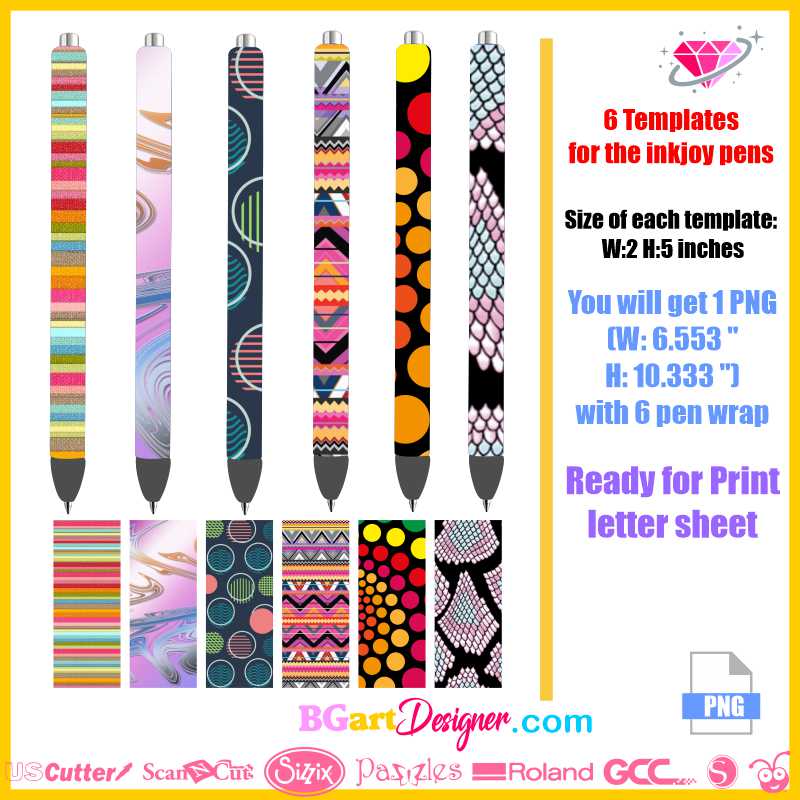
How to apply Waterslide and glitter on Epoxy pen?. This is a long procedure that has to be done perfectly for it to work!. Guess what, in this post will be the step by step of the entire procedure; Get amazing results and beautiful projects!
List of things needed:
- Pens
- Glitter
- Glitter glue/ brite tone
- Sandpaper/ sanding pad
- Craft knife
- Blinggasm Waterslide Paper
- Rust-oleum 2xgloss clear
- Base coat
- Epoxy
- Plastic gloves
- Ink printer/Laser printer
Preparing the Waterslides
First of all, choose a design HERE and open it into the software of a cutting machine (cricut, silhouette, brother, etc) (optional step). Each one should be measured out to fit the pen perfectly; at 4.75 inches tall by 1.5 inches wide. This way they will end up wrapping around the pens perfectly; Print the designs in high quality in some Blinggasm Waterslide Paper (remember that it can be printed in an inkjet printer or in a laser printer).
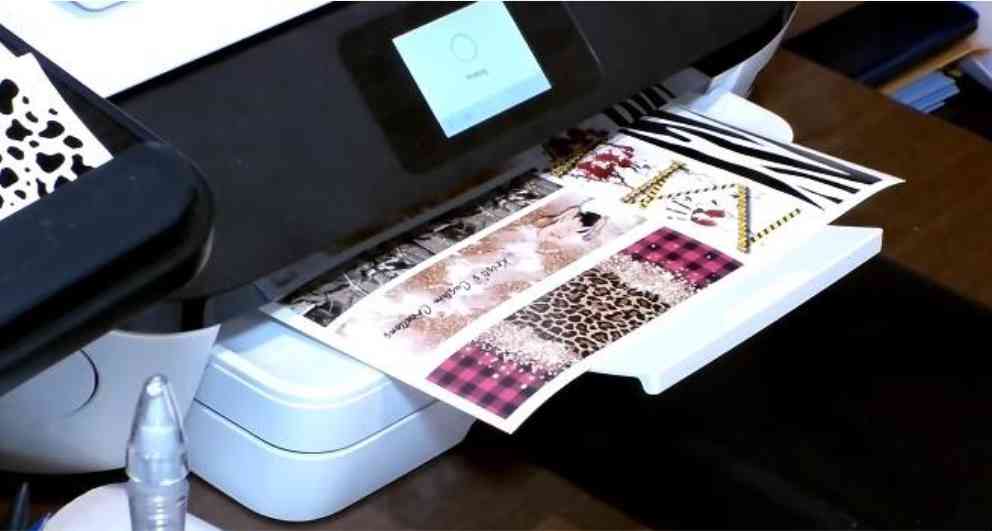
In addition; it’s also necessary to seal the waterslides; Then to use some clear spray paint; if they were printed with inkjet, because the ink will run and disappear if not sealed. Use rust-oleum 2xgloss clear to do that; with a laser printer is not needed have to seal them.
For example Seal it with 4 thin coats 30 minutes apart (make sure it is completely dry before applying another coat) then let them dry for at least two hours and a half, but if possible let it dry overnight.
Preparing the pens
First, unscrew the tip of the pen (the paper mate pens are available on amazon, but could be any other), and pull out the inside; the ink and the rest of it. Put those pieces in one place to not lose them. And left with the casing of the pen.
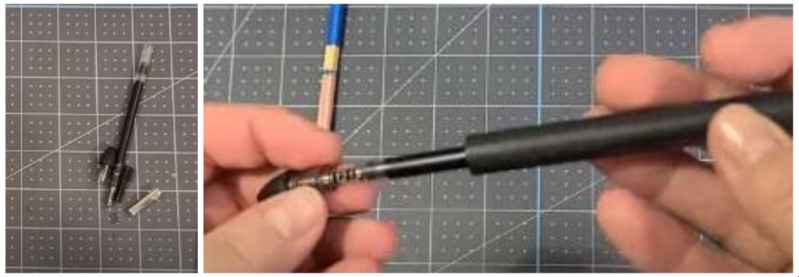
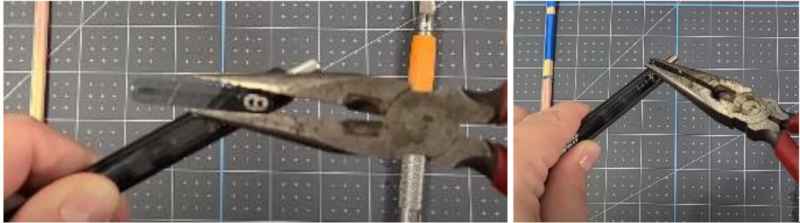
Remove the clip using some pliers and twisting it off; there will be a bit of plastic left, so take a craft knife and shave off some of the excess plastic very carefully. Now take a piece of sandpaper; a 220 grit will work and go over it until you can’t feel anything, so the pen is as flat as possible.
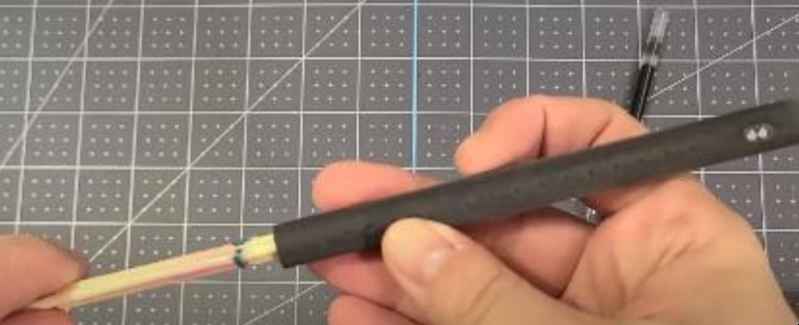
Sand down the entire pen to prepare it well. Next, place the skewers inside of it (take three skewers and tape them together), slip it right on so it will be tight enough to doesn’t go anywhere, this way it will be easier to handle.
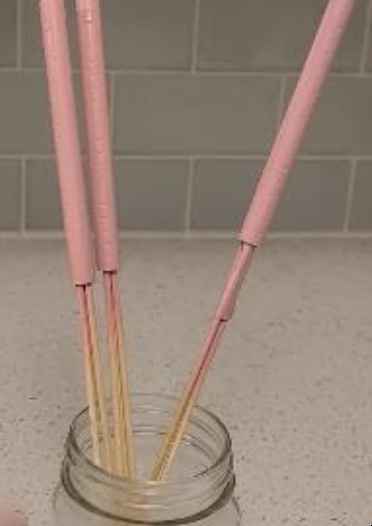
The next step is to apply the base coat (you can add some pigment or just use universal white). Paint the pen and wait about 4 hours to put on another coat, two of them will work nicely. Let it dry (putting the pens in a mason jar to dry will work).
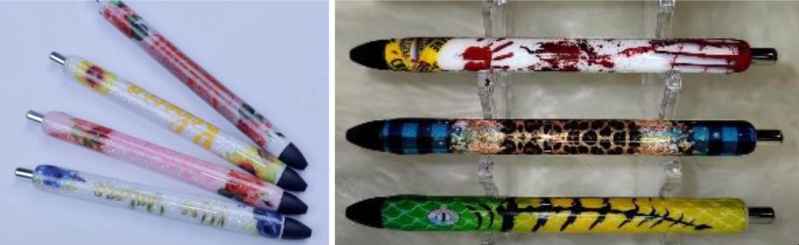
Glitter time
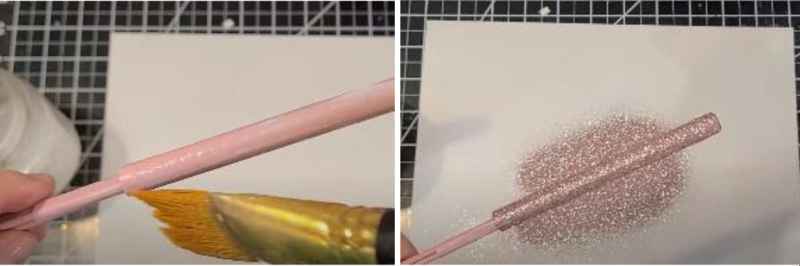
Apply a coat of glitter glue or brite tone all over the pen; sprinkle on the glitter. Once the pen is completely covered in glitter, remove the excess and let it dry for about two hours.
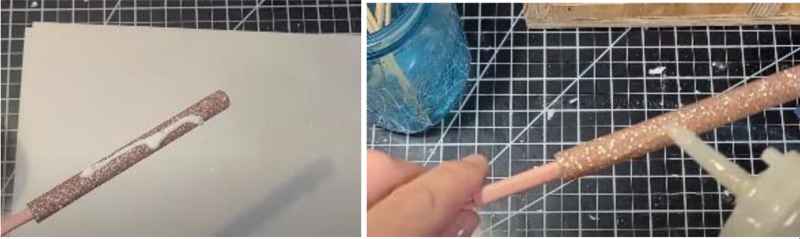
Next, brush off the excess glitter and seal it by putting on some glitter glue and spreading it all over the pen with a flat brush. Let it dry for two hours. After that time, add the first coat of epoxy to the pen, spread it all over the pen with plastic gloves, and let it dry for another 4 hours.
Finally, sand it with 400 grit sandpaper or a sanding pad. Sand it around the pen because it is the only way to end up with a smooth surface.
Putting the waterslides on the pens
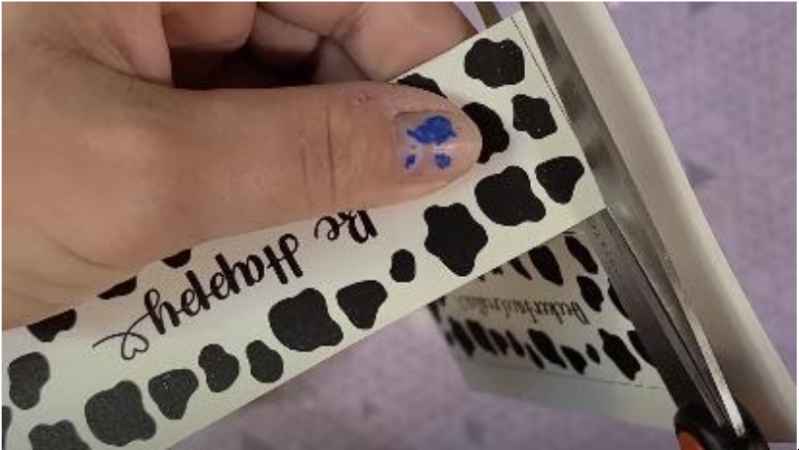
Cut out the already printed and sealed waterslides. Cut out close on the top and the bottom, it doesn’t have to be close on the sides because it doesn’t show when it overlaps.
Now, go ahead and soak the waterslide in some water for about 45 to 60 seconds. When it releases from the backing that’s the signal that it’s ready; So it’s time to put the water slides in the glitter pen.
Wet the surface of the pen before applying the water slide. Place it on the surface; line it up and wrap it around. Now, to smooth out the waterslide; use a soft cotton cloth and very carefully smooth the entire surface of the pen. Do not press too hard so as not to damage the water slide.
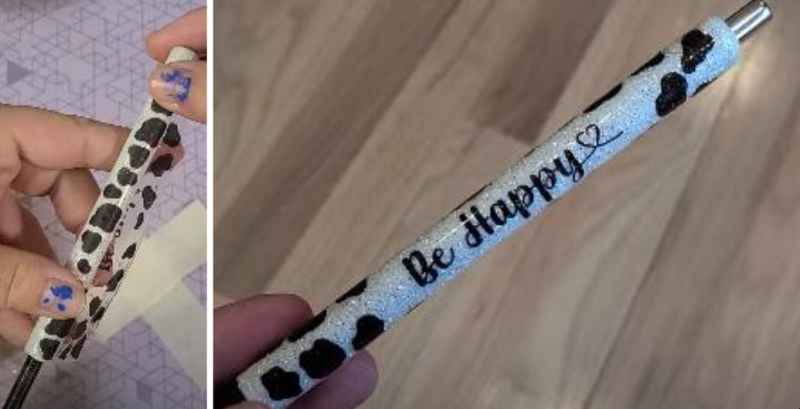
- Here is a quick tip! if images are going to be over glitter use clear water slides so the glitter will shine through. But if the idea is to put it in a darker color, do it with white waterslides.
Before moving on the epoxy step, let the pen with the water slide dry for almost two to three hours to make sure it is completely dry; and then it will be ready for the final coat of epoxy, after that let it dry for reassembly.
The final step is to reassemble all the parts of the pen. Clean the bottom and top with a craft knife if necessary. Test the pens to make sure they are in perfect working order.
That’s the whole tutorial on How to apply Waterslide and glitter on Epoxy pen! This technique can be applied not only to pens; Let your creativity run wild! If you like this kind of tutorial let me know below in the comments!