Cricut Design Space, Cutting and Crafting
Fill text with photos in Cricut
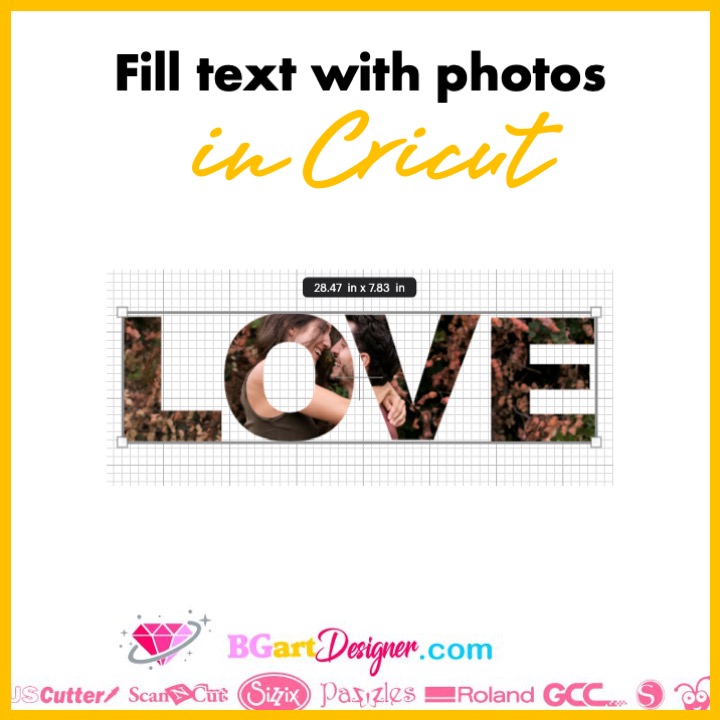
Learn how to fill text with photos in Cricut design space. Create amazing custom projects with this technique. Also here is a tip to make the image larger than the print then cut out restriction. Learn all the details below!
Supplies needed
- Printable vinyl
- Cricut machine
- Grip mat
- Frame
- Brayer
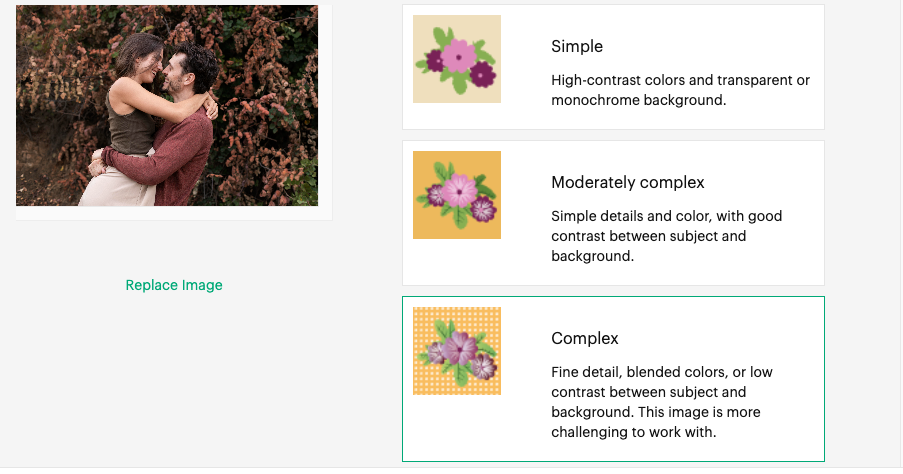
First of all, measure the blank frame. Open Cricut design space and insert the square with your measurement, to create a template, and work according to it. Upload the photo, go to your computer folders and select the image. Cricut Design Space will display different types of image formats. Choose the “complex” option and click continue.
Next, choose the image type “print then cut” and press continue. Insert the image in cricut design space. Once you have the image, insert a text and type a word. As a recommendation, use a thick font so that the photo can be seen better in the word. You can download beautiful fonts at dafont.com.
Type the word and if necessary modify the spacing of the letters and move them closer together. If it doesn’t work, simply ungroup the letters and move them closer together. Select the letter and click shift while moving them, this will keep the letter aligned to the others. Do not forget to group them together at the end.
How to fill the text with photos?
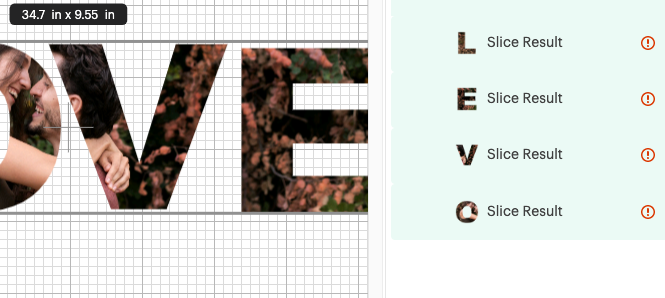
To fill a text with photos using a cricut, place the word over the image. Align it with the part of the image that will fill the letter. To do this, we are going to slice each letter with the image. Here are the reasons. First of all, to fill the whole word at once we would need to weld the word design. Because it is not possible to slice two more layers at the same time.
If you select the whole word and the image, the slice function will not appear, remember that each letter of the word is a layer. Secondly, if we weld the word and then slice it, a warning will appear that the image is too large for the size allowed by the print and then cut function. Consequently, we have to make it smaller, in case the image fits your frame, you can certainly do so. But if not, here are the steps to slice it.
Larger print then cut image
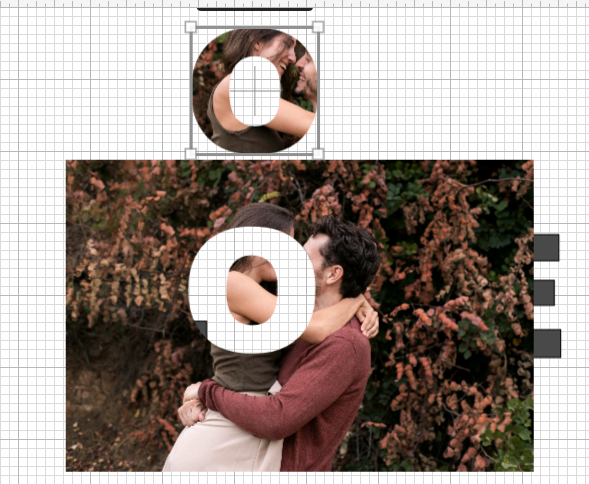
Ungruop the word and slice each letter with the image individually. Once you slice the first letter the others will be on the back of the image, they won’t get lost so don’t worry. Find them in the layers panel on the right, it’s really helpful.
Instead of moving the image to select the letter, select it in the layers panel and, pressing Shift, select the image. Finally, click on “slice”.
Once you have all the letters delete the image. The filled letters will be behind the original letters. So delete them to continue the process. Then put the whole word back together again. It is possible to add other details and cut them out in vinyl. Find some nice designs for that HERE.
Here’s a tip: when cutting script fonts, move the letters to connect them, then select all the letters and click “weld”. Otherwise, the machine will cut the lines in between and it will be a mess. Most importantly, don’t forget to delete the template or hide it, and click make it.
Photo filled text frame
It is possible to use this technique on how to fill a text with photos to make a cute frame with Cricut. First of all, click on send to printer. Keep the bleed on and click on “use system dialog”, then hit print. A screen will come up. To clarify, it will look different depending on the printer you have. In the print settings, change the quality to “best”.
It makes a big difference when printing on printable vinyl and then press print. Place the printable vinyl sheet, on the correct side according to the printer. Next, set up the material. Search for printable vinyl and hit done. Above all, for printable vinyl it is best to use the light grip mat, because it helps to remove the vinyl more easily.
During the process the Cricut machine will first read the registration marks to start cutting, keep it in mind. Do the same process to cut each letter, in case they are on different mats. Finally, to align the design, place a cricut Grip Mat behind the frame glass.
Remove the backing from the printable vinyl, of course after weeding it. Align it on the frame glass using the grip mat as a guide. It is not necessary to use transfer tape for this unless you want to.
To make the process easier, simply peel off some of the backing from the vinyl. Align it with the grip and adhere it to the glass. Next, start removing the rest of the backing and adhere the rest of the letter to the glass.