-
×
 Mermaid Encouraging Natural Hair
1 × $3.99
Mermaid Encouraging Natural Hair
1 × $3.99 -
×
 Balenciaga Small Logo Rhinestone SVG
1 × $4.99
Balenciaga Small Logo Rhinestone SVG
1 × $4.99 -
×
 Saints Girl Heels
1 × $3.99
Saints Girl Heels
1 × $3.99 -
×
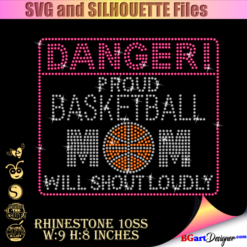 Danger proud basketball mom
1 × $5.99
Danger proud basketball mom
1 × $5.99 -
×
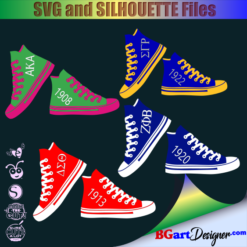 Sorority shoes bundle
1 × $5.99
Sorority shoes bundle
1 × $5.99 -
×
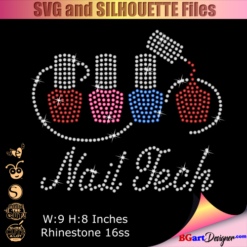 Nail Tech Rhinestone Design
1 × $5.99
Nail Tech Rhinestone Design
1 × $5.99 -
×
 MSU Spartans Rhinestone
1 × $4.99
MSU Spartans Rhinestone
1 × $4.99 -
×
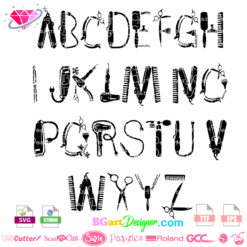 Hair salon font
1 × $5.99
Hair salon font
1 × $5.99 -
×
 Beauty afro black girl
1 × $2.99
Beauty afro black girl
1 × $2.99 -
×
 Birthday girl slay svg
1 × $3.49
Birthday girl slay svg
1 × $3.49 -
×
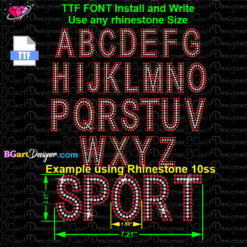 Download Rhinestone font BGART11
1 × $9.99
Download Rhinestone font BGART11
1 × $9.99 -
×
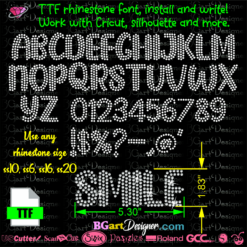 Rhinestone ttf font bgart4
1 × $7.99
Rhinestone ttf font bgart4
1 × $7.99 -
×
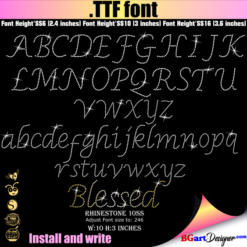 Script Rhinestone font
1 × $6.99
Script Rhinestone font
1 × $6.99 -
×
 Santa Hat Wine glass svg
1 × $5.99
Santa Hat Wine glass svg
1 × $5.99 -
×
 I love my HBCU
1 × $5.99
I love my HBCU
1 × $5.99 -
×
 Walk by faith svg
1 × $3.49
Walk by faith svg
1 × $3.49 -
×
 Merry Grinchmas Truck SVG
1 × $2.99
Merry Grinchmas Truck SVG
1 × $2.99 -
×
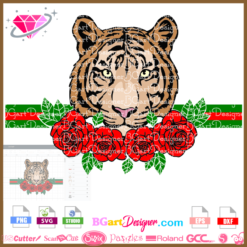 Tiger Rose Bouquet SVG
1 × $3.49
Tiger Rose Bouquet SVG
1 × $3.49 -
×
 God is the Plug Rhinestone svg
1 × $5.99
God is the Plug Rhinestone svg
1 × $5.99 -
×
 Legs in sexy high heels shoes
1 × $2.49
Legs in sexy high heels shoes
1 × $2.49
Cricut Design Space, Cutting and Crafting
How to cut metal sheets with Cricut
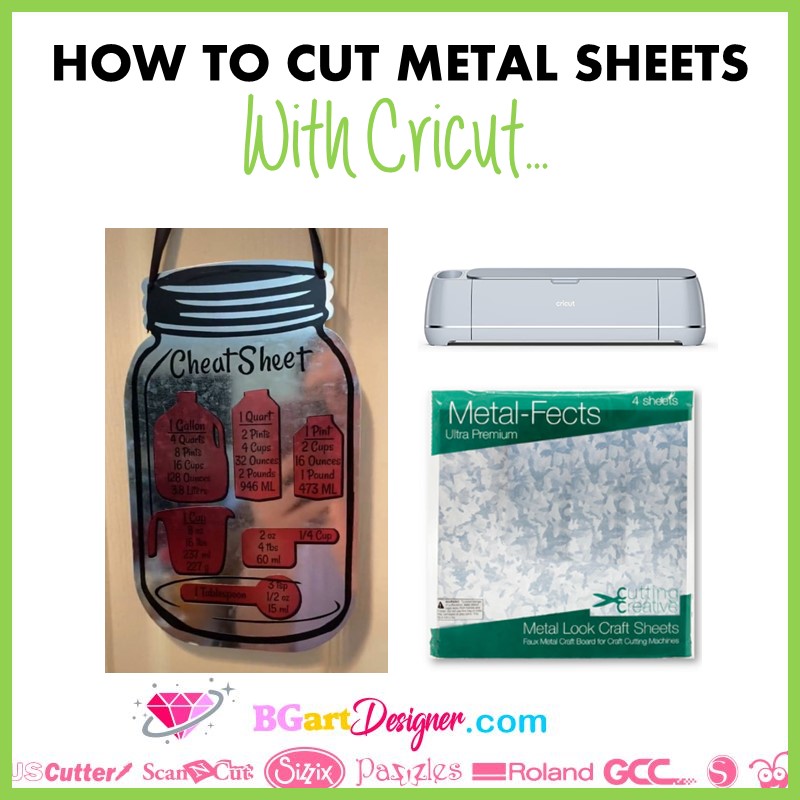
Learn how to cut metal sheets with a Cricut machine. Above all, those metal sheets are special for Cricut machines, and it works to achieve a metallic look on projects. Get a Cricut explore or a Cricut Maker and a deep point blade to get started on this project.
Supplies needed
Design tips for cutting metal sheets with Cricut
First of all, keep in mind that these sheets are 11 by 11 inches, so make sure the design will fit on it. Choose the design of your preference,at BGArt Designer are designs that will work for the best price, check them out!
To choose a design it is important to know that with this material if the design is too thin the layers of the sheet will start to separate when cutting. So it is best to modify the thin lines of the designs to get a perfect project.
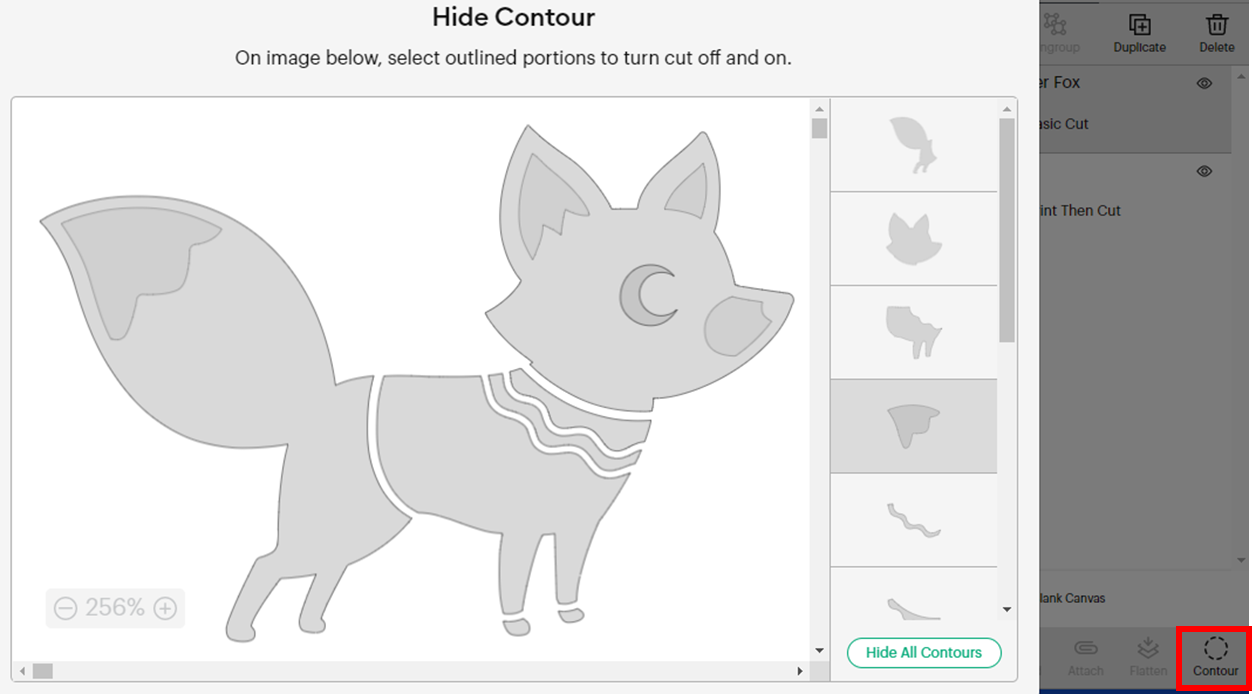
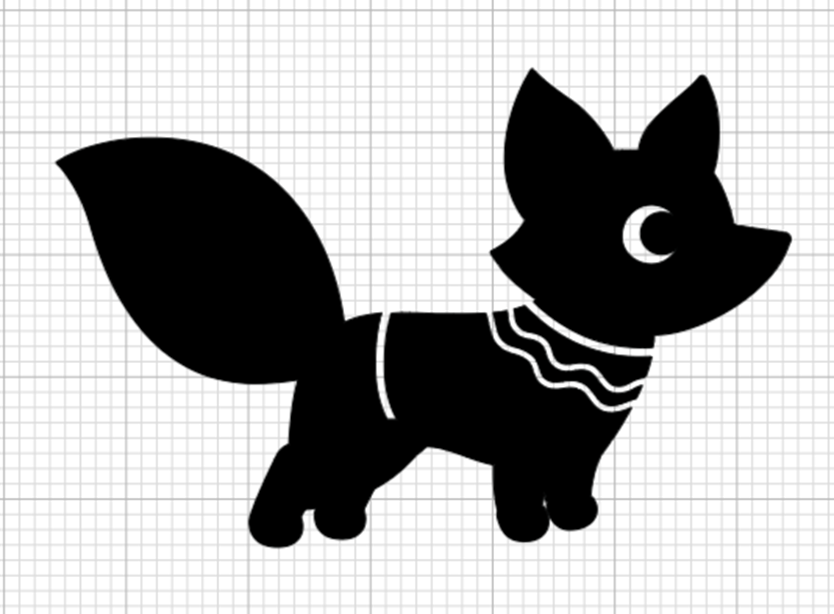
To do this, go to Cricut Design Space. One way to modify the design is to add an offset; this will bulk up the lines. Finally, to have it in one cut select all and click on “weld”. Another way to modify a design is to remove the small interior pieces of the design using the contour feature. Click on the part you want to hide and then click apply.
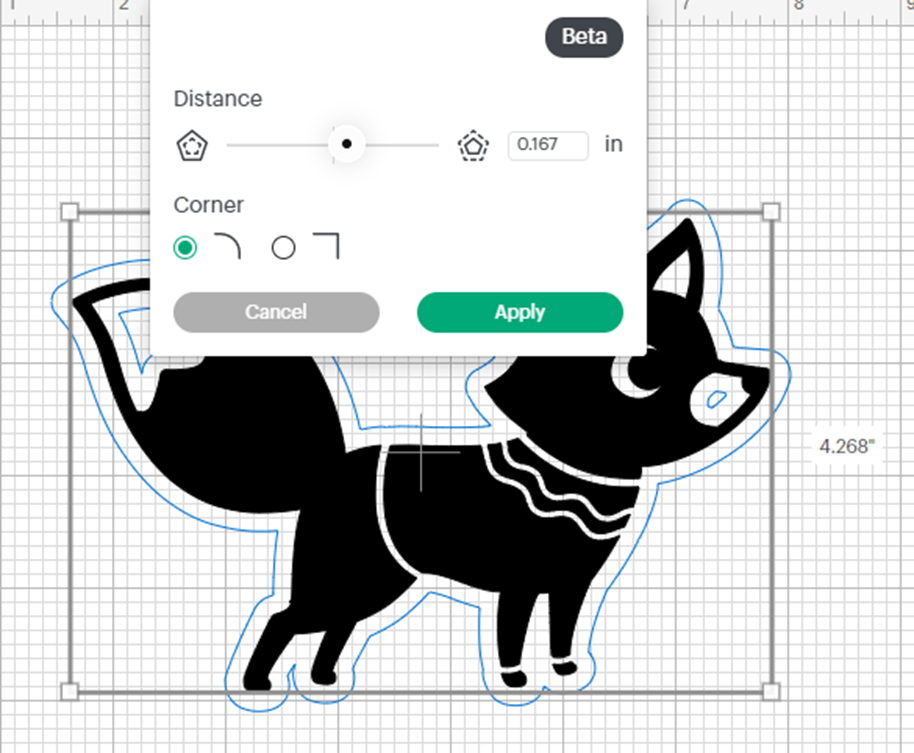
The offset feature will make the cut lines thicker.
The last method you can use is to modify only a small and specific part of the design. For that we will use the original design and add the exact modified part to it. To do this duplicate the design and add an offset to it.
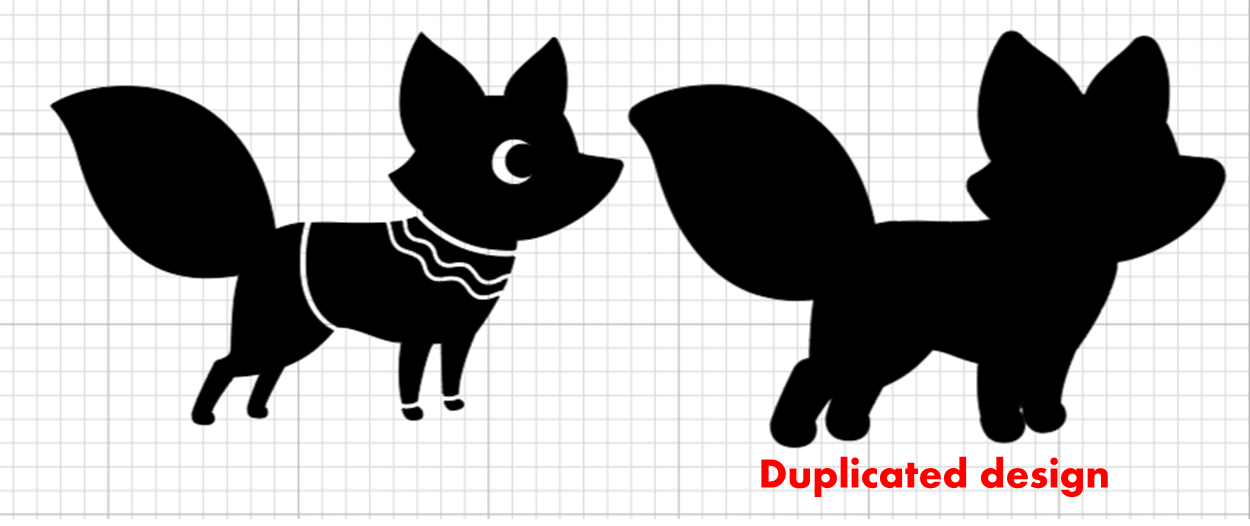
Weld the design with the offset, and then insert a shape to place it over the design. Make sure it covers only the piece you want to remove and leaves free the piece you want to keep.
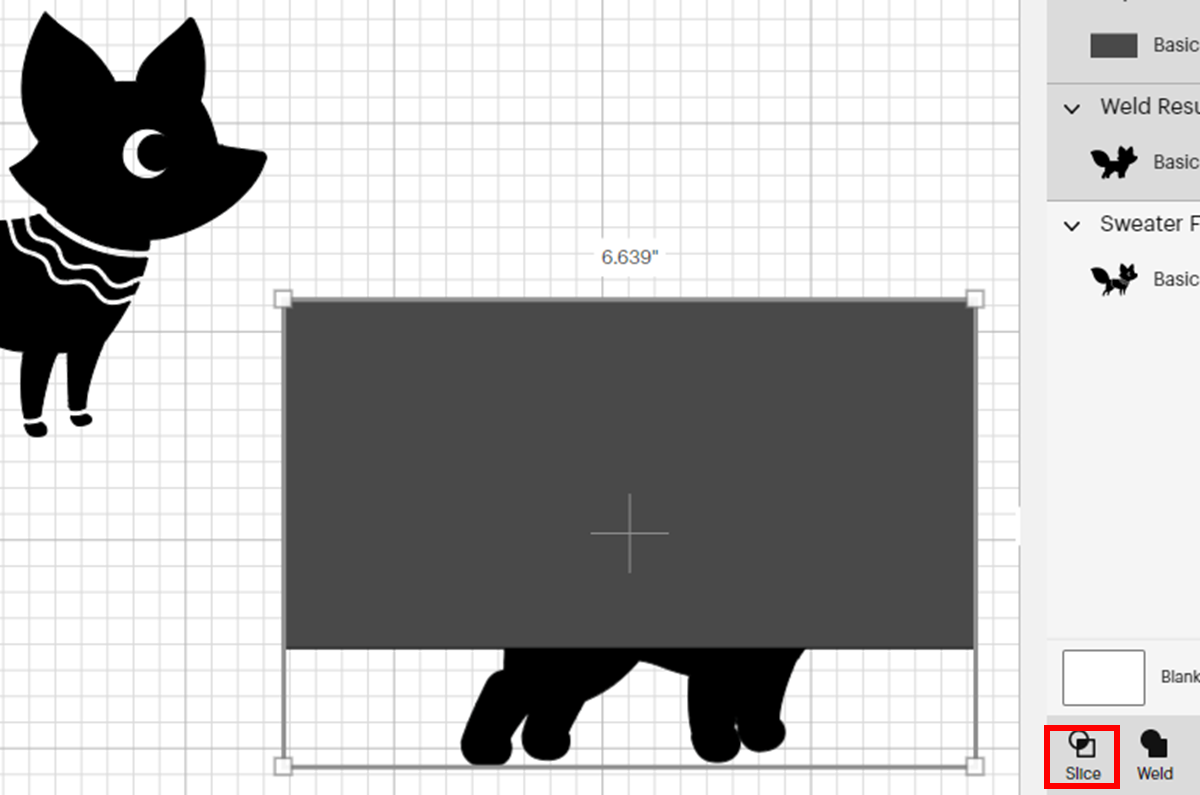
Select both pieces and click on “slice”. finally place the piece over the existing design and make sure it meets the design on some line of it. select both and click on weld.
Cutting the metal sheet
The metal sheets linked above are like chipboard with a metallic finish applied to the exterior, and is self-adhesive. Most importantly, it requires a deep point blade to cut it with the machine. Take a sheet and place it face up on the strong-grip mat.
Do not place it up to the white line at the edges of the mat. It’s better to move the sheet a little to the right. It is important to press the sheet well on the mat. As a recommendation, use a brayer for best results.
After cutting the sheet, select the material. Go to the all materials screen and click on the material settings in the bottom left corner. scroll to the bottom and click on “add new material” put the name on it and click save. set it for the 295 deep point sheet, 8x eight times. Once set you can select it every time when using a metal sheet.
Move the star wheels to the right side, so they do not mark the material. Finally, insert the deep point blade, load the mat and start cutting. As we are cutting a material similar to chipboard, if some small pieces come out, stop the machine and remove that piece so that it does not disturb.
When the cut is done, as a recommendation, check it before removing it from the machine and the mat. peel off the material and make sure it is cut all the way through. Remove the material from the mat by turning it upside down to ensure that the adhesive backing of the metal sheet does not come off.