Cutting and Crafting
How to wood burn with the Singe Quill and Cricut
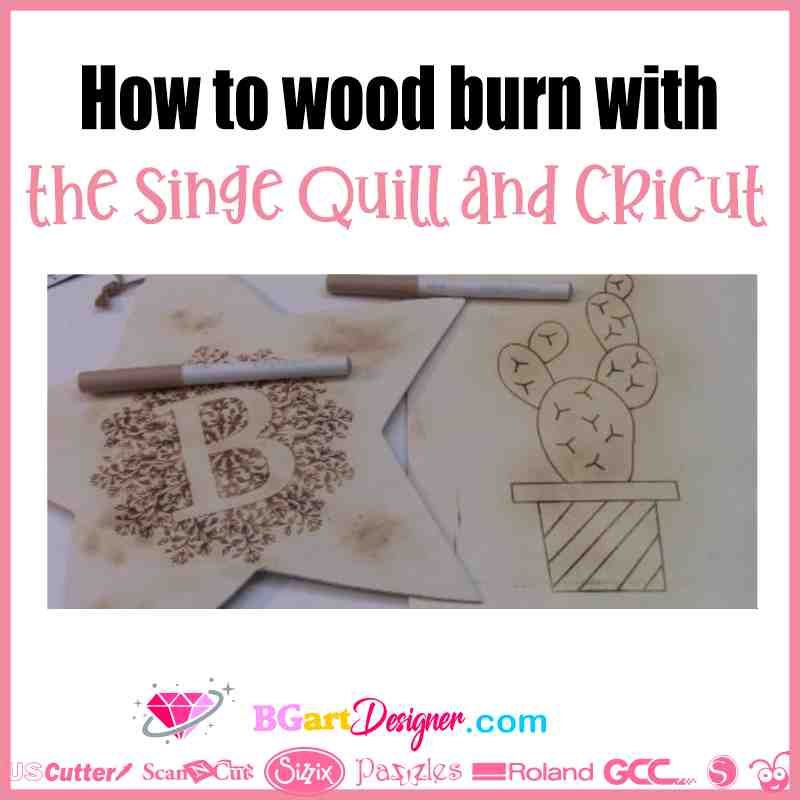
Make incredible projects in wood burn with the Singe Quill and a Cricut machine! In an easy, impressive and original way.
How to wood burn with the Singe Quill and the Cricut. Another step by step Cricut tutorial. Starting with how to set up the design and ending with how to burn the wood to finish the design.
All you need is a piece of wood 2mm or less thick, balsa wood will work (to do this on a Cricut machine the wood has to be very thin), also a Singe Quill pen and some kind of heat gun.
Setting up the design using Sketch pen
Go to the Cricut design space, upload the design and browse it. SELECT ONE HERE. Then save it as a cut image. Find the design for this to look for foil quill or single lines designs.
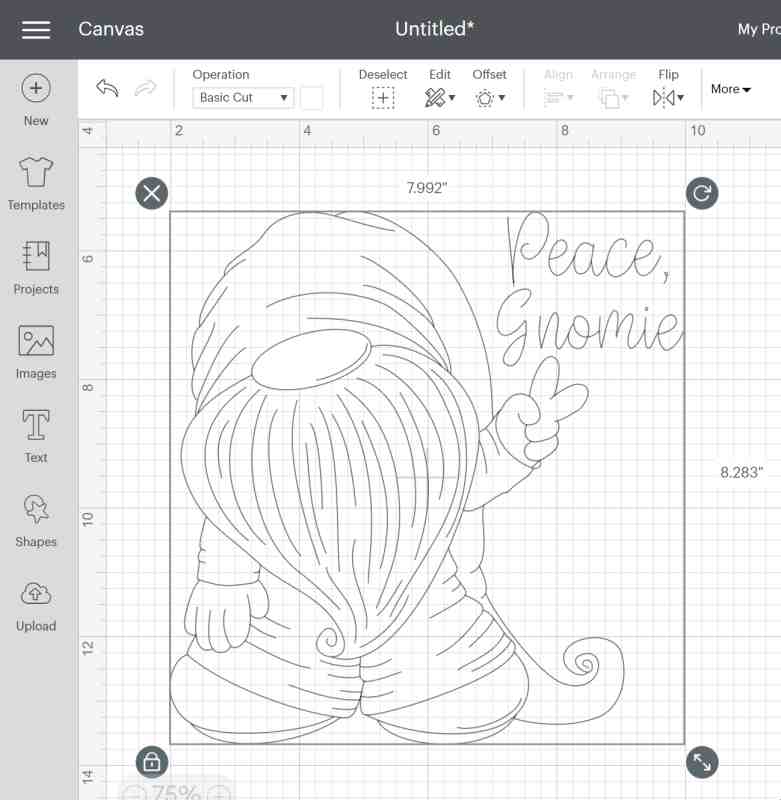
Insert the image into the design space and size it down. Make sure the size of the design is correctly sized to fit the piece of wood that will be used. Go to the line type setting and change it to “draw”. The image will look as if you have a double line drawing.
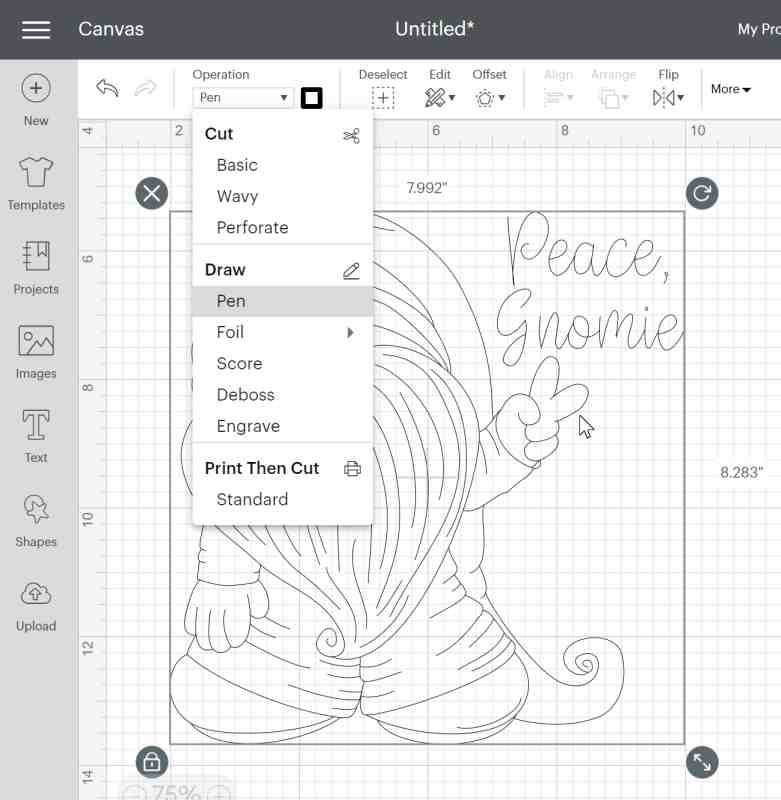
Click on “make it”. Place the design so that the wood has room around it to put painter’s tape, line it up. Do this by looking at the mat and your design to get an idea of where the tape is and where to lay the design on the mat.
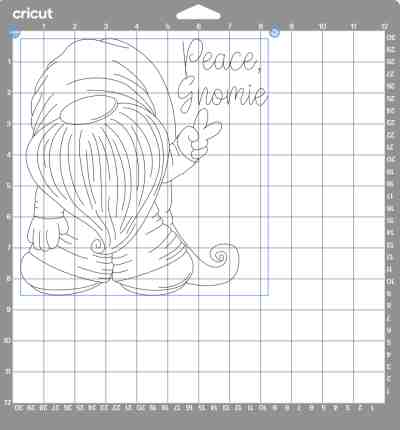
Then select “continue” and select the material, the “medium cardstock” will work, because keep in mind it is not necessary for the cricut to press super hard.
Loading the Singe Quill and drawing the design
The Singe Quill pens come in two different sizes in fine and bold.
First, remove the cap from the pen and make sure it is wet and writing. Next, load it as you would a Cricut pen and then close the button. Make sure the white wheels are out of the way of the wood.
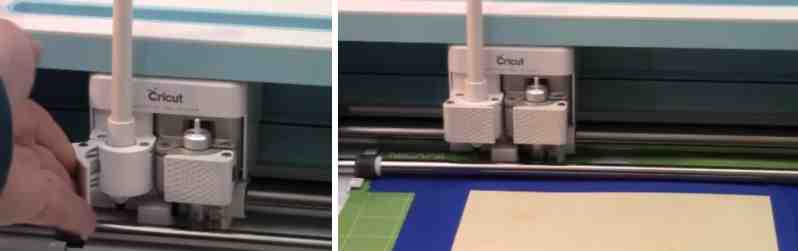
- It is very important to apply the painter’s tape even if you have a very sticky mat.
When it is done, peel the tape off. It won’t look like you’ve done anything on the wood, but there will be a faint line from where it was drawn; don’t worry it’s totally there.
Final step with the heat gun
Take the heat gun, keep it away from anything it can damage. Move away from anything flammable; and do it in a safe area.
Keep your hands away and run the heat gun all over the wood to heat it up. It will take time for the lines to appear. Don’t hold it on one spot too long because you will burn the wood and not just the design.
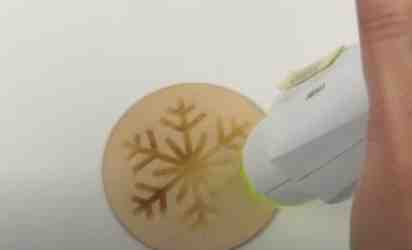
- The longer you hold over a spot the darker it will get.
- It won’t work with a blow dryer because it will not get hot enough to do this. There will be some discoloration in the wood but it is totally normal, it is from heating it.
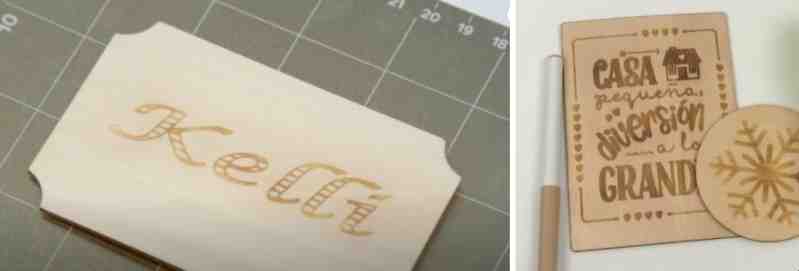
Following these steps on how to wood burn with the Singe Quill and Cricut, so you will make awesome projects! Let me know your comments below.