-
×
 Living My Best life
1 × $2.99
Living My Best life
1 × $2.99 -
×
 Dabbing unicorn
1 × $1.99
Dabbing unicorn
1 × $1.99 -
×
 LSU tigers Rhinestone SVG
1 × $5.99
LSU tigers Rhinestone SVG
1 × $5.99 -
×
 Anna Princess wine glass SVG
1 × $2.45
Anna Princess wine glass SVG
1 × $2.45 -
×
 Birthday Queen
1 × $2.49
Birthday Queen
1 × $2.49 -
×
 Standing on his promises heel Rhinestone file
1 × $5.99
Standing on his promises heel Rhinestone file
1 × $5.99 -
×
 Pray until something happens
1 × $5.99
Pray until something happens
1 × $5.99 -
×
 Olaf Frozen svg and printable
1 × $2.45
Olaf Frozen svg and printable
1 × $2.45 -
×
 Danger proud basketball mom
1 × $5.99
Danger proud basketball mom
1 × $5.99 -
×
 St Patrick's Day Rhinestone Love Clover svg
1 × $5.99
St Patrick's Day Rhinestone Love Clover svg
1 × $5.99 -
×
 BGART2 Rhinestone Alphabet
1 × $7.99
BGART2 Rhinestone Alphabet
1 × $7.99 -
×
 Queen Birthday Look Fabulous Rhinestone
1 × $9.99
Queen Birthday Look Fabulous Rhinestone
1 × $9.99 -
×
 Love Asu hornets Rhinestone
1 × $5.99
Love Asu hornets Rhinestone
1 × $5.99 -
×
 School Girl with Backpack SVG
1 × $2.99
School Girl with Backpack SVG
1 × $2.99 -
×
 logo Alabama AAMU University Rhinestone
1 × $3.99
logo Alabama AAMU University Rhinestone
1 × $3.99 -
×
 Queens are born
1 × $3.49
Queens are born
1 × $3.49 -
×
 Taurus symbol Queen Crown Rhinestone
1 × $5.99
Taurus symbol Queen Crown Rhinestone
1 × $5.99 -
×
 Love Alabama Bulldogs Rhinestone
1 × $5.99
Love Alabama Bulldogs Rhinestone
1 × $5.99 -
×
 Graduation Class Senior SVG
1 × $3.99
Graduation Class Senior SVG
1 × $3.99 -
×
 Princess Disney wine glass
1 × $7.49
Princess Disney wine glass
1 × $7.49 -
×
 Aurora Princess Bachelorette
1 × $1.49
Aurora Princess Bachelorette
1 × $1.49 -
×
 Birthday entourage girls
1 × $5.99
Birthday entourage girls
1 × $5.99 -
×
 Alabama AAMU University Bulldogs heel rhinestone
1 × $5.99
Alabama AAMU University Bulldogs heel rhinestone
1 × $5.99 -
×
 God is the Plug Rhinestone svg
1 × $5.99
God is the Plug Rhinestone svg
1 × $5.99 -
×
 Outline rhinestone alphabet BGART6
1 × $5.99
Outline rhinestone alphabet BGART6
1 × $5.99 -
×
 Auburn Rhinestone High Heel
1 × $5.99
Auburn Rhinestone High Heel
1 × $5.99 -
×
 Won't he do it
1 × $5.99
Won't he do it
1 × $5.99 -
×
 Black woman queen
1 × $2.99
Black woman queen
1 × $2.99 -
×
 Round rhinestone alphabet BGART5
1 × $5.99
Round rhinestone alphabet BGART5
1 × $5.99 -
×
 Minnie mouse wine glass svg
1 × $2.49
Minnie mouse wine glass svg
1 × $2.49 -
×
 Rolling stones vintage distressed
1 × $2.99
Rolling stones vintage distressed
1 × $2.99 -
×
 Afro Puffs Little Girl
1 × $5.99
Afro Puffs Little Girl
1 × $5.99 -
×
 Beauty afro black girl
1 × $2.99
Beauty afro black girl
1 × $2.99 -
×
 Baltimore Ravens lips
1 × $3.91
Baltimore Ravens lips
1 × $3.91 -
×
 Birthday girl slay svg
1 × $3.49
Birthday girl slay svg
1 × $3.49 -
×
 Queen born Living Rhinestone
1 × $5.99
Queen born Living Rhinestone
1 × $5.99 -
×
 Walk by faith svg
1 × $3.49
Walk by faith svg
1 × $3.49 -
×
 Disney patriotic American flag
1 × $3.49
Disney patriotic American flag
1 × $3.49 -
×
 Frida Kahlo quotes SVG
1 × $2.49
Frida Kahlo quotes SVG
1 × $2.49 -
×
 Dripping lips Kansas chiefs
1 × $3.91
Dripping lips Kansas chiefs
1 × $3.91 -
×
 Black Nurses Rock
1 × $5.99
Black Nurses Rock
1 × $5.99 -
×
 Download Sweet 16 Sixteen SVG
1 × $2.99
Download Sweet 16 Sixteen SVG
1 × $2.99 -
×
 Lips svg bundle
1 × $1.99
Lips svg bundle
1 × $1.99 -
×
 Christmas diva bling
1 × $5.99
Christmas diva bling
1 × $5.99 -
×
 Mermaid Encouraging Natural Hair
1 × $3.99
Mermaid Encouraging Natural Hair
1 × $3.99 -
×
 Believe hairstylist salon quote
1 × $2.49
Believe hairstylist salon quote
1 × $2.49 -
×
 I Love NKOTB Rhinestone SVG
1 × $5.99
I Love NKOTB Rhinestone SVG
1 × $5.99 -
×
 Diva afro girl rhinestone svg
1 × $5.99
Diva afro girl rhinestone svg
1 × $5.99 -
×
 Love rhinestone emoji
1 × $3.99
Love rhinestone emoji
1 × $3.99 -
×
 Regular Svg file convert
1 × $5.99
Regular Svg file convert
1 × $5.99 -
×
 Custom cake topper
1 × $9.99
Custom cake topper
1 × $9.99 -
×
 Black woman sisterhood sorority
1 × $5.99
Black woman sisterhood sorority
1 × $5.99 -
×
 Christmas Wine glass svg
1 × $3.99
Christmas Wine glass svg
1 × $3.99 -
×
 Saints Girl Heels
1 × $3.99
Saints Girl Heels
1 × $3.99 -
×
 Butt Old Couple Funny Quote SVG
1 × $2.99
Butt Old Couple Funny Quote SVG
1 × $2.99 -
×
 Bride Diamond Heart Rhinestone SVG
1 × $5.99
Bride Diamond Heart Rhinestone SVG
1 × $5.99 -
×
 Tennessee titans lips svg
1 × $3.91
Tennessee titans lips svg
1 × $3.91 -
×
 Cheer mom bow svg
1 × $2.99
Cheer mom bow svg
1 × $2.99 -
×
 Jamaican woman SVG file
1 × $5.99
Jamaican woman SVG file
1 × $5.99 -
×
 Princess Tiana wine glass
1 × $2.79
Princess Tiana wine glass
1 × $2.79 -
×
 I love my HBCU
1 × $5.99
I love my HBCU
1 × $5.99 -
×
 Christmas wine glass svg
1 × $5.99
Christmas wine glass svg
1 × $5.99 -
×
 Dripping lips NY Giants
1 × $3.91
Dripping lips NY Giants
1 × $3.91 -
×
 Sitting girl cake topper download
1 × $7.49
Sitting girl cake topper download
1 × $7.49 -
×
 Dots Bling Letters Font
1 × $9.99
Dots Bling Letters Font
1 × $9.99
Cutting and Crafting
How to use the button press
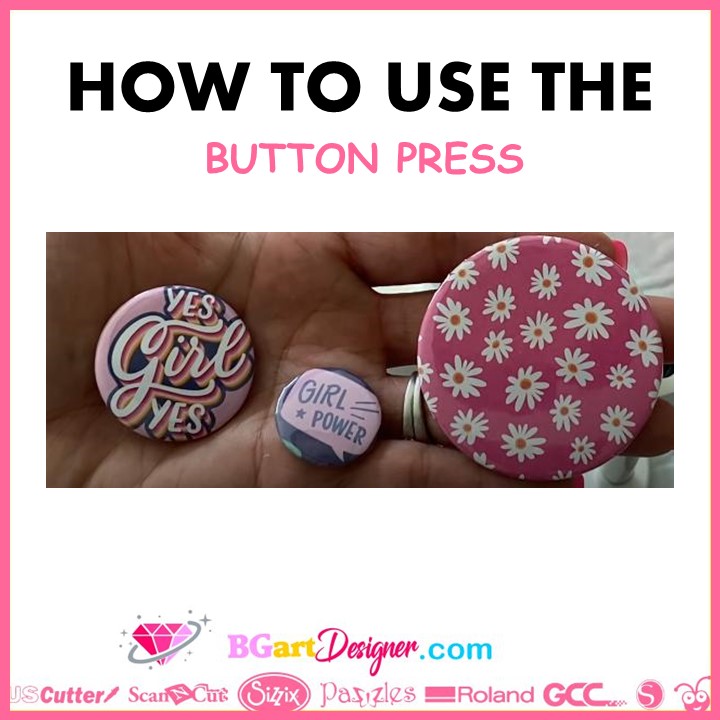
A tutorial on how to use the button press! Make the most stunning and customized project buttons easily!
It seems a little confusing at first, with all these different gadgets; but once you get going it’s really easy. With this button press, it is possible to make three sizes of buttons, large, medium, and small.
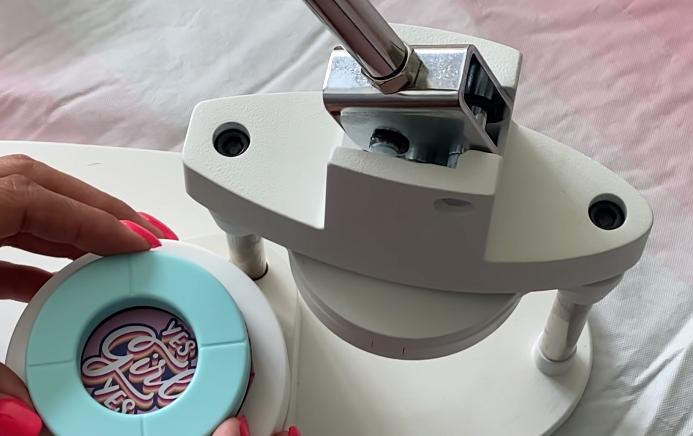
How to use the press button to do small buttons
Before making any buttons, it is necessary to use the cutting inserts; to cut the piece of paper. This sticks-on very easy; they have magnets on them. The cutting inserts are the white pieces.
to make a small button you are going to use all the pink pieces. Start with the pink cutting piece. Get a piece of paper with a stamp or design of choice. put the cutting piece on the paper. swivel the platform until it is just below it and finally push down the level.

The cracking noise is a good sound, now there’s the little circle perfectly cut out.
Now we’re done with the cutting pieces, remove those, and place the small pink press pieces, one on the top and one on the base. Just hook them together with the magnets.
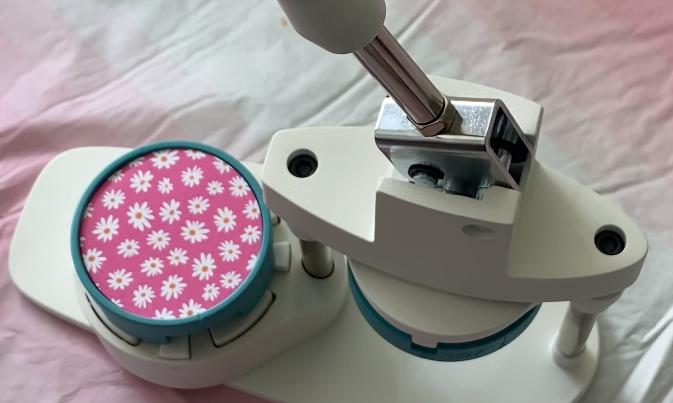
Take the base pieces, in this case, the small ones. take the top piece and put it in the hole face up, then put the paper you cut before, and finally put the mylar sheet; align the paper with the lines of the pink piece. First, line everything up with the “a”, make sure the top and bottom are on the “a”.
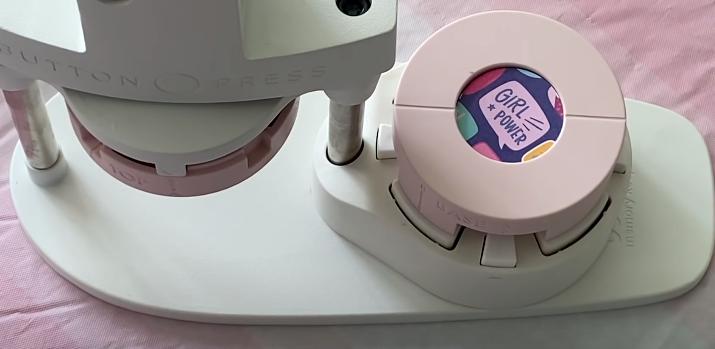
Now swivel and check again that they are on “a”. push down on the level and then swivel it out.
Now it’s time to make the back of the button, take the other piece and the part with the safety pin will go down. Before pushing down, move the base and top to the “b”. swivel it; making sure both are lined up with the “b”, and push down.
For medium buttons
It is exactly the same process, but in this case, you are going to use the blue pieces. Start putting the cutting inserts, which for all three sizes are the same. put the piece of paper, then the blue cutting piece, and press. Remove the cutting inserts, and repeat the process as we did with the small button.
Remember that to make the back part of the button, the piece that has the safety pin has to go down, and the flat part will go up.

First, aligned to “a”, and when making the backing, aligned to “b”.
For large buttons
It is also exactly the same process. But when cutting the paper for this, you actually have to press much harder and a couple of more times to really get through.
That was all about how to use the press button! It is possible to customize the buttons in three different sizes with the same machine, isn’t it fantastic? Let me know your comments below!