Cutting and Crafting
Football team designs: Cheer bow
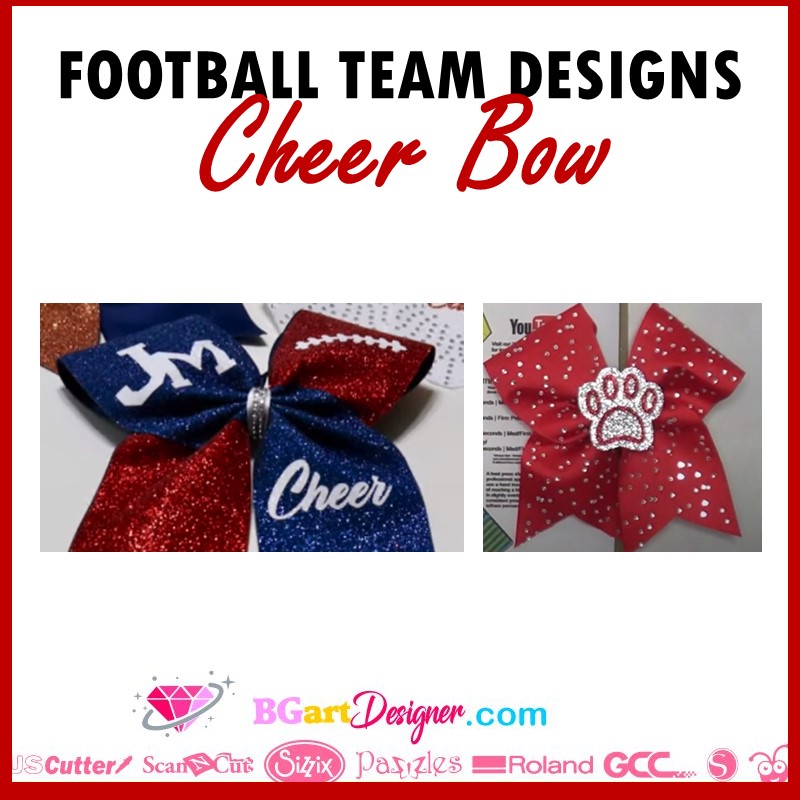
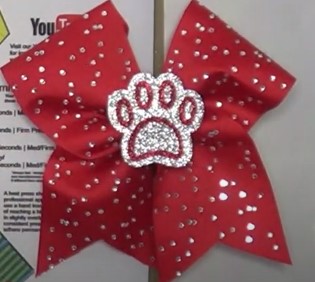
Find a way to use those wonderful football designs! Plus learn how to make a cheer bow! This is a post about the creation of cute aa cheer bow using the football designs many fans love!
Supplies needed
- Grosgrain ribbon (30 inches long and 3 inches wide)
- Ribbon ⅜ of an inch and 3 inches long
- Hair tye
- 4 inches zip ties
- Heat press
- Double sided tape
- glitter HTV
- Lighter
Custom the ribbon
To create a custom cheer bow with football designs, first of all, cut the ribbon with the measurements from the materials list. Find a nice football design HERE, they can be logos or any other design you want.
To create the bow, first fold the ribbon in half and press it to leave a crease and use it as a central guide. To customize the bow it is possible to press Glitter HTV on half of the ribbon. For that cut a strip of HTV of the same measurements but decreasing one inch in length. This is to separate the HTV from the crease and to be able to fold the ribbon later.

To press the glitter HTV strip, use btucher paper and as a recomendation start at the very, pressing just a little part, so that the HTV does not move and become misaligned.
Align the HTV to the bottom edge and Press that little part for just 3 seconds using butcher paper to protect the press. then align the rest of the trip and press for 15 seconds at 320 degrees. Finally, remove the plastic sheet from the top.
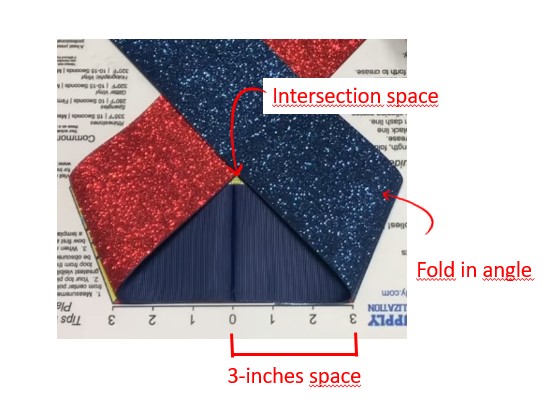
Folding marks to make the bow
After that, flip the ribbon, and put the center crease on the middle of a ruler and then fold three inches from each side. Do not fold it straight, make an angle and make sure to leave a space in the intersection of the vertical part of the ribbon and the stripes we are folding. To make easier this process purchase the bow template, wonderful to make exact folds!
Design Placement
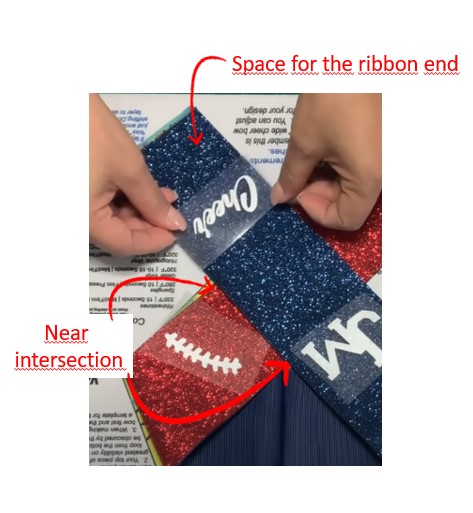
With the ribbon folded, it’s time to put some designs in place. Cut the designs first, and remove the excess from the backing sheet, Remember that only the cutting parts of the design will remain on the transfer.
The first placement is two fingers above the top on each side, almost before the two strips join together. It is also possible to place a design on one end, just make sure to leave a space for the ribbon form, so don’t put it on the very end.
Above all, it is important to fold the tape to place the text of the figures that we are going to print. This is to visualize the space. But to press them unfold the tape so as not to make another fold, making sure that the designs do not move.
Create the Bow
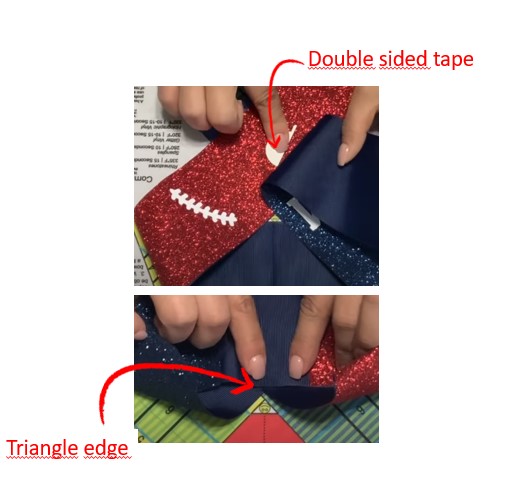
Place double-sided tape at the intersections of both ends of the ribbon. Turn the ribbon over and align the fold with the triangular shape, use double sided tape to make sure it doesn’t move.
After that, create the ribbon shape by making accordion folds starting at the bottom and working your way to the top. Next, take a zip tight and wrap it around the center. Before closing the zip, insert the hairtie through it. Then close the zip but loosely so that you can make adjustments.

Take a look at the bow, if one side seems to be shorter just pull the strip down carefully. If everything is ok, go ahead and pull the zip tight completely, and cut off the excess.
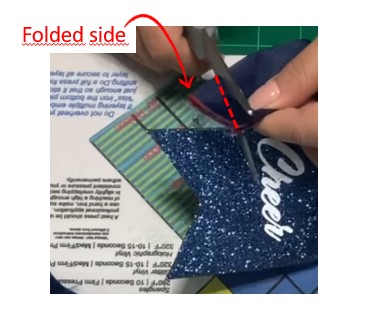
Finally it’s time to cut the ends to create that ribbon look! Fold the ends in half, with the shiny part in. Place the scissors on the folded part upper and follow an imaginary line until you get to the edge point of the other side.Burns the end with a lighter.
Wrap the small ribbon around the center, for that, add a dot of glue in the back, wrap it around, and add another dot of glue on the back. Don’t forget to pull the ribbon a little to make it tight, and cut out the excess.
Create a 3D center
Supplies needed
- Felt
- Printed glitter vinyl
first of all, to add a football designs to a cheer bow, we can create a 3d center. For that, print the images on the printed glitter vinyl, a football team logo will look great here! Peel off the glitter vinyl and place it on some felt, press it at 320 degrees for 15 to 20 seconds. The felt is to stiffen the 3D center.
With the design on the felt, trim the edges by hand and finally glue it to the center of the bow. If you want the center to have the design on both sides, print another logo but mirrored and glue it to the felt once you cut it out. This is to help with alignment.