Cutting and Crafting
DIY bling tumbler personalized
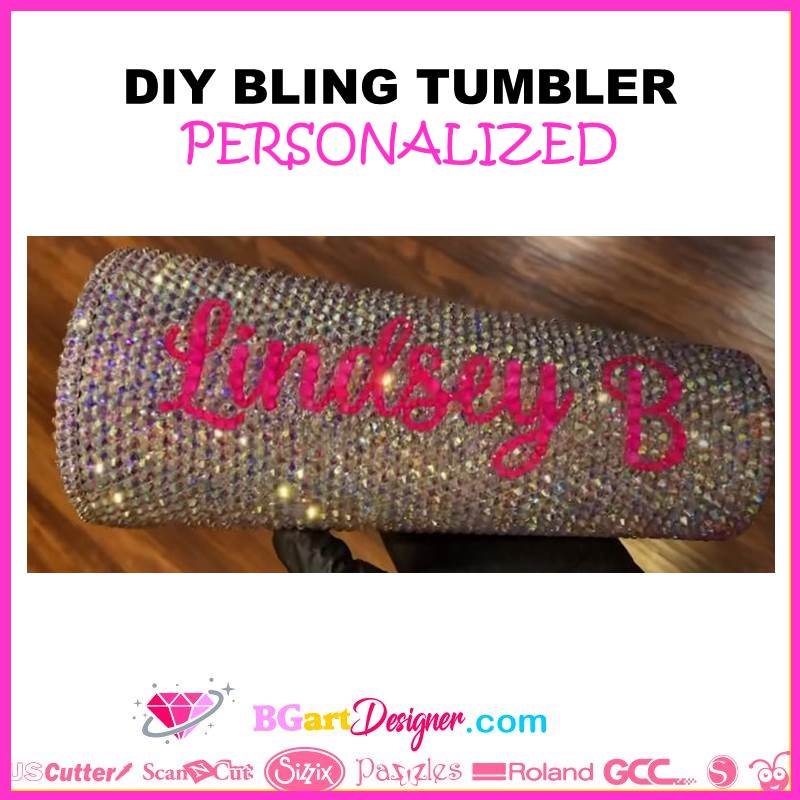
DIY bling tumbler personalized! Get an out of the world tumbler, with this step by step tutorial it is possible to make an awesome personalized tumbler with jewels!
In this post is the whole process to get an awesome personalized tumbler! For more post like this and to get some designs you can click HERE.
Supplies Needed
- Tumbler
- Jewels (SS16/ SS20)
- Sand paper
- Permanent Vinyl
- Cutting machine (Cricut, silhouette Cameo, brother Scanncut)
- Glue ( Gem-tac/ Liquid fusion)
- Wax Rhinestone pen (optional)
Preparing the tumbler and the design
The first thing to do is to sand the tumbler, this will help the jewels stick better. After sanding the tumbler, take some alcohol and clean the surface of this as best as possible.
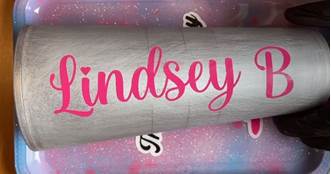
Then create something to send to a cutting machine like the Cricut or cameo. Before cutting remember to take the measurement of the tumbler and then select the best size for the name or design you want to glue on the tumbler.
It is important to use a permanent type of vinyl, such as oracle vinyl. Otherwise, it will not last. Cut out the design and weed it to continue. Before gluing it in the tumbler, sand it a little and clean it with some alcohol. Then with some transfer paper, glue the design onto the tumbler.
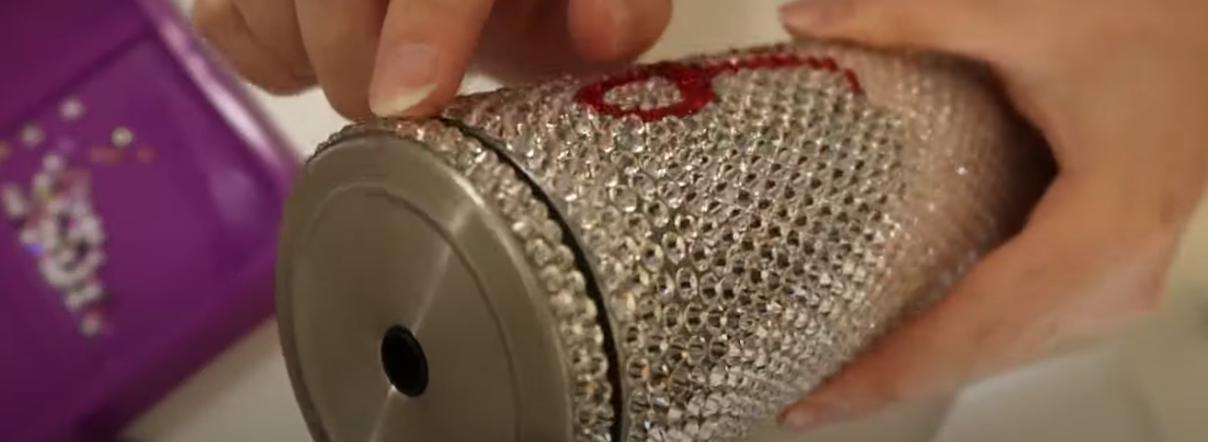
Adding jewels to personalize the bling tumbler
Now find a spot where you want to start and grab the glue. First, we are going to add the jewels on the name, and then we are going to cover the whole tumbler.
As a recommendation, use small jewels like SS12 on the name and larger ones to cover the rest of the cup. It will also look cute to alternate between large and small jewels.
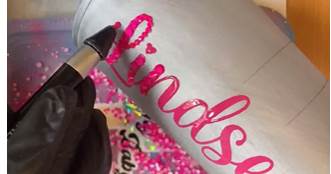
jewelry can be glued with hands or with tweezers, or using a special pen.
Once you have finished putting the jewels on the name, start gluing more jewels around the tumbler in a different color, So the name will be clearly visible and pretty.
Gluing the last jewels around the tumbler
Keep in mind it is better that the jewels around the tumbler have the same color as the background, otherwise, if there are small spaces between each jewel it will be easily seen.
Put more glue and start putting the jewels, and play with the sizes to fill the whole cup.
Then put some glue on the bottom of the cup and start placing the jewels in order around. If you put them like in a honeycomb order it will be easier. Keep making rows until you get close to the letters.

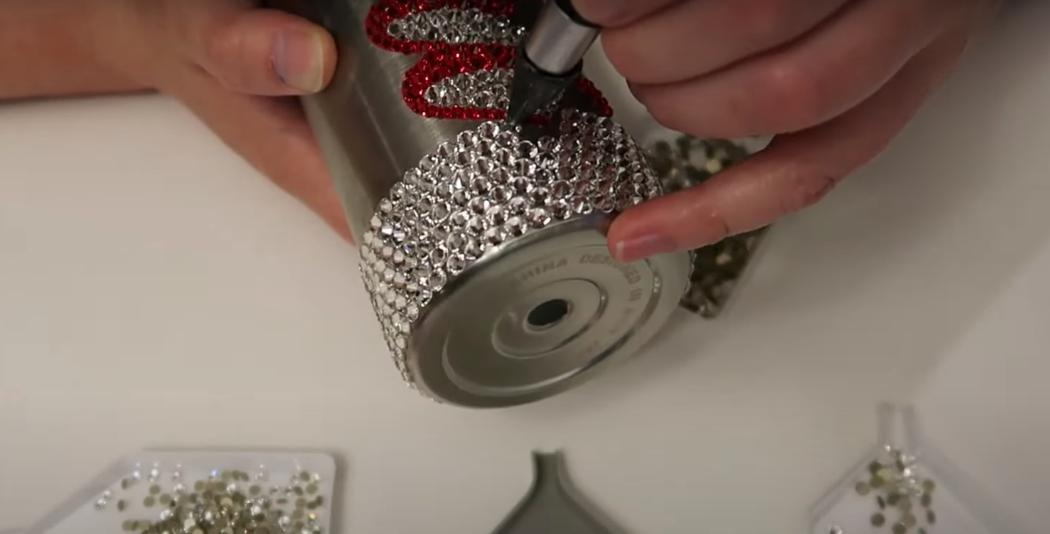
When you get close to the design or lettering you glued before, you have to find out what size jewels will fit to fill the space. Make sure you have enough glue for the jewels to stick. If there is a gap between the jewels, you can glue a few small ones and that’s it. It is important to glue the rows around the cup as straight as possible so that it looks good.
This DIY bling tumbler personalized, it’s hard work, but it’s really worth it, look at that tumbler! let me know your thoughts in the comments!