-
×
 logo Alabama AAMU University Rhinestone
1 × $3.99
logo Alabama AAMU University Rhinestone
1 × $3.99 -
×
 Christmas Wine glass svg
1 × $3.99
Christmas Wine glass svg
1 × $3.99 -
×
 Lips svg bundle
1 × $1.99
Lips svg bundle
1 × $1.99 -
×
 St Patrick's Day Rhinestone Love Clover svg
1 × $5.99
St Patrick's Day Rhinestone Love Clover svg
1 × $5.99 -
×
 Regular Svg file convert
1 × $5.99
Regular Svg file convert
1 × $5.99 -
×
 Lips NFL teams SVG
1 × $7.49
Lips NFL teams SVG
1 × $7.49 -
×
 Christmas wine glass svg
1 × $5.99
Christmas wine glass svg
1 × $5.99 -
×
 Sitting girl cake topper download
1 × $7.49
Sitting girl cake topper download
1 × $7.49 -
×
 Princess Disney wine glass
1 × $7.49
Princess Disney wine glass
1 × $7.49 -
×
 Dripping lips JSU tigers
1 × $3.91
Dripping lips JSU tigers
1 × $3.91 -
×
 Valentine Gnomes couple SVG
1 × $1.99
Valentine Gnomes couple SVG
1 × $1.99 -
×
 Christmas diva bling
1 × $5.99
Christmas diva bling
1 × $5.99 -
×
 Alabama State university ASU Hornets Rhinestone
1 × $5.99
Alabama State university ASU Hornets Rhinestone
1 × $5.99 -
×
 Black Nurses Rock
1 × $5.99
Black Nurses Rock
1 × $5.99 -
×
 Love rhinestone emoji
1 × $3.99
Love rhinestone emoji
1 × $3.99 -
×
 Danger proud basketball mom
1 × $5.99
Danger proud basketball mom
1 × $5.99 -
×
 Virgo Girls Lips SVG
1 × $3.49
Virgo Girls Lips SVG
1 × $3.49 -
×
 Believe hairstylist salon quote
1 × $2.49
Believe hairstylist salon quote
1 × $2.49 -
×
 Black Fame Us Option1 SVG
1 × $2.99
Black Fame Us Option1 SVG
1 × $2.99 -
×
 Queens are born
1 × $3.49
Queens are born
1 × $3.49 -
×
 I want a hippopotamus for christmas
1 × $1.99
I want a hippopotamus for christmas
1 × $1.99 -
×
 Leather Cord Keeper SVG
1 × $3.49
Leather Cord Keeper SVG
1 × $3.49 -
×
 I love my HBCU
1 × $5.99
I love my HBCU
1 × $5.99 -
×
 Birthday entourage girls
1 × $5.99
Birthday entourage girls
1 × $5.99 -
×
 Merry christmas wine glass
1 × $5.99
Merry christmas wine glass
1 × $5.99 -
×
 Diva afro girl rhinestone svg
1 × $5.99
Diva afro girl rhinestone svg
1 × $5.99 -
×
 Frida Kahlo quotes SVG
1 × $2.49
Frida Kahlo quotes SVG
1 × $2.49 -
×
 Wife mom nurse file
1 × $2.49
Wife mom nurse file
1 × $2.49 -
×
 Love Asu hornets Rhinestone
1 × $5.99
Love Asu hornets Rhinestone
1 × $5.99 -
×
 Auburn Rhinestone High Heel
1 × $5.99
Auburn Rhinestone High Heel
1 × $5.99 -
×
 Template for use slice in design space app
1 × $3.91
Template for use slice in design space app
1 × $3.91 -
×
 Standing on his promises heel Rhinestone file
1 × $5.99
Standing on his promises heel Rhinestone file
1 × $5.99 -
×
 Birthday Queen
1 × $2.49
Birthday Queen
1 × $2.49 -
×
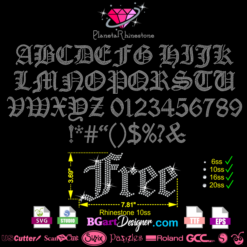 Old English font rhinestone
1 × $9.99
Old English font rhinestone
1 × $9.99 -
×
 Johnny Depp Movie Face SVG
1 × $2.99
Johnny Depp Movie Face SVG
1 × $2.99 -
×
 Save the turtles svg
1 × $1.49
Save the turtles svg
1 × $1.49 -
×
 Dabbing unicorn
1 × $1.99
Dabbing unicorn
1 × $1.99 -
×
 Hair salon font
1 × $5.99
Hair salon font
1 × $5.99 -
×
 Love Alabama Bulldogs Rhinestone
1 × $5.99
Love Alabama Bulldogs Rhinestone
1 × $5.99 -
×
 Faux Leather Jewelry bundle
1 × $3.99
Faux Leather Jewelry bundle
1 × $3.99 -
×
 Minnie mouse wine glass svg
1 × $2.49
Minnie mouse wine glass svg
1 × $2.49 -
×
 Merry Grinchmas Truck SVG
1 × $2.99
Merry Grinchmas Truck SVG
1 × $2.99 -
×
 Afro Puffs Little Girl
1 × $5.99
Afro Puffs Little Girl
1 × $5.99 -
×
 Blessed and unstoppable svg
1 × $2.49
Blessed and unstoppable svg
1 × $2.49
Cricut Design Space, Cutting and Crafting
Spiral Betty to create rhinestone designs with Cricut

Convert images into spirals or dots for rhinestone designs using Spiral Betty and a Cricut!
With SpiralBetty it is possible to convert any image into spirals and dots to create a rhinestone design and add it to a t-shirt, a canvas, or a frame. The whole process is completely free, but be aware that to use it for commercial use it is necessary to purchase a license.
General Spiral Betty uses
First of all, go to SpiralBetty.com. Click on upload image, and select the photo. As a recommendation select one with a simple background, otherwise the design will be difficult to understand. Zoom in or out as desired. Once done, click on the check mark. To cut the design in vinyl, leave it in black.
If the design is to make a project using the print then cut technique or the sublimation technique it is possible to change the color of the design on the web page.
Below the image there will be some different settings. To edit the number of rings or dots in the design click on the corresponding word. The higher you move the bar, the more detailed the design will be, but also the thinner the lines or dots will be. Therefore, cutting and weeding it into the vinyl will be difficult. On the other hand the lower you move the bar the thicker the lines or dots will be.
It is also possible to modify the scale (zoom in or out), the contrast (with a higher contrast it will be easier to see the image in some cases) and the lightness. Once finished, just click on the download button. The Spiral Betty website has the option to download the image as a .JPEG or .PNG file.
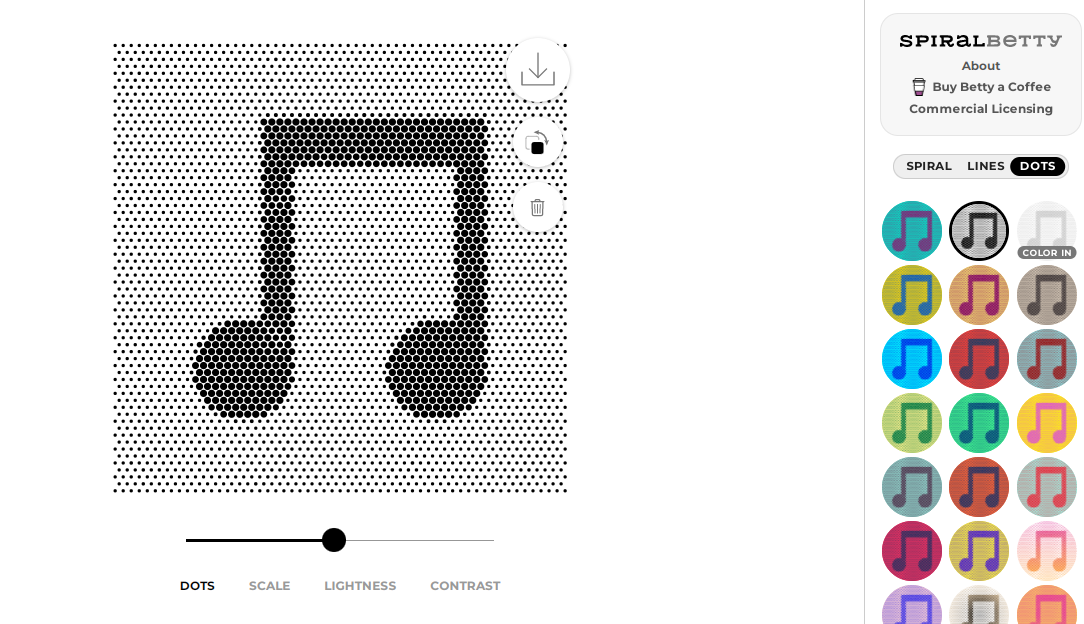
Spiral Betty dotted artwork
It is possible to make a rhinestone designs with Spiral betty and a Cricut! Spiral Betty has a feature to create dot designs, which means anyone can easily make their own custom rhinestone designs. Then, any Cricut cutting machine can cut the design to create a project.
To do this, open Spiral Betty as usual and then click on ” dots “. The process is the same when creating a spiral design. It is possible to modify the number of dots to have a design that is understandable and looks good. At this point, it is possible to do two different processes.
The first one is to create the design leaving all the dots that the Spiral Betty software created for the design. This way you can use the design completely as developed by Spiral Betty, cutting it out on some cardstock, to create a project such as a sign, personalize a letter and others!
How to make larger dots artwork
Here’s a tip for creating a very large or long design in Spiral Betty’s dot function. To do this just upload the image and convert it to dots in different parts. Don’t worry if one of the halves repeats a section of the previously dotted half, it will actually help in the process of assembling the design.
Once all the parts are done, download them in PNG make sure you select “advanced options” and then click “clear background”. Upload each one on the same canvas in Cricut Design Space. Select “Complex image” and finally “cut image”. Start overlapping the images on the repeating sides. Zoom the image to see the dots better and overlap them correctly.
Make sure the points are well overlapped horizontally, then select the images and click on “align vertically”. Do not align horizontally because the images will overlap completely. Finally, select the images and click “weld” to create a single image so that the machine can cut it correctly. Clicking ” attach” the machine will cut the two parts separately. And that’s all!
To cut that design on Cardstock, as a recommendation use the material setting “cardstock intricate cutting” applying the highest pressure possible. The machine will last a couple of hours cutting the design because remember there are a lot of dots in it.
Spiral Betty rhinestone design
Of course you can use Spiral betty and a Cricut to make a rhinestone design! The disadvantage of this is that Spiral Betty performs the dot design in a linear pattern, so the rhinestones will not be surrounding the design and following its same shape, on the other hand, it will create a base that we can work on to easily modify and customize a rhinestone design.
The first step is to create the dotted design in Spiral Betty. Next, it is necessary to remove the extra dots. Removing them will help reduce the working time of the cutting machine. And also it is necessary to prevent the rhinestones from getting stuck in them interfering with the process of creating the project using the template.
Rhinestone template creation
To remove the excess dots, go to Procreate, Sketchbook or another application that allows you to draw over the images. First, insert the silhouette from which the dotted design was created. Then select the dot design and place it over the silhouette. be sure to add the dot image on a different layer.
Size the dot design a little smaller than the silhouette to modify the edges and make it look smoother. Another option is to leave it as a rectangular type design; it will look good. Start painting with a white paintbrush on the outside dots. be sure to lock the silhouette layer first. To work and modify only the dots layer. erase all the dots that are outside the silhouette.

Modify the remaining details, adding larger dots in the spaces inside the silhouette where there are small dots so that the rhinestone can fit inside when cutting the template. for that change the color of the pencil to black and size its thickness according to the dots of the design. Now download the image and go to Cricut design space, upload it and delete the background.
Cricut Design Space process
Finally, in Cricut design space size the image so that the dimension of the circles are the dimensions of the rhinestones you are going to use. to do this create a circle with their size, if it is a SS10 size rhinestone make it about 0.135 inches wide 0.135 inches high. then start sizing the image until the dots of the image have the same size as the circle created, this way you will be sure that they are in the correct size.
As a recommendation, use this technique mainly with designs with straight lines and simple shapes, otherwise the process will be more complicated.
So those were the tips and steps to create a rhinestone pattern using spiral betty and a Cricut, but now here are the steps to create the spiral designs also super customizable and fun!
Creating the Spiral Betty artwork
To create a Spiral design just upload the image and start modifying it to have a spiral that works with the machine.
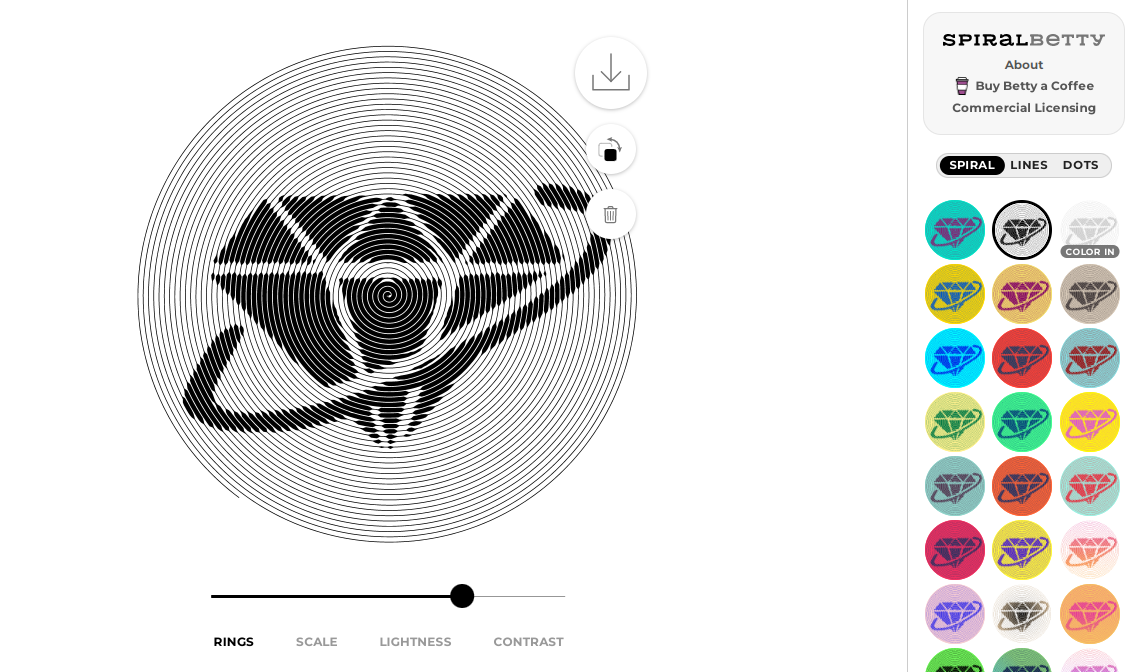
Select the PNG format and choose the transparent background. The PNG format is best for working with Cricut design space or Silhoutte Studio. If you are curious to know the difference between them and if there are other types of formats to use in those design softwares, see HERE for a post that talks about it.
Cutting the Spiral
The process of transforming the spiral image into a cut file in the Cricut design space is different from the process in Silhouette Studio, but here are the two explanations so to use whatever software of choice. To use Silhouette Studio to create the cut file, first select the downloaded image. Then trace the design and finally simplify the lines to make them easier to cut.
On the other hand, in Cricut Design Space, first upload the image by clicking on “browse”. Then select the “complex” option. After that, remove the background by clicking on the white parts. Finally, click on “cut image” and upload it to the canvas. Finally, resize the design keeping it proportional, just manually change the height and let the width change accordingly. Send it to the machine, for this it is possible to use HTV, regular vinyl or even the sublimation technique.
To weed the design always start on the outside, otherwise there is more chance of catching the wrong thread, and the design will be ruined. As a recommendation, glue the corners of the carrier sheet to the table so that it does not move. Do not weed it on the mat because touching it too much will remove the glue quickly and it is not convenient.
First of all, to start weeding, look for the corner with the free space. Remove the outer parts first. Then, start pulling the line carefully until the whole design is clean. Finally, use some transfer tape to adhere it to the surface.
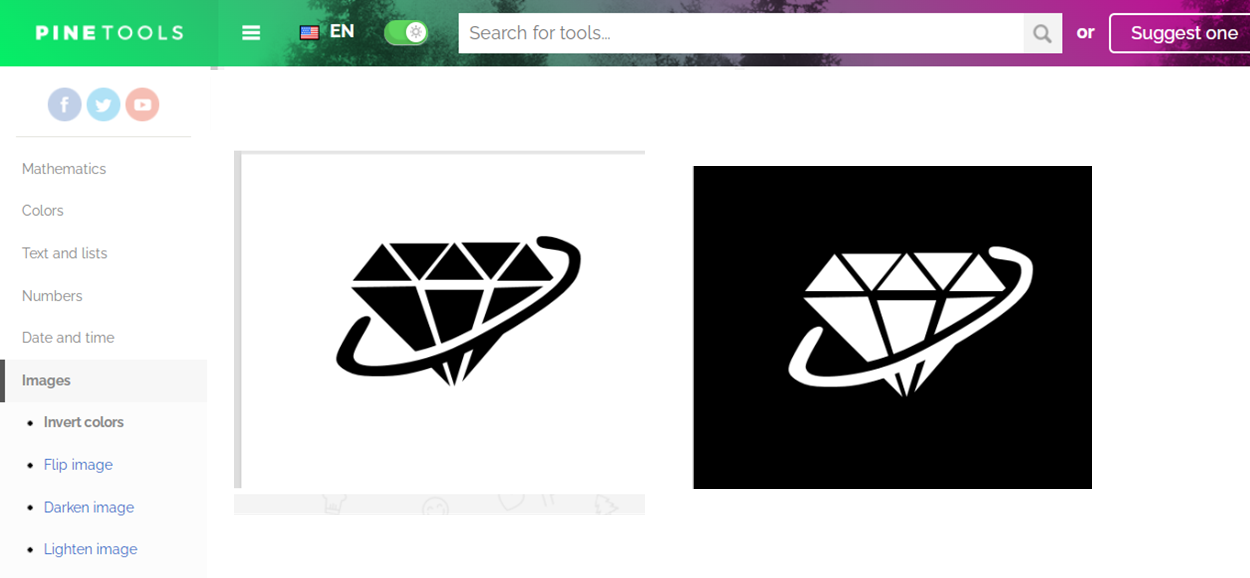
How to use the spiral on black backgrounds
To create an artwork using Spiral Betty and a Cricut on black backgrounds, such as on a black t-shirt with white vinyl, the same process will not work. This is because the colors tend to look inverted once it is cropped.
To apply the design on those dark backgrounds, it is necessary to invert the photo. This way, the design will look as intended. To do this, go to a color reversal website, pinetools.com will work. Upload the image and download it. Then upload it to SpiralBetty.com, create the spiral and repeat the process to convert it to a cut file.
Remember that to cut it in HTV it is necessary to mirror the design or flip it horizontally.