-
×
 God is the Plug Rhinestone svg
1 × $5.99
God is the Plug Rhinestone svg
1 × $5.99 -
×
 Christmas Wine glass svg
1 × $3.99
Christmas Wine glass svg
1 × $3.99 -
×
 Delta sigma theta high heel
1 × $5.99
Delta sigma theta high heel
1 × $5.99 -
×
 Birthday Queen
1 × $2.49
Birthday Queen
1 × $2.49 -
×
 I love my HBCU
1 × $5.99
I love my HBCU
1 × $5.99 -
×
 Rolling stones vintage distressed
1 × $2.99
Rolling stones vintage distressed
1 × $2.99 -
×
 Certified She CEO Rhinestone SVG
1 × $5.99
Certified She CEO Rhinestone SVG
1 × $5.99 -
×
 Diva afro girl rhinestone svg
1 × $5.99
Diva afro girl rhinestone svg
1 × $5.99 -
×
 Dripping lips FAMU Rattlers
1 × $3.91
Dripping lips FAMU Rattlers
1 × $3.91 -
×
 Black Nurses Rock
1 × $5.99
Black Nurses Rock
1 × $5.99 -
×
 Standing on his promises heel Rhinestone file
1 × $5.99
Standing on his promises heel Rhinestone file
1 × $5.99 -
×
 Won't he do it
1 × $5.99
Won't he do it
1 × $5.99 -
×
 Auburn Rhinestone High Heel
1 × $5.99
Auburn Rhinestone High Heel
1 × $5.99 -
×
 Template for use slice in design space app
1 × $3.91
Template for use slice in design space app
1 × $3.91 -
×
 Sunflower monogram template svg
1 × $2.49
Sunflower monogram template svg
1 × $2.49 -
×
 Merry Grinchmas Truck SVG
1 × $2.99
Merry Grinchmas Truck SVG
1 × $2.99 -
×
 Santa Hat Wine glass svg
1 × $5.99
Santa Hat Wine glass svg
1 × $5.99 -
×
 Minnie Mickey Drinking Starbucks Coffee SVG
1 × $3.49
Minnie Mickey Drinking Starbucks Coffee SVG
1 × $3.49
Inkscape
How to separate an image in the SVG editor inkscape
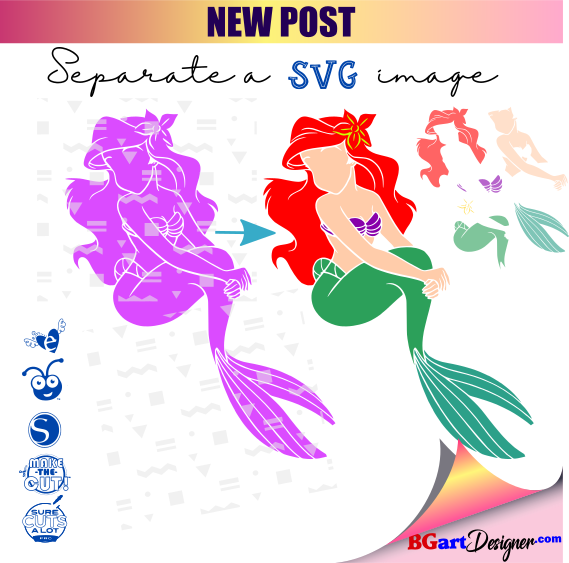
If you need to know, how to separate an image in the svg editor like individual files, read the following tutorial; So you’ll know What To Do When You Can’t Ungroup An SVG File in Cricut & Silhouette.
Using SVG editor INKSCAPE
- Open a new document in inkscape and import the svg file that you want to separate.
- Select the image and clic in menu EDIT/FILL and Stroke, a new window with 3 tab (FILL, STROKE paint, stroke style) will open on the right side of the screen.
- Select “flat color” in stroke paint tab and select “no paint (X)” in fill tab.
- Now, select the image an clic in menu PATH/Break apart. Then you will be able to select the parts of the design you want, change of color, eliminate elements and much more.
- Once you have made the changes you want, then group the design by color ( select an element filled with any color and clic in Edit/Select same/fill color) after apply menu PATH/ combine.
- This way you have the design ready to save and use with your cutting machine. Customize your purchased designs exactly to your needs, it’s easier than you think!
You can see my first video tutorial:
I invite you to leave a comment, indicating what topics you would like to learn in the next tutorials
Don’t forget to subscribe HERE to get the download code for the best FREE SVG cut files
Your post is so helpful and the video is always extra! For the next tutorial can you make a video how to create a Svg font and a image on inkscape or any other program free or not? Thank you for all the work you do!
Thank you Sonia! In the next tutorial, I will explain how you can create your own svg image