-
×
 Diva afro girl rhinestone svg
1 × $5.99
Diva afro girl rhinestone svg
1 × $5.99 -
×
 Dripping lips no justice no peace
1 × $2.49
Dripping lips no justice no peace
1 × $2.49 -
×
 Birthday entourage girls
1 × $5.99
Birthday entourage girls
1 × $5.99 -
×
 Never Walk Alone Heart SVG
1 × $2.99
Never Walk Alone Heart SVG
1 × $2.99 -
×
 Won't he do it
1 × $5.99
Won't he do it
1 × $5.99 -
×
 Angela Davis Download svg
1 × $3.49
Angela Davis Download svg
1 × $3.49 -
×
 I get it from my momma SVG
1 × $2.99
I get it from my momma SVG
1 × $2.99
Cutting and Crafting
How to personalize a Christmas sack with vinyl HTV
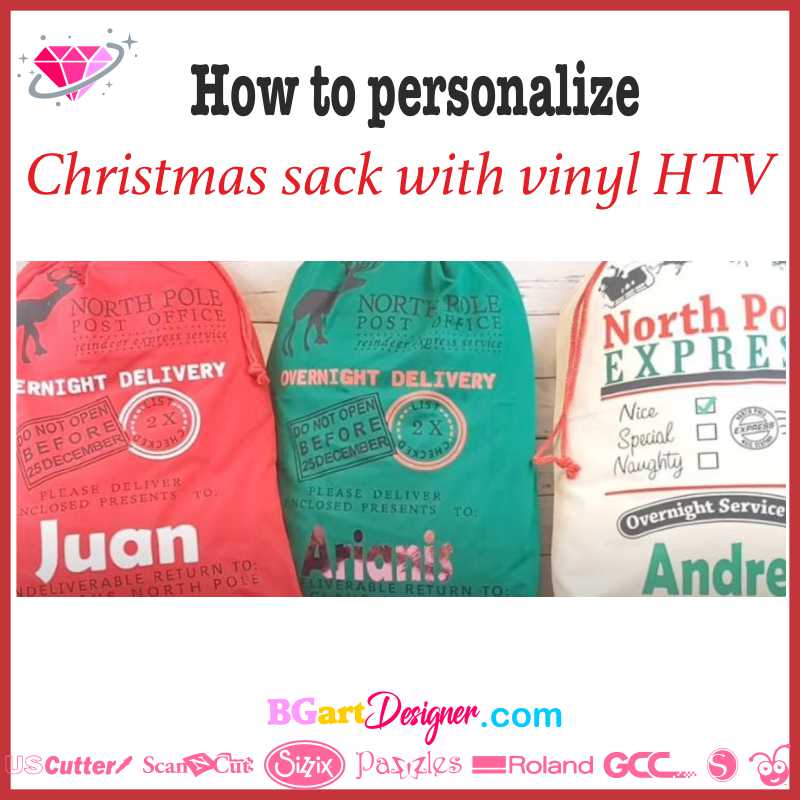
Personalize Christmas sacks with vinyl HTV! surprise everyone this christmas with an original gift.
In this post you will see step by step the whole process on how to personalize a Christmas sack with HTV vinyl. These are great because they are quite large, measuring 19 and a half by 27 and a half, so it’s possible to fit a lot of gifts in there.
It’s a nice alternative to not wrapping any gifts at all, just stuff them inside and it will look great. So let’s get started
Things needed:
- Christmas sacks to personalize
- heat press/ Cricut easy press
- vinyl HTV brand scissors easyweed
- Cutting machine
DESIGN PROCESS Christmas Sack
First of all, open a design program, it can be silhouette design studio, Cricut design space, Illustrator, or any other. Then create a design or choose one HERE.
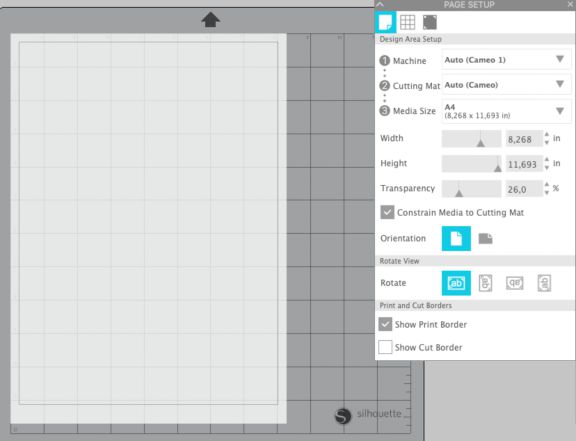
Make sure to have the right size vinyl, to do this go to the icon on the right, it is called “open the page set up”, and click on the size of the vinyl to be used.

To be able to see the paper, go to “transparency” and set it to zero, so it will be visible on the screen. Then insert text in the preferred font or insert a design. Change the color to see how it looks; It doesn’t matter what color it is.
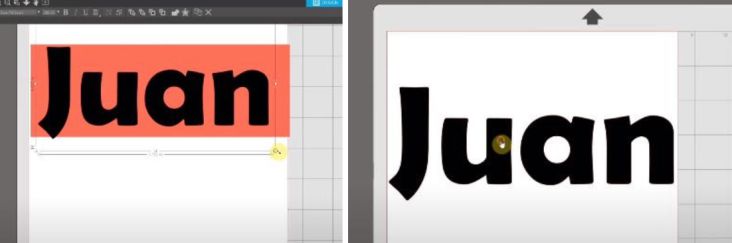
Before cutting out the words, measure the Christmas sack where the name will go to create a template. To do that add a rectangle and then in the settings at the top put the exact size measured before.
Color the rectangle to make it easier to see on the screen. Then put the name on top and fit it into the rectangle; For that pull the squares in the corners to make sure it keeps the same size and doesn’t distort it. Finally, remove the rectangle.
CUTTING THE HTV VINYL for personalize sack
When cutting the HTV vinyl be sure to mirror the design, which means flip it horizontally. To do this, right-click on the design and then click “flip horizontally”. Then send it to be cut.
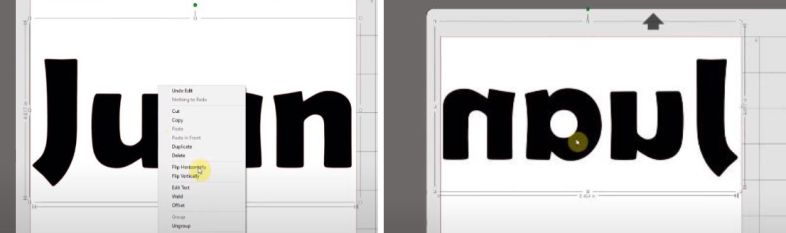
- Don’t forget this step, otherwise, the vinyl will be messed up.
Select the material, and settings, presets can be used, but here are some that work well too.
- blade on 3
- force on 10
- speed on 8
Make sure the design is within the red outline, as it ensures that it will cut. Also, make sure you put the vinyl shiny side down on the mat, load it in the machine and send it to cut.
HEAT-PRESSING TIME Vinyl HTV
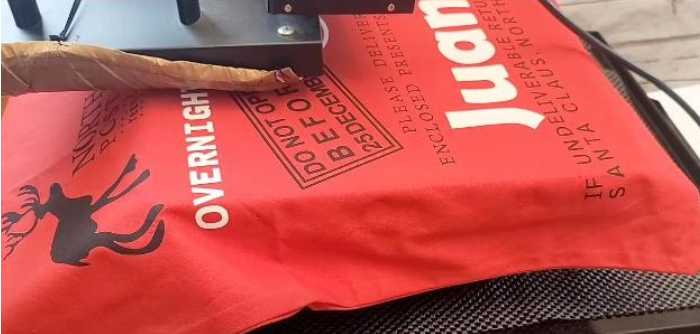
First of all, weed the vinyl and remove the vinyl pieces that are not needed. Once the weeding process is done, put the design where desired on the Christmas sack to personalize it.

Place the Christmas sack in the heat press, and heat it for at least five seconds to remove the moisture from the garment.
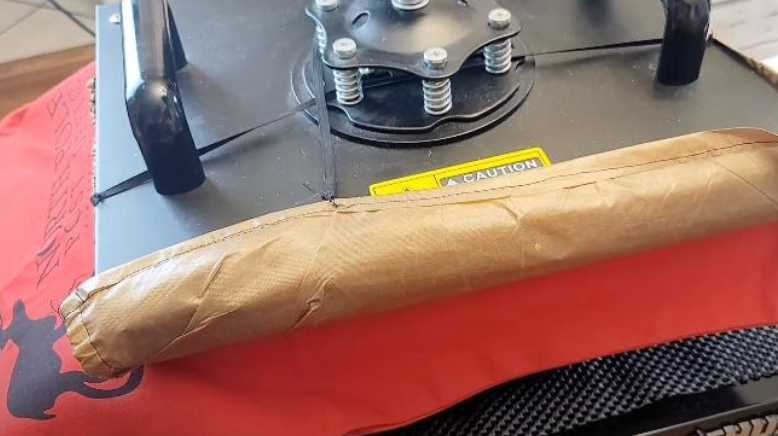
- Don’t forget to put butcher paper on top.
Then put the name where it is wanted to go and center it as much as possible and put some heat-resistant tape on it so it doesn’t move. Now, press for about 5 seconds.
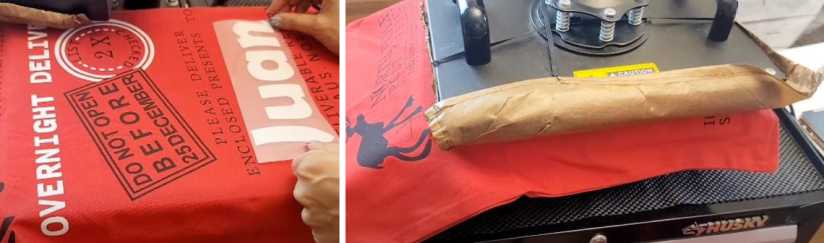
Then remove the protective sheet because it should not remain on the garment.

- Note if the HTV vinyl peels off cold or hot, so if it’s hot-peel it off while it’s hot.
Finally, press again for about 30 seconds, don’t forget to put butcher paper on top.
And that’s it! Super easy, right? Let me know below in the comments if you liked this tutorial on how to personalize a Christmas sack with HTV vinyl!