Cutting and Crafting
Contour to create layered images in Cricut
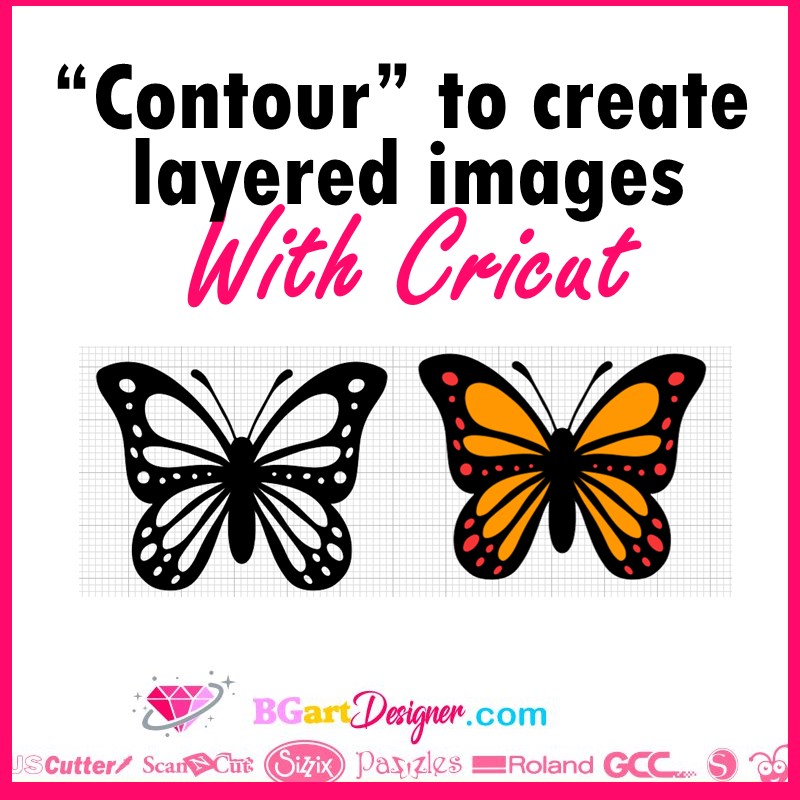
Use the contour feature to create layered images in cricut design space!
It happens many times that we come up with an amazing design that is only in black and white, with no possibility to change the color of the layers in the layers panel because it is a condensed image. In this post we are going to solve that little problem with a wonderful trick.
So read on to learn how to convert a normal Cricut design space image to a layered design. It is possible to find nice designs on “images”. First of all, upload the image and duplicate it. To do this, right-click on the image and click “duplicate”.
Keep an image as a base to check the layering process and start modifying the copies. Add as many copies as you want to add color layers. Above all, to elaborate the different color layers it is necessary to figure out what we want in each layer and how many layers we are going to create.
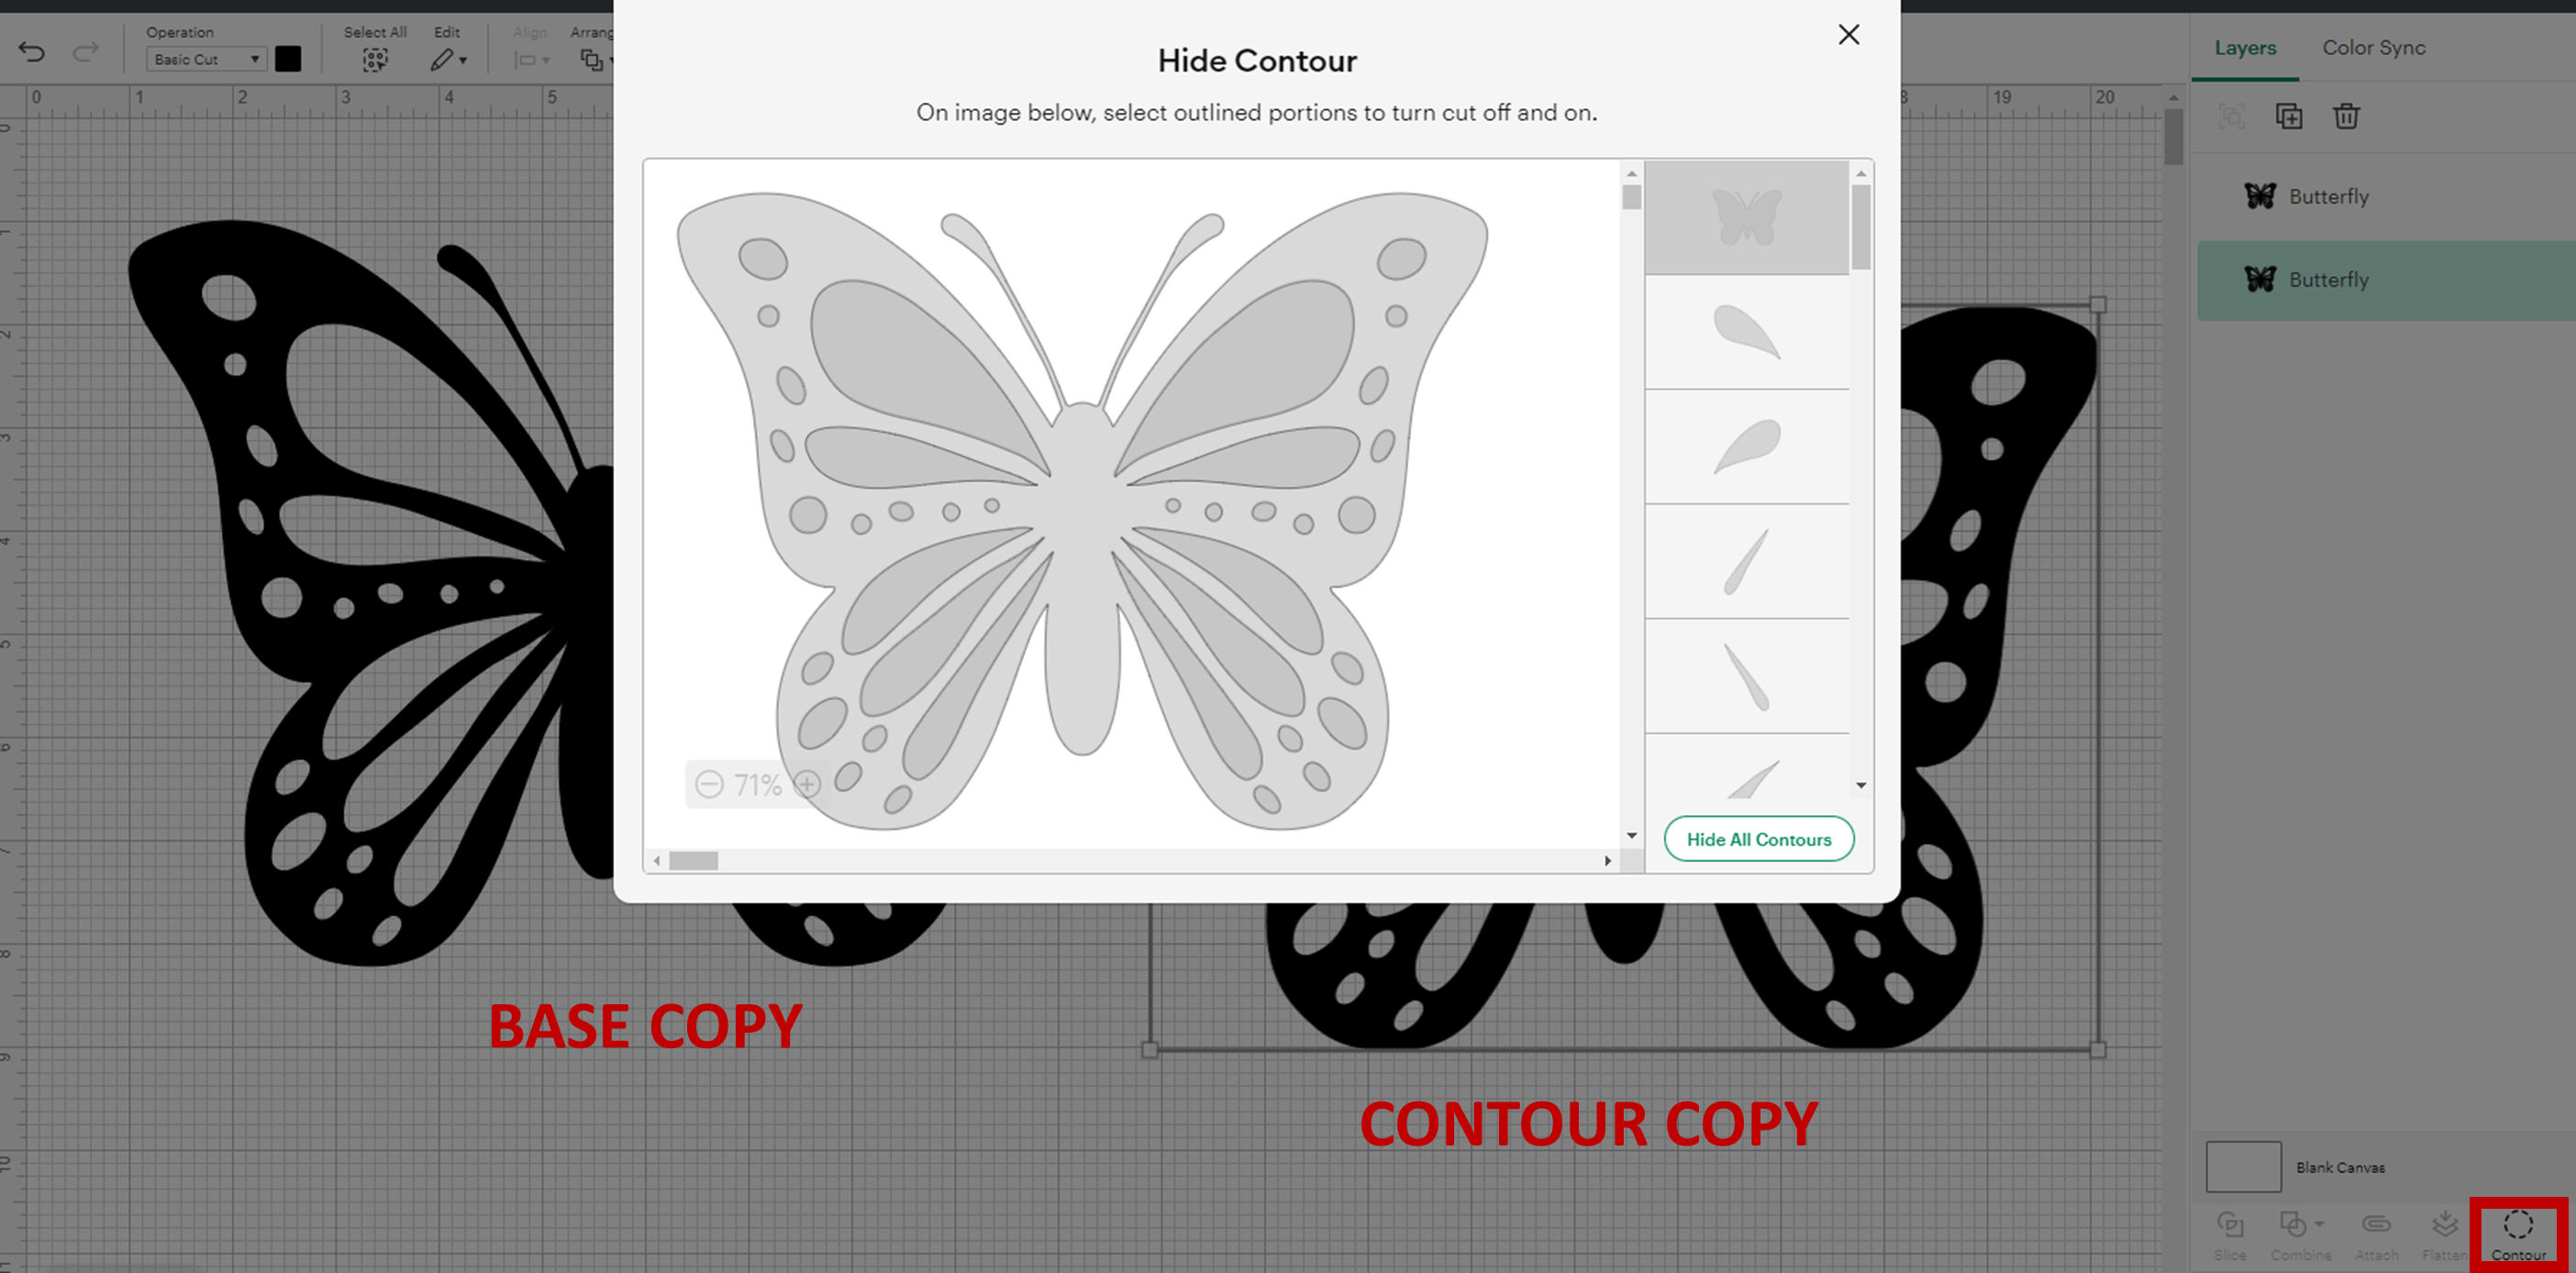
Contour Feature
First select a copy and look for the contour feature. It is in the right corner. Click on it, it will bring up a panel showing all the different parts of the design. Zoom in to start working and see all the individual parts of the design.
First of all, it is possible to create a background-only layer. To do this, click on “hide all contours”. When using this option, the contour function will leave the large layer of the design or the background as the only contour. This is because an outline must be shown at all times.
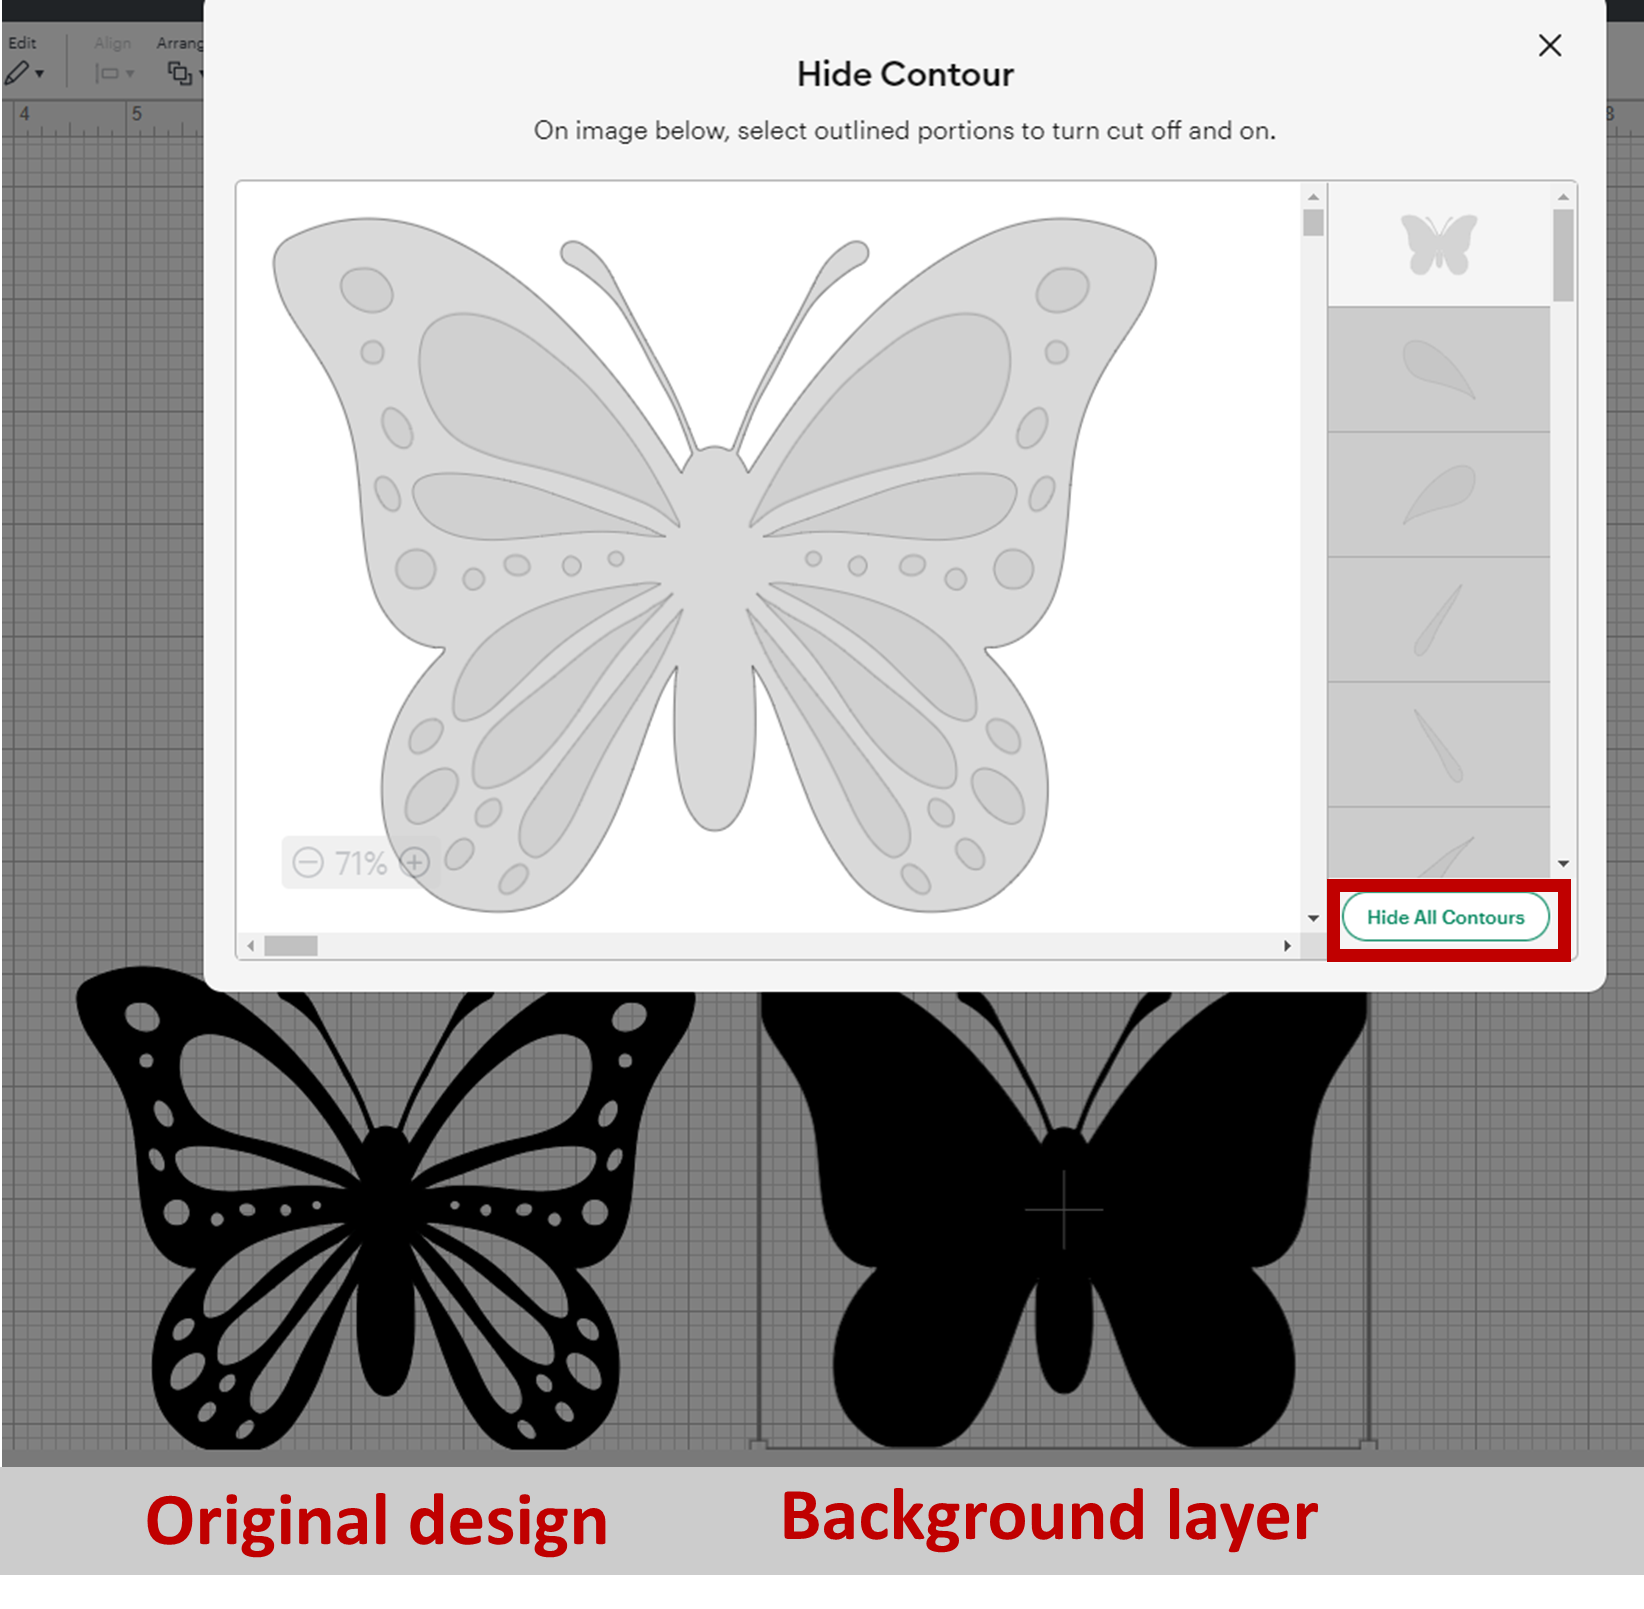
Above all, it is important to know that even if we are hiding all the layers it is still possible to see the other layers if we click on the outline again, so they are not deleted and can be edited.
Creating the layers
To create a layered images with the cricut contour feature, duplicate the background layer. This will make easier the process. By duplicating that layer we just have to start selecting the parts of the new layer we want to create. Also click the background layer to hide it. It is also possible to select the parts in the right panel by clicking on them. But it is a bit tricky to know which parts are which. It is a matter of trial and error.
Then change the color of the new layer and move it to the top of the background to see how it would look. When all layers are in position make a comparison with the initial design. In case you have misplaced a part of a layer, simply select the layer and go to the contour again. Find that misplaced part and click it.
Here’s one last tip, when looking for the layer color it is sometimes difficult to select it from the canvas. So go to the right panel and click on the desired color layer. Finally, since we are not separating the parts of each separate layer from the design, each one will appear as a group design. so we don’t have to attach them at the end.
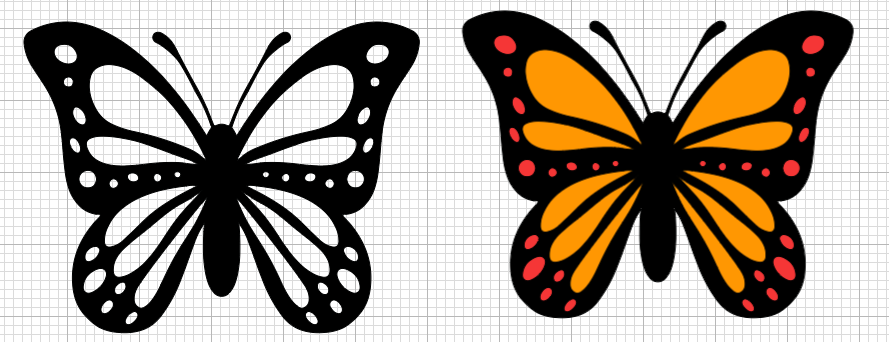
Knowing this trick it is possible to create a lot of projects with the cricut cutting machines! Also to complement these designs you can fins some awesome ones HERE! Let me know in the comments if it works for you.