Cutting and Crafting
DIY ADVENT CALENDAR BOOK PROJECT

DIY advent calendar book, a wonderful and ingenious project to give as a gift!
Looking for a spectacular DIY to keep making awesome projects? Here’s one for you! This project can be decorated in many styles, add photos and personal phrases and it will be the perfect present!
MAKING THE COVER
To make the cover of this advent calendar book take a cardboard with the color of choice that measures about 33cm in height and 58cm in width.
Then cut three pieces of another thicker cardboard, the color of these does not matter because they will be covered by another cardboard.
It is needed two that measure 28cm in height and 21cm in width and one that measures 28cm in height and 6cm in width; Place these pieces on the cardboard and center them; Leave 0.5cm between each one, glue them well to the cardboard.
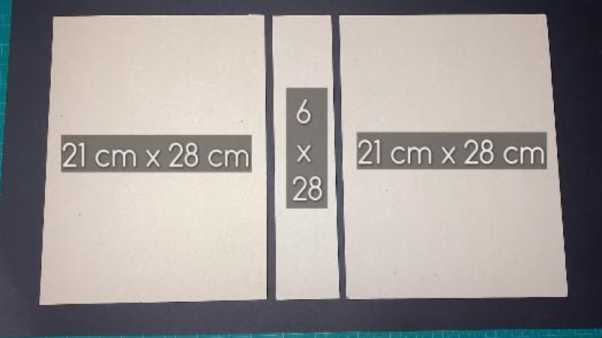
Take a folding helper, could be a dull plastic knife and start marking the folds, around the three cartons, do it very close to them after gluing, otherwise it won’t work; Fold them inwards to get the shape; Before gluing the overhanging cardboard cut the corners a little.

- After gluing the cartons, mark the folds again.
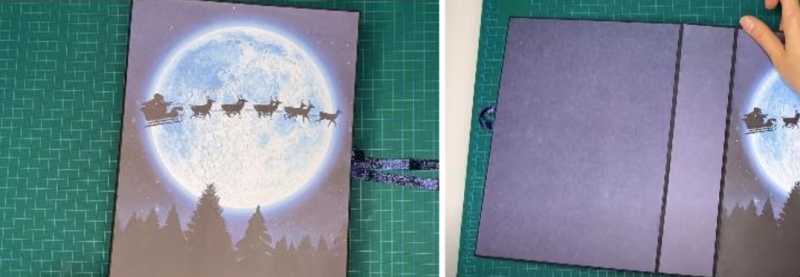
Now cut a piece of cardboard 12cm high and 27.8cm wide, glue it in the center, with craft glue and mark the fold again so that the advent calendar can close properly.
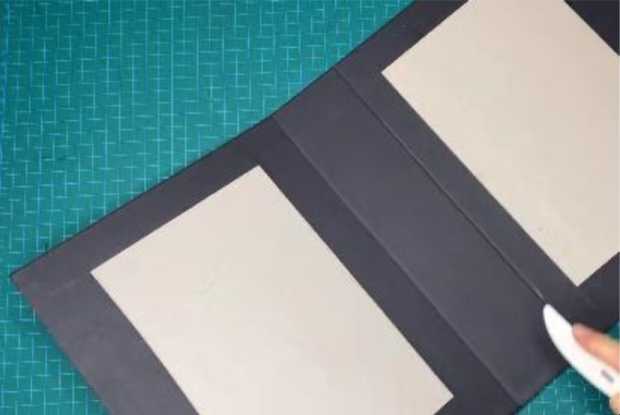
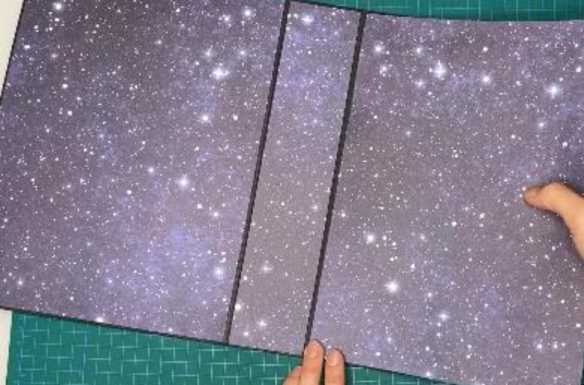
Now take a piece of paper with the design of choice and glue it inside. To make it look pretty make sure to leave a small border all around, and a space between each piece of paper.
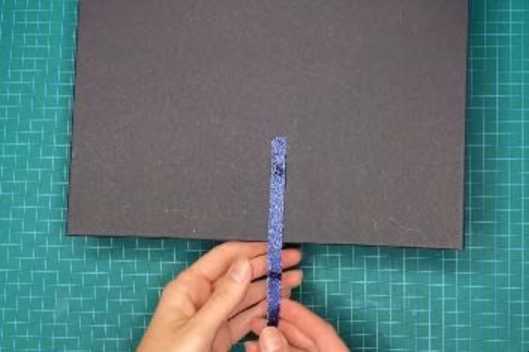
After take two thin ribbons and glue them in the center of the book, front and back, separately. Make sure they are long enough to loop them together later.
Finally take an image or design of choice, select one HERE and glue it on the front, be sure to leave a small border to make it look nice. On the back and on the spine it is best to glue a single color card that matches all the other colors, but remember that it is up to you.
MAKING THE BOXES
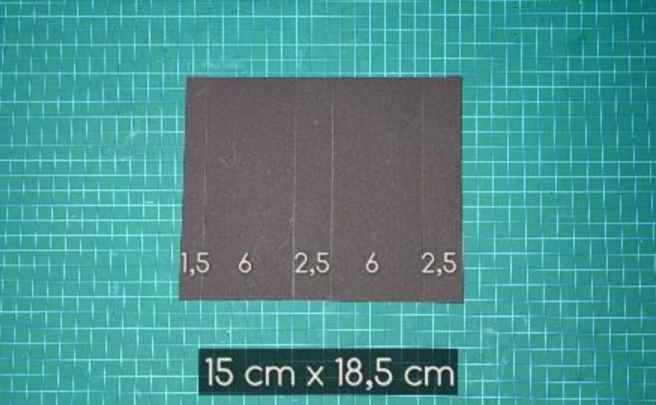
Now is the time to make the little boxes that are going to be inside the advent calendar book, first take a piece of cardboard about 15cm high and 18,5cm width.
Put the paper horizontally taking as a guide the part of the paper that measures 18,5cm. Then make 5 marks; Make the marks on the top and on the bottom of the paper to draw straight lines.
- The first one must measure 1,5cm.
- The second one 6cm counting after the first mark.
- The third one 2,5cm counting after the second mark.
- The fourth one 6cm counting after the third mark.
- The fifth one 2,5cm counting after the fourth mark.
Then put the paper vertically, taking as a reference the side measuring 15cm, and make 4 more marks. To do this, place the ruler on the paper and start making the marks in the following positions.
- The first at 2cm
- The second at 4,5cm
- The third at 10,5 cm
- The fourth at 13 cm
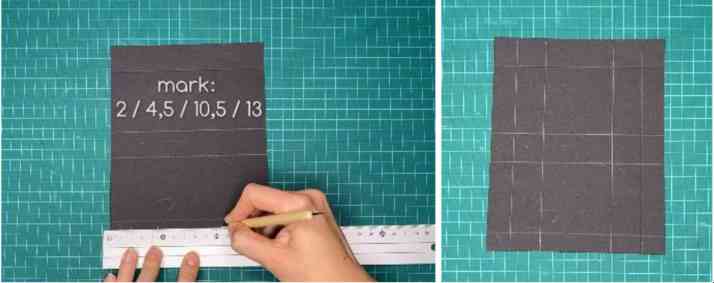
- Make the marks on the top and on the bottom of the paper to draw straight lines.
Place the paper horizontally again, cut completely only the spaces indicated by the image. Then cut the squares but in order to fold them, do not cut them completely; If wanted with a craft punch, give the box a few details

Start folding each line after marking, to assemble the box. Now, put some glue only on the 4 little squares, and glue them at the inside of the box. And finally the box will be done!

Repeat the process to create 12 boxes to put on the left and 12 boxes to put on the right. On the lid and inside-bottom of the boxes it is a good idea to add an image, or a design of choice as well.
FINAL STEPS for advent calendar
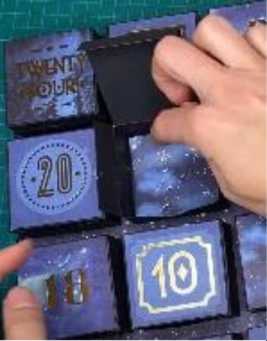
First glue the boxes on one side of the advent calendar, and take that side as a guide so that both sides look the same.
Also To do this, put the box face down on the already glued box and put some glue on it; close the advent calendar and it will be glued in the same place as the other one.
When starting to glue the boxes on the other side; start at the edges, once they are done, glue the boxes that are going to be in the center.

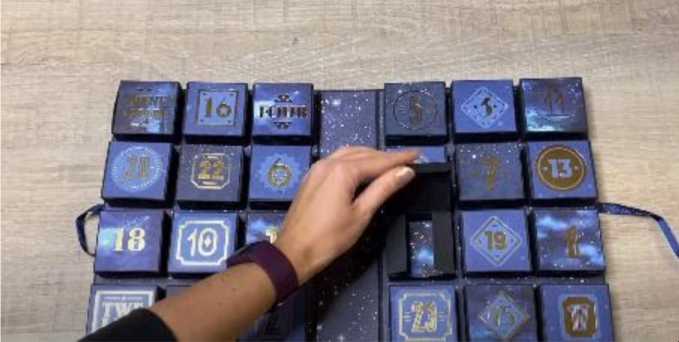
Then Follow all the steps indicated previously for get a beautiful advent calendar book!. This DIY is perfect for the Christmas holidays, let me know below your comments about this project!
