-
×
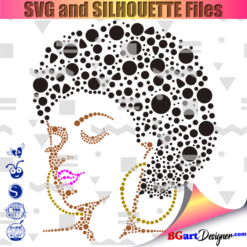 Beauty afro black girl
1 × $2.99
Beauty afro black girl
1 × $2.99
Cutting and Crafting
Stickers for planner with Cricut tutorial
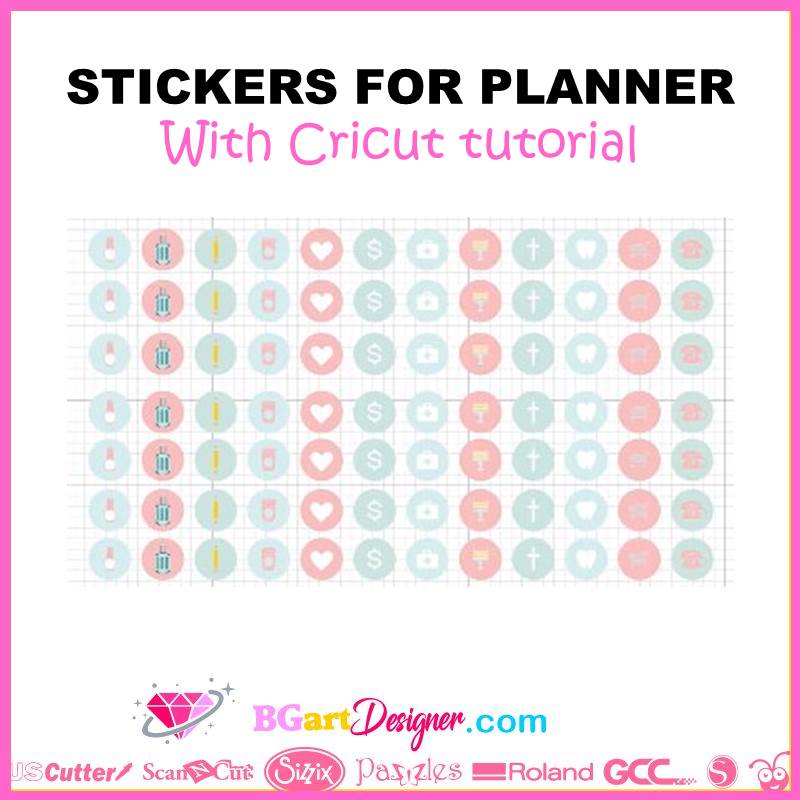
Stickers for planner with Cricut tutorial! This is a post for those planner persons out there! It will help you be intentional with time, and to organize all the activities.
The planner stickers will help to be more intentional with time; and it’s a great way to have fun with the planner and create some visual fun on the pages. To create planner stickers on your own take a look at this post! They also work well for use in the Acrylic calendar with Cricut
Design process
Let’s go to Cricut design space.
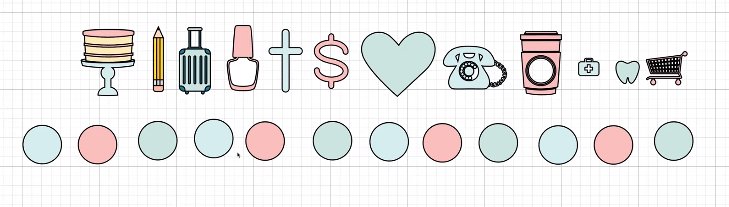
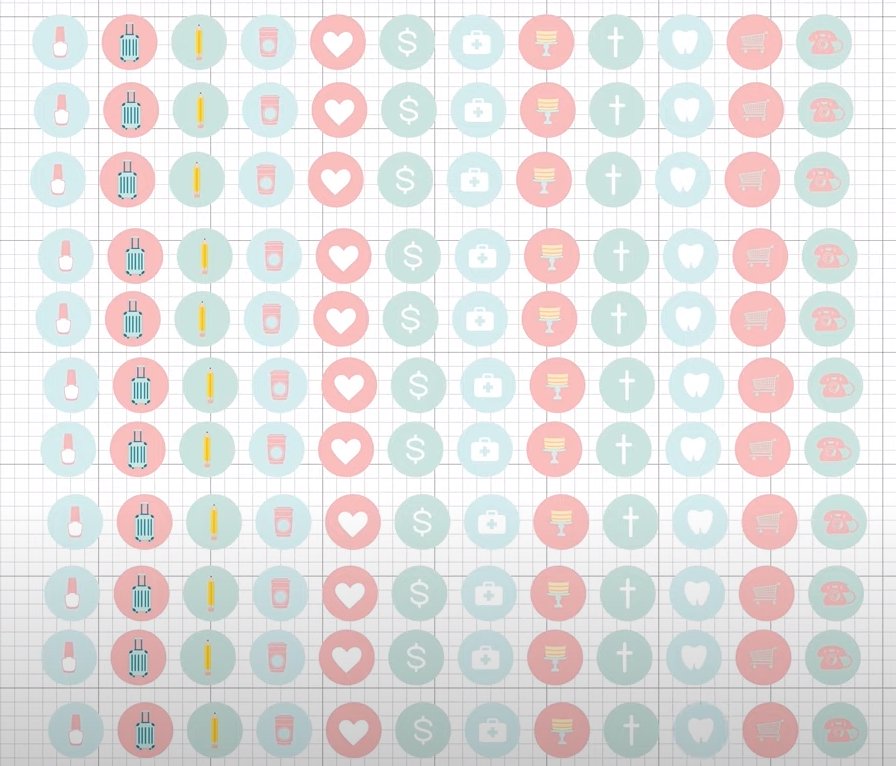
We are going to make 12 different icon stickers. So the first thing to do is to go to the images and select the icons; It will depend on your activities and interests. So look in the Cricut images for the name of the one you want and select from all the options.
To save the selections, just click on the image and it will be added in the lower right corner, in a kind of icon. Keep looking until all the images are there. Finally, put them on the canvas by clicking on the “insert image” button.

The best way to make stickers is to give them a unique meaning that represents the activities and it is possible to create them with any color; selecting the color palette and even adding some words.
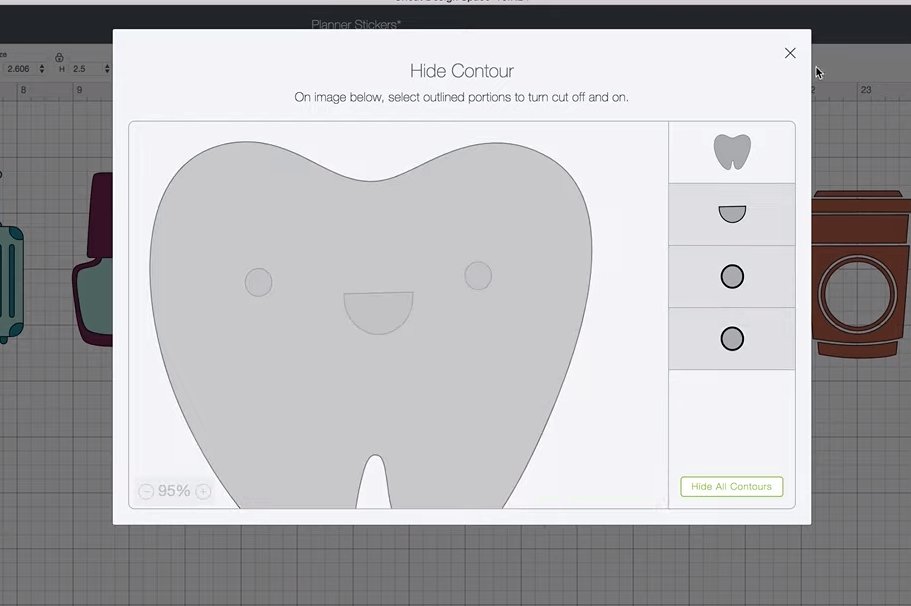
Here are some tips for editing some of the images. If you want to remove something from the image, or hide an unwanted area of the image, click on the image and select the “contour settings” in the right corner.
Then click on what you want to remove, and finally click on the ‘X’ to exit. In addition, it is possible to change their colors, by selecting a palette of colors or simply selecting the ones most suitable for each of them.
Final touches to get planner glossy stickers
After that, add a circle, and give it the size you want your stickers to be, in this case, the size of the circle is 0.5 by 0.5.
Next, use the colors from the previously selected palette. Make as many circles as stickers to create. These will be the icons. Now start placing the drawings in front of the circles, sending them to the front, and sizing each one. Then highlight both the circle and the image, and align them to the center.
Above all, it is necessary to take each one from a cut file and convert them into a print file. For that just highlight the design and go to the bottom right corner and click on “flatten” so to have a pretty sticker. Repeat the process with each one. The ideas for these stickers are endless.

Once the stickers are done you just have to save the project and when there are none left you can easily reprint them.
Printting and cutting
For this last part of the Stickers for planner with Cricut tutorial! First, organize the designs a bit, put them close enough to save paper, and with space to cut them later. Select everything and go to align and click on “distribute horizontally” and then “align bottom” so they are all perfectly straight.
Next, the stickers all need to be joined together; to make sure they are going to be cut in this same order. Select all of them and click on “attach”. So now, duplicate that whole line; so when it’s time to print they’ll all print in rows.
After that, select all the lines and click on “align right” to get them all organized. Then click on make it.
It will look organized, each design on a line, this is because we attached them. Otherwise, all the stickers would look like a mess.
This is a print cut, so select “continue”; then click on “send to printer first”. What happens here is that the Cricut design space sends this to the printer; so load the sticker paper into it, so it can print. Also put on the “add bleed” setting. If you have problems, such as the printer cutting the registration box, try changing the paper settings to “thick paper”.
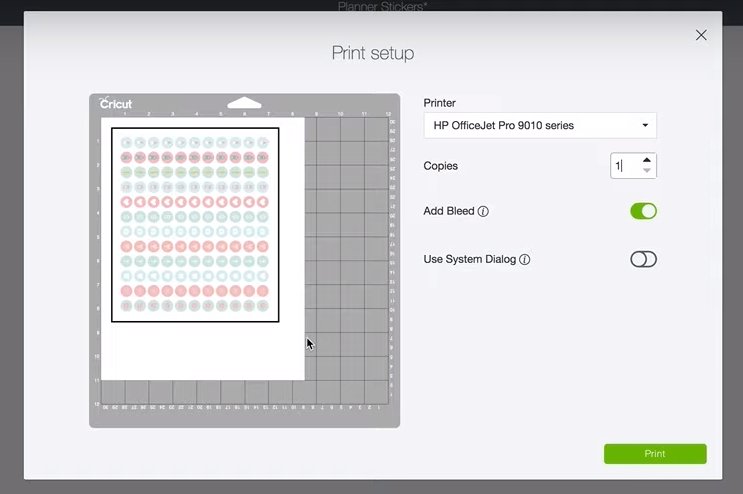
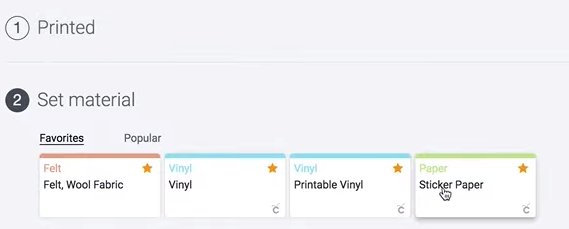
Next, to cut the stickers select the Cricut machine,and then in the media set select sticker paper.
Now, place the sticker paper on the mat, make sure the paper sticks well to it, and start cutting. It will take about eight to ten minutes to cut all of that.
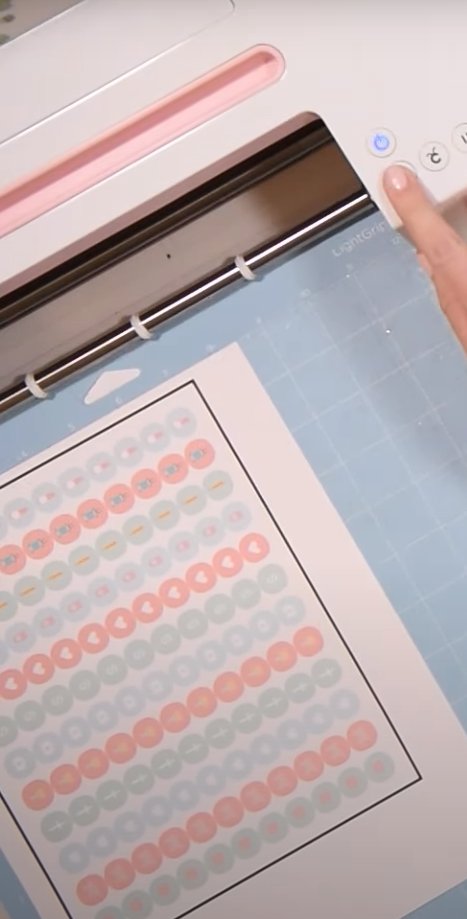
The black box is what the Cricut is going to use to read the image and to know where everything is located, so don’t cut it off.
And that’s the end of this Stickers for planner with Cricut tutorial! Hope it works, let me know your comments below!