Cutting and Crafting
Shaker number Cake topper with Cricut tutorial
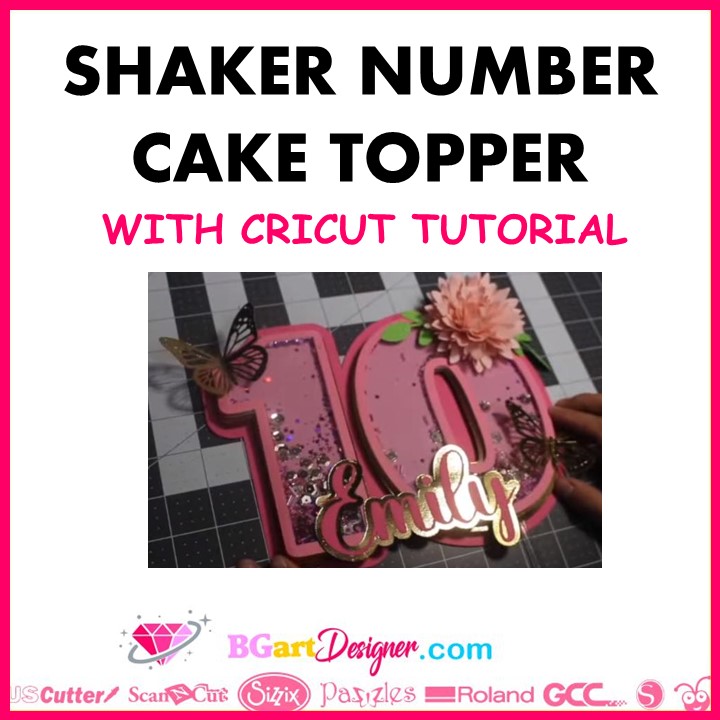
Cake topper and number shaker, on Cricut design space! An amazing and easy way to personalize a cake!
Required parts
- Acetate number (Layer 1)
- Number border (Layer 2)
- Paper number (Layer 3)
- Paper number offset (Layer 4)
- 2 offset backgrounds (Layer 5)
Design process of the number layers
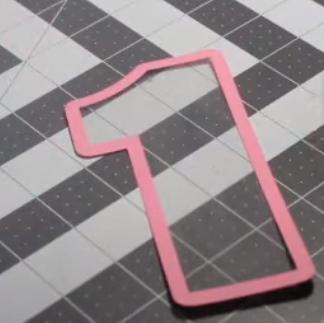
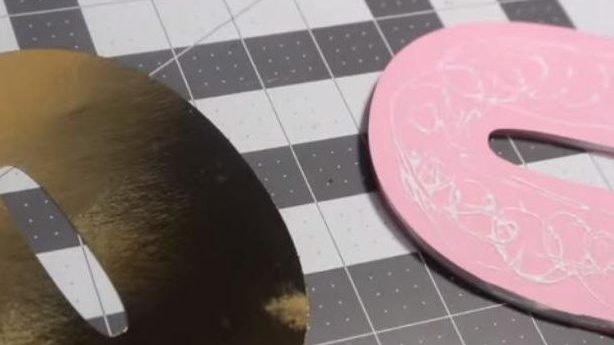
Open the Cricut design space, type the number with a bold font, size it, and apply to it an offset of 0.097. Select the number and in the bottom corner click on “slice”. On the slices, there will be a gray number, delete it. And keep the border and the black number ten.
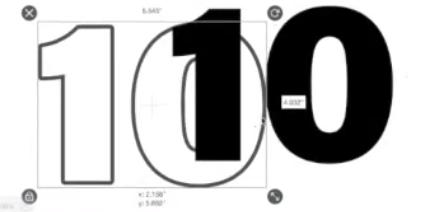
Add another offset of 0.089 to the black number. This will be for the part of the topper cut in acetate, to make the shaker. Once the offset is done, delete the black number, duplicate the gray number, and change the color of the one inside the border (layer 3), also change the color of the border (layer 2). the gray is going to be for the acetate (layer 1).


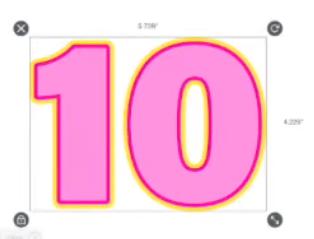
Now select only the number inside the border (layer 3), and make another offset with it, it will be for the background of each number individually (layer 4). Apply an offset of 0.097 and change its color (in this case it will be yellow).
Select that new offset, and do another offset again, do this until you have a piece that marks the entire border leaving a margin. This is going to be the offset background (layer 5).
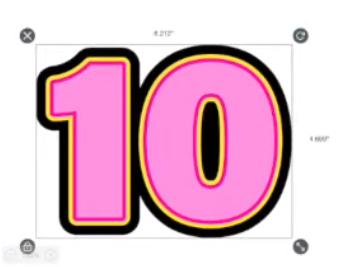
Do this offset until there is no circle in the middle of the numbers.
Choose the size of the cake topper, in this case, it will be nine inches by seven inches. When sizing the cake topper make sure to select all the pieces of the number.
Extra pieces for the cake topper
Now type the name in a font you like. If it’s a script font, ungroup the letters, and move them together to make them look nice. Group the letters to make an offset, which has to be the whole edge of the letter, with a margin. Put this piece of the design in front of the ten to size it.
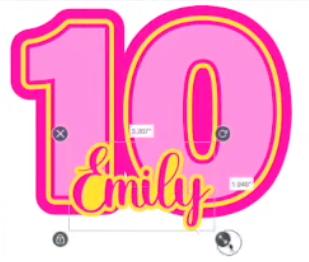
Finally you can add extra pieces like a butterfly or 3d flowers by getting an awesome SVG at the best price at BGARTDESIGNER. size the pieces to fit well in the topper. Place the extra pieces in the number to see how it will look. Then start cutting.
If the extra pieces are too intricate, use the intricate cardstock cut for the setting, for the setting to cut the acetate put it to cut twice. As a recommendation cut two pieces from the offset background to make it sturdy, or cut one from 100-pound cardstock. Any Cricut machine will work!
Assembling the number shaker cake topper
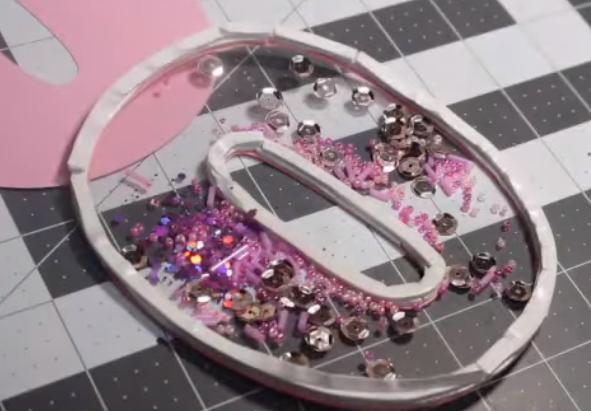
First glue the border of the number (layer 2) to the acetate (layer 1), when gluing make sure not to put too much glue so as not to get the acetate dirty, otherwise, it will look bad. But if a little glue gets on the acetate it will be possible to clean it later. To clean the acetate; remove the glue with alcohol wipes, and then wipe the acetate with some glasses cleaner; this way the acetate will look clean and clear.
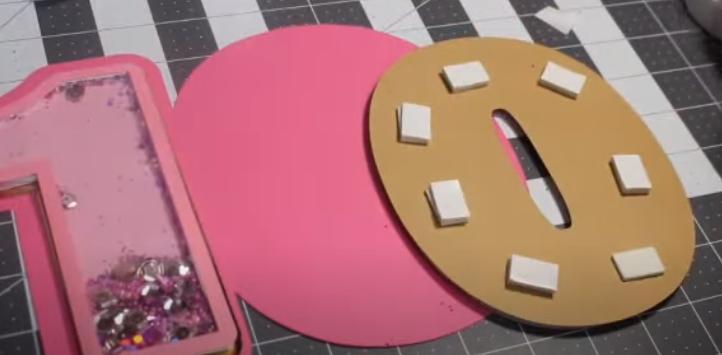
Next, put some foam tape around the edge of the acetate number. Put two layers of it, if the foam tape is too thin, and if it is too wide, cut it in half. Add some beads, sequins, and glitter.
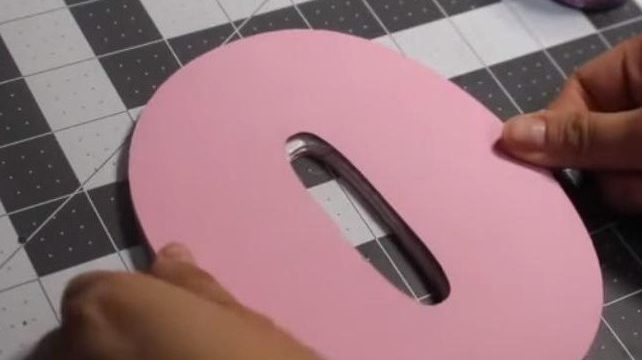
Start gluing the individual background of the numbers (layer 3), sticking them to the foam tape. After that, glue the paper number offset (layer 4) to each piece. do the same process with the two acetate numbers.
Now take the last layer, and use foam tape to glue the numbers to that background layer, to make it look like it is elevated. Note that there should be some space between the foam tapes in the number, to glue then the cake topper sticks.
Glue the extra pieces to the number, finally glue the topper sticks. And you will have a stunning Shaker number Cake topper.