Cutting and Crafting
Paper flower shadow box with Cricut tutorial
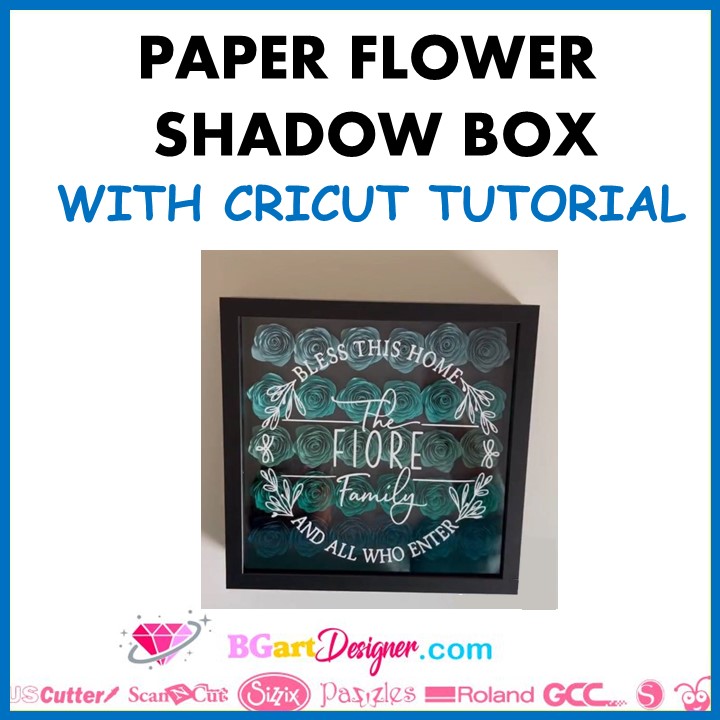
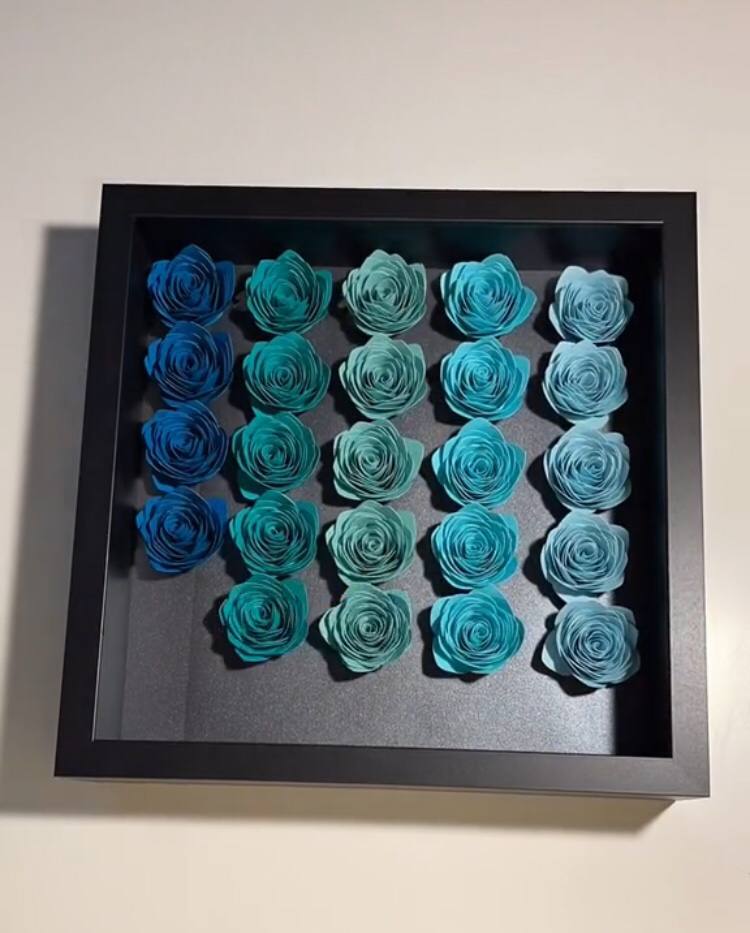
Make a pretty paper flower shadow box, with a cricut machine! A project that can be customized in multiple ways.
Any of the Cricut machines can do this project, and best of all, it can be completely customized, the colors, the size, the type of flowers, the design of the front, everything can be customized.
Supplies needed
- Cricut cutting machine
- Color papers
- Shadow box
- Vinyl
- Transfer tape
Find the paper flower template
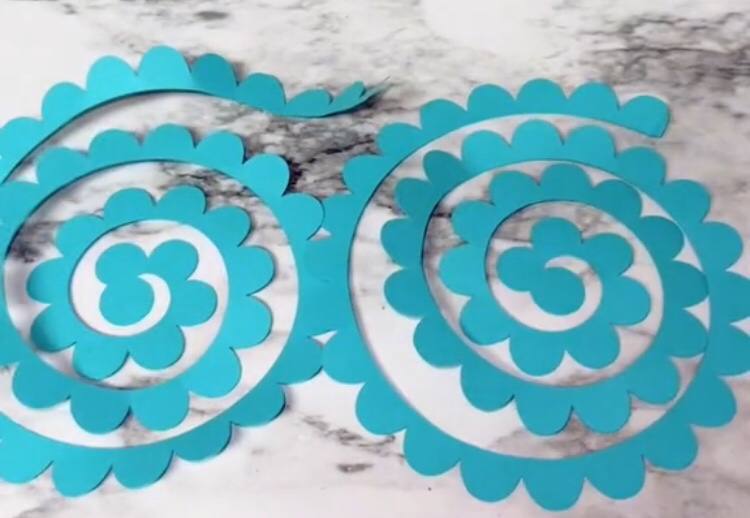
Now let’s go to Cricut design space, to find the flower template to create those awesome 3d flowers, go to “image”, and search for flowers. On the left Scroll down “project type” and select 3D, it will start to show some types of spiral flowers, which are the ones to make 3d flowers with paper.
Then click on the exclamation icon, of the image you want, to click on “view image sets”. It will show more variations of the flower you are looking at, from there will be easy to find a flower to use in the shadow box project. Insert the selected version of the flower; and play with the sizes, putting about 4 on a sheet so as not to waste material.
Find a design HERE for the front, or make a monogram. For that search in Cricut design space for the letter you want with the word “monogram” next to it, for example “H monogram”. Insert the image, edit it if it’s necessary and finally add the name in a font you like, in the center of it. Size it to fit in the shadow box, and attach the pieces, so they are cut from one piece of vinyl.
To make a design easy to change, use removable vinyl; but if removal is not in the plans, use permanent vinyl.
Finally, send to cut. Set the material in Cricut design space, the medium cardstock will work for the Cricut papers.
Assembling the paper flower shadow box
Now it’s time to assemble the flowers, and here are some recommendations on how to make them. To remove the flowers from the mat; flip it over, then peel the mat back to remove each of the flower pieces.
A quilling tool can be useful when assembling the flowers, as a recommendation buy it only if you are going to make several of these shadow boxes to sell because it will make your life easier. If only want to make a shadow box, use your hands. To assemble the flowers start at the outside edge and roll inward as tight as possible.
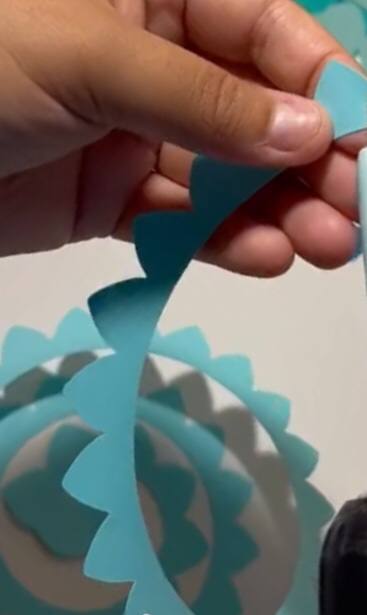
Once you have it, let the fingers loose a little and let it expand, until you like the look. When it opens as wide as wanted, hold it with some fingers so it doesn’t get bigger. Use the center part which is like a circle for the glue; float that piece down slightly, to put glue on it. Then flip it back over onto the flower, holding it into place for a few seconds.
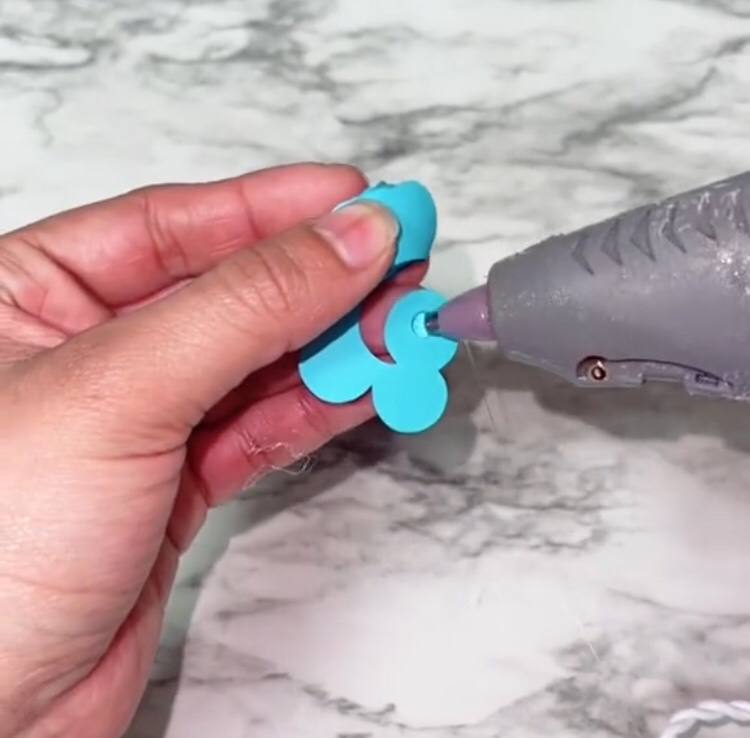
If using a hot glue gun, the process will be easier because the glue will dry faster.
Apply a little pressure to make sure the flower sticks perfectly, and then work the outer petals, bending them to make them look a little open. Do this with some petals; until you like the look of the flower itself. Repeat the process for all the flowers.
Now take the shadow box, and glue some colored paper on the backing; then start placing the flowers, and glue each one individually to the paper backing. Clean the glue threads, and also the glass; inside and also outside, to assemble it. Put the backing on the glass mark; and there you will have the flower shadow box!
Placing the vinyl on the shadow box
Before adding the monogram to the front make sure the glass is completely clean. Put some transfer tape on the design. If the design is too big use this trick to attach it to the shadow box. it’s called the hinge method of application. Or you can apply the wet method too!
Run a piece of tape down the center of the design, on the front, over the transfer tape. Stick it well with the scratch tool. Use the tape to find the center in the shadow box and make sure it is taped down well so it doesn’t move.
Start removing one side of the transfer tape, peel off the backing paper from one side of the vinyl only. Then cut off the part you peeled off, and then start placing the vinyl; on that side, working slowly from the center outward. Doing it slowly also helps with the bubbles.
Once you have that half attached, you can remove the tape, flip the other side over, remove the backing sheet from the other half; and once again work that down from the center slowly to the other side.
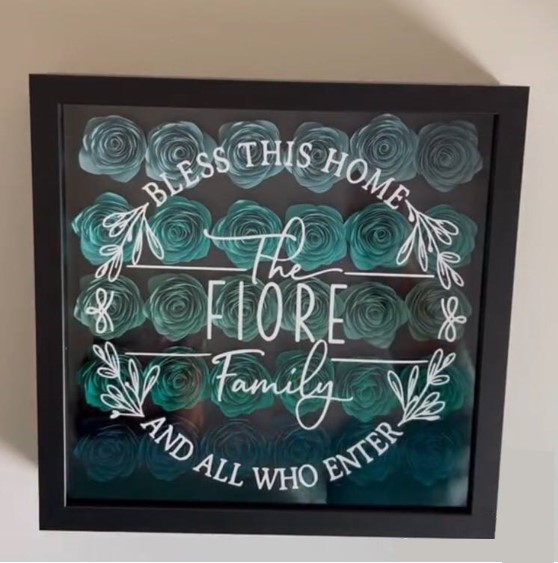
Finally, remove the tape and make sure the vinyl adheres perfectly; and the paper flower shadow box will be ready to display at home or to give as a gift!
