Cricut Design Space
How to add a new material and change blade settings DS

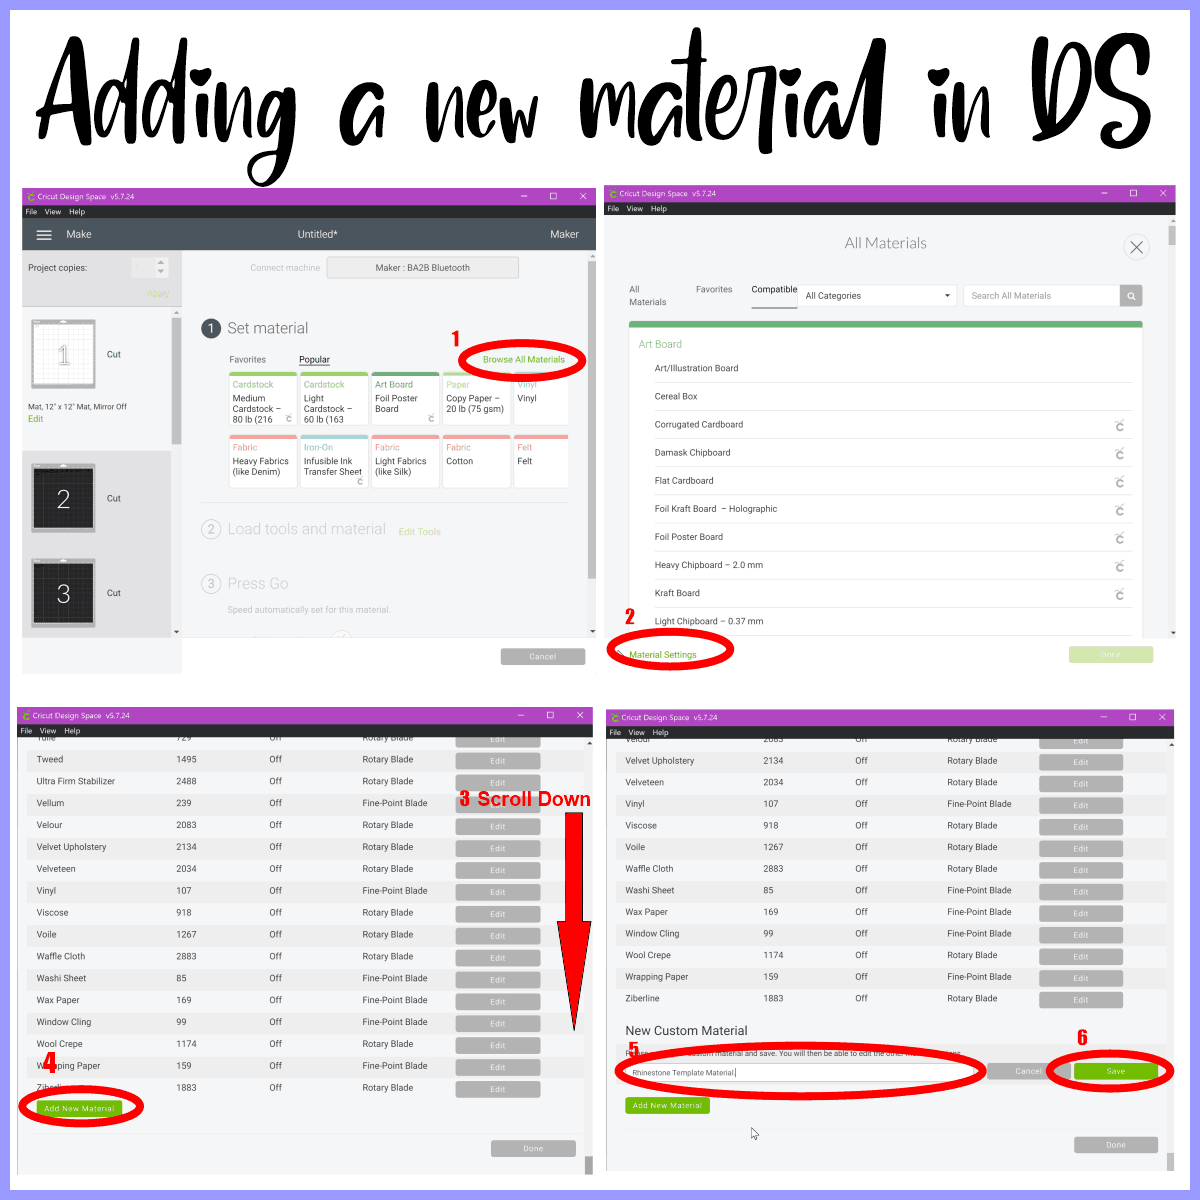
To add new Custom materials on the Cricut Design Space DS, requires a series of steps, so I have taken a snapshot of each of those steps and added a new material that I have called the Rhinestone template, I’ll also show you how to change blade settings.

- Make sure you have your cricut machine on, start a new project and draw any basic shape (circle, square, etc) in the DS workspace, then select the “make it” option and “continue” and clic on “Browse All Materials” (See the picture above).
- In the new window select “Material Settings”
- Scroll down and
- Clic on “add new material”
- Write the name for your new material, in my case “Rhinestone template material”, as indicated in this other tutorial about how to cut a rhinestone design with a cricut machine
- Clic on the option “save”

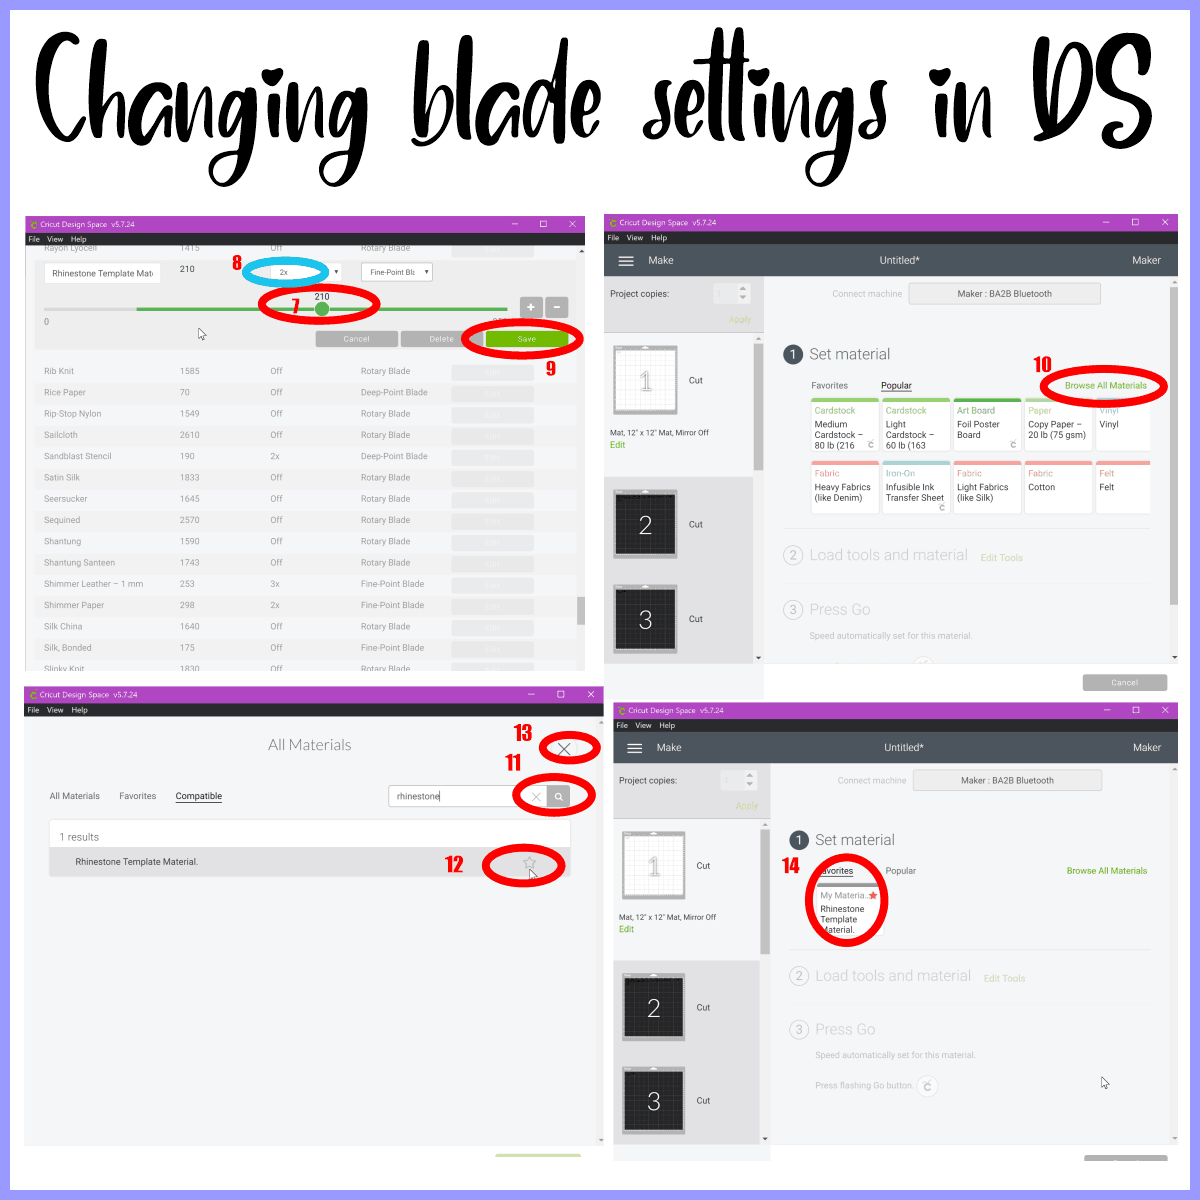
- 7. Adjust the blade setting (in my case I use 210 for rhinestone template material).
- 8. Place the number of times you want your cricut to cut the material you have added, in this case as the material for rhinestone is a little thick and I want to use the fine point blade, then place 2x, so the machine will cut twice the same template.
- 9. Clic on “save”
- 10. The material has already been created and you can see it by clicking “browse all material”
- 11. Type the name of the material you just created and select the magnifying glass icon to display the result.
- 12. Now you can add the material to your list of favorite materials by clicking on the star-shaped icon, so you can quickly locate it every time you go to cut a design with that material.
- 13. Clic on “X” for close this window.
- 14. Now you have your material added to the favorite list and you can find it quickly.
I hope this tutorial will be useful for you and leave your comment if you have any questions or suggestions for a future tutorial.

This post was really helpful 🙂 Thank you BG art Designer 🙂
Great! you’re welcome