Cutting and Crafting
How to make a Led Cake topper with Cricut
Making a topper is really super easy, but in this post we are going to take this kind of project to the next level! By adding some LED lights, here is the full process of how to make a LED cake topper with a Cricut! Also on my website Bgartdesigner.com there is another tutorial on how to make a Shaker topper, check it out HERE!
Parts needed for the topper
- Acetate layer
- Paper outline layer
- Background layer
Supplies needed
- LED lights
- Foam tape
- Topper sticks
- Coin battery
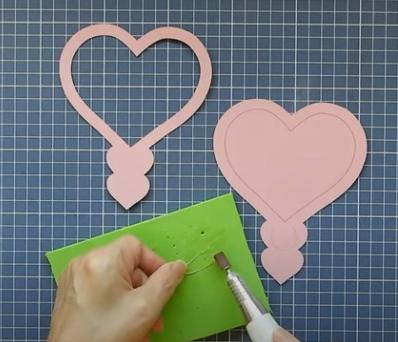
Firstly, cut out the topper design using a Cricut machine. You can purchase some custom cake toppers at great prices at BGARTDESIGNER. After you get and cut out the design, start taking some foam tape, as a recommendation use a thick one. Make an incision in the middle of the foam tape, without cutting it completely in half. Just cut a little bit to put the LED lights inside it.
Secondly, take the LED lights and remove the coating from one end. This can be with an emery board or using a nail drill. Don’t clean more than one inch. To do that put the end on a piece of foam. As a result, you will have two ends of the led light line. One of them will be on one side of the card battery, and the other, on the opposite side, to turn on the LED lights.
Bend the ends of the LED light a little to make sure they make proper contact with the battery. It is recommended to use a coin battery because it is much thinner and perfect for hiding in the cake topper itself. Make sure the battery is on the correct side for each end contact so that the lights come on, and have a wonderful LED cake topper made with a Cricut and some creativity!
Assembling the LED cake topper
In addition, glue the foam tape on the border of the background layer of the topper, not too close to the edges. After that, start putting the LED light in the incision made before carefully. Glue one end of the light to the paper with some foam tape. Then put the battery over it. Therefore place the other end of the led light on it. Finally, put another piece of foam tape to stick the end to the battery and make the contact.
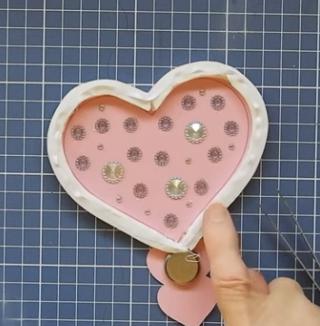
To the background of the topper you can add some jewels, as a result, they will reflect the light and will look very nice. Glue the topper stick, then glue the acetate layer to the foam tape glued first on the edge of the background, and on it glue the paper outline of the design to make the topper. You can add other details like gems on the edge, some 3D flowers, or whatever you want. Obviously, you can find the best cutting files at BGARTDESIGNER, check it out!

It is very easy and the result is impressive, making this LED cake topper will be the highlight of the day you use it for sure! Let me know your comments below.