Cutting and Crafting
3 ways to make labels for organizing with cricut
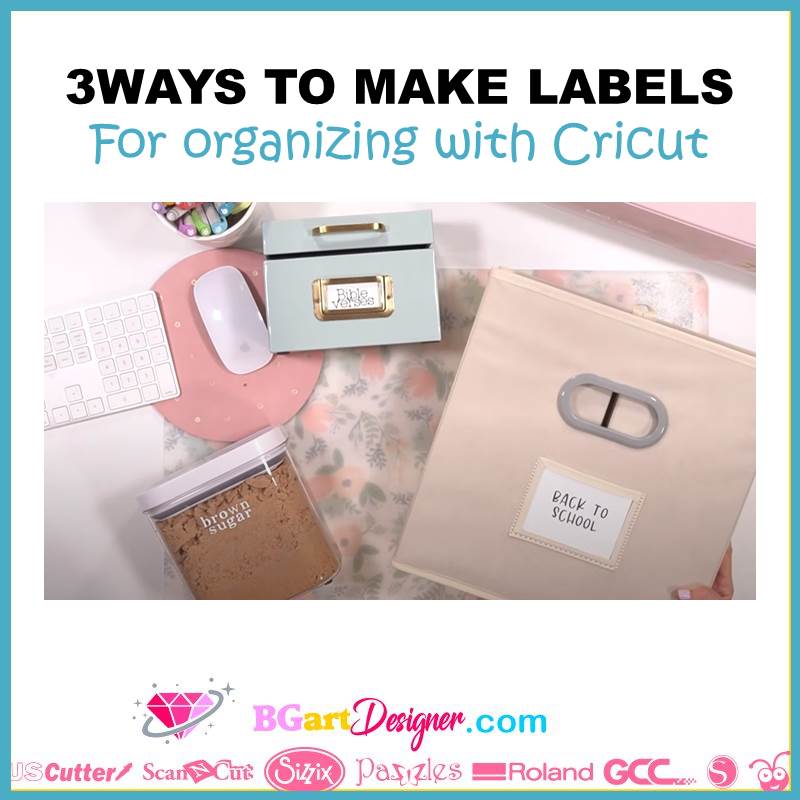
3 ways to make labels for organizing with a Cricut! Handy to reach the organization’s goals!
Here are some ideas for making different types of labels, a step-by-step process. This project takes organization to a higher level, as it allows you to stand your ground and know where things need to be. Also if you are looking for some designs, click HERE
Vinyl labels
First, insert a text with any font and type out the word. If the name of what needs to be identified; has more than one word then use this trick. Get to the “lines spacing” and decrease it to move each word closer together.
Next, size the words according to the size of the surface on which they will be placed. To have exactly the same size in all words. First, size the longest word and then copy its font size. Select each word and paste that number into the font size setting. This way they will all be consistent.
Finally, click on make it; and be sure they have enough space between them to cut and weed without having problems. Select the correct material on the settings. In this case, the “premium vinyl” will work. Then load that material on the mat and start cutting. This is an oracle 651 permanent vinyl.
An important thing to do when making vinyl labels for a container is to clean the surface with alcohol and a cotton swab; washing the area to make sure there is no dust or dirt, or oils. this will help the vinyl stick better.
Start weeding the vinyl, and as a recommendation; when dealing with small pieces of vinyl it is best to weed one at a time. so cut the vinyl into pieces to weed. slowly peel and leave the word on the clean sheet.
Finally, use a piece of transfer paper, and place the word vinyl face down to press on the backside. with the vinyl still face down remove the cutting support sheet, and place it on the surface.
Making labels with the Cricut pen
The second option of these 3 ways to make labels for organizing with a Cricut, is with the Cricut pen!
First of all, measure the place where you want to put the label to get the exact size. Go to cricut design space and insert a square, and in the size settings put the exact number of the size to create the label.
Then select the text, then go to the font and select the filters option; it’s in the top right corner of the font setting box. In that filters option select “writing” that way it will show the fonts that work well to use with the pen and the foil tip. Type the word and adjust its size finally, taking as reference the square we did before.
Highlight both the word and the square and align them to the center. Also, select both and go to select attach; This setting lets the Cricut know exactly where you want it to write the words. Make sure the words layer says “pen” and the square layer says “basic cut”.
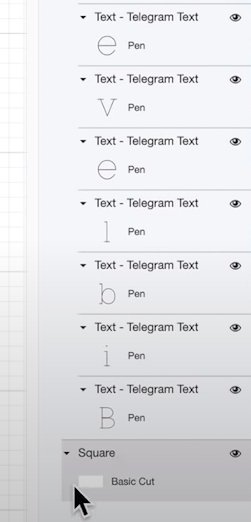
Click on make it; select the material. Finally insert the Cricut pen and the blade and send the Cricut to start. When it is done writting it will automatically switch to the blade. And then we have a nice label.
Print then cut label
This can only be done on the explore air machines or the maker, the joy does not support print and cut.
Go to shape and insert a square, put the exact size of the surface it will go on. Insert the word; and make sure you clear the font filters in this case; so you can see all the font options.
To have all the labels with the same size take as a reference the one with the longest word, this way each one will be exactly the same. Copy and paste the same label and just edit the text to make it fast.
To make those elements a print cut, select the label and the word, one group of the mat a time, and click on “flatten”. It will take it from two layers that were both cut files to one layer that is a print layer and then cut; go ahead and do the same thing with each individual label.
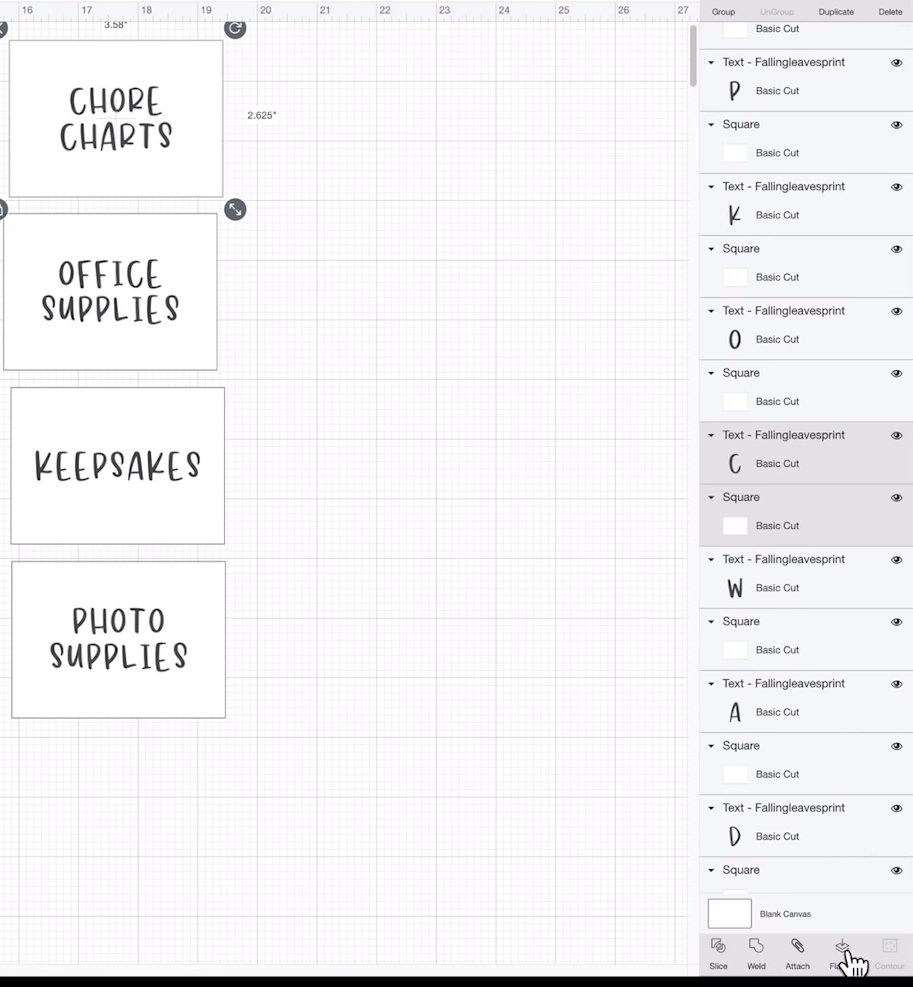
Before sending to make the project make sure that the labels have enough space between them, if the color of the label is white change the background mat color to have a better view.
If you have a lot of labels, attach some elements to make the printing and cutting process easier. the problem with printing and cutting projects is the size restriction because it makes it difficult to make bigger projects.
Printing and cutting
When you finish organizing the labels, click on “make it”. First, send it to the printer. For this project; if you use a white background you don’t need to activate the “add bleed” option. You have to do this with each of the groups the software creates for it to work.
Once the label is printed, select all the materials and select the one you are using. Then place the printed image on the mat and load it into the machine so you can cut it out.
Remember to leave that black box on the paper, because those are the registration marks; which let the Cricut know where it needs to cut.
These 3 ways to make labels for organizing with a Cricut, they’re super cute and easy to make, right? Leave me your comments below!