Cutting and Crafting
Engraved bracelets with Cricut
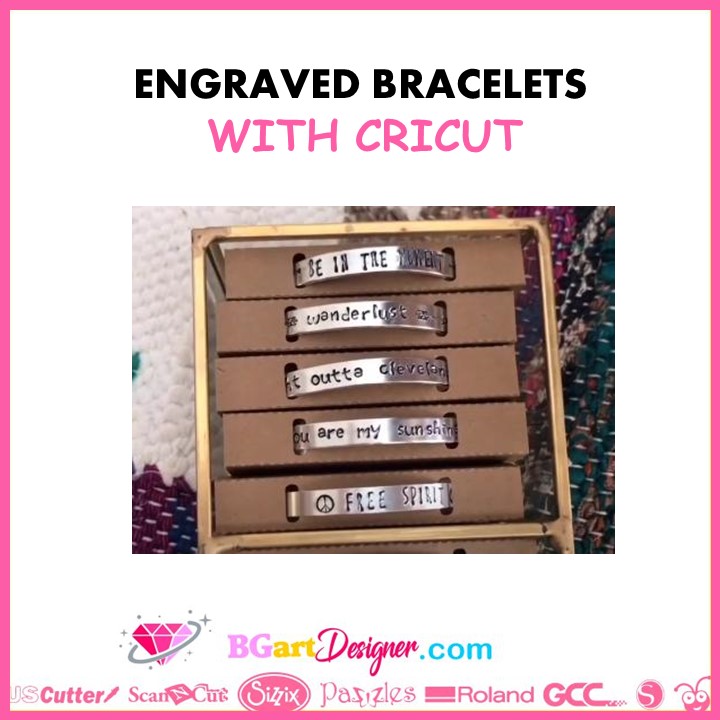
Engraved bracelets with cricut! Get an amazing bracelet to give as a gift in minutes, just with your Cricut machine!
This is an awesome project for those looking for personalized gift ideas or to make something special; You can engrave whatever you want in any font on this bracelets blanks.
Supplies needed
- Cricut maker
- Engraving blade
- ImpressArt Essential Bracelet Kit
- Strong grip mat
- Painters tape
In the ImpressArt Essential Bracelet Kit, there will be some stamp enamel to fill in the engraving, some blanks, and other useful things for this project.
If you run out of blanks bracelets or stamp enamel you can buy them separately to purchase more bracelets, (by the way the stamp enamel markers work well too).
We are also going to use a pen; another light grip mat, and some thin tissue paper to test the placement (which is optional but helps to not struggle with this engraved bracelets with Cricut project).
Working on the design of the engraved bracelets
When designing the project in Cricut design space; first draw a flat rectangle with the size of the bracelet. Then write some phrases or words, here are some recommendations when choosing the font.
- Capital letters are a good choice because they are all the same size; which allows you to make the text a little bigger when it fits on the bracelet so it can be better appreciated.
- Search in the Cricut fonts, and filter them for “writing”, because they work well.
Make sure the selected font is not a cutout, this means it doesn’t look like a single line; to fix that go to the text style, pull it down and select writing.
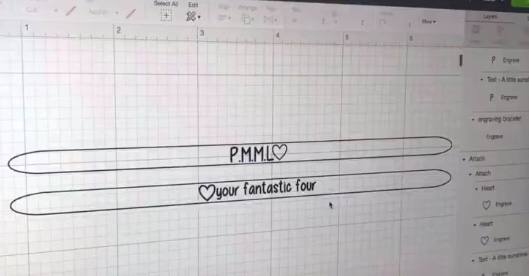
Now duplicate the rectangle with the size of the blank bracelets and arrange them in two groups; one on the right and one on the left.
The one on the left is to test the placement of the design without ruining the blank bracelet (this step is optional but recommended); and the one on the right is to engrave it on the bracelet.
Size the words in the rectangles, so they fit the template. If there is more than one word to size; first make one and choose the size number for it; then select the other word and put that number in the size setting at the top so it will be the same.
Testing the location of the bracelets designs
Concentrate on the group on the left of the design, hide the words of the other group to test the location with the first one.
Click on do, there will be two different groups on the mat, one for the words and one for the rectangles; move the rectangles to the same mat as the designs; just for a minute to align the words better.
Place the rectangles on the mat where you think is best, as a recommendation put it in the center of some grid lines; then place the design inside the rectangle as centered as possible, and finally hide the rectangle.
Don’t forget to hide the rectangles
Now put some tissue paper on the light grip mat, this paper is good because it’s a bit transparent, and this way it is easy to see the exact location on the grid.
Draw the shape of the bracelet on the paper tracing around it with a pen; then we are going to write with the Cricut maker what we just designed; and this way we can see if it is necessary to correct something.
Add the Cricut pen in the Cricut maker, draw the words and use it as a guide to making a perfect personalized bracelet.
Engraved bracelets with Cricut
Back in Cricut design space, now focus on the design group on the right. Delete the left design group that we do to draw; and keep the other group, don’t attach them together because the rectangles will be hidden.
Choose the word that is inside the rectangle template and then go to the top and make sure that the Cricut maker or Cricut maker 3 is chosen; because those are the only two machines that can engrave.
With the word selected, pull down the operation setting at the top left and select the “engrave” option; Repeat this operation selection process with each word in the group. Then click on make it.
Repeat the process of putting all the elements in one mat and placing the designs in the same location of the test we made before; if it is necessary to correct something, do it.
Don’t forget to hide the rectangles
Time for the action
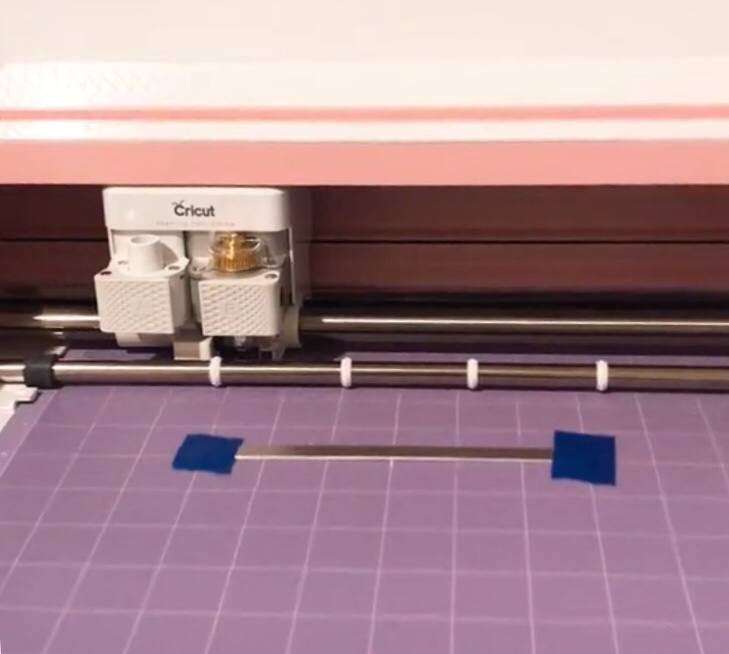
Now it’s time to put the bracelets on the strong grip mat, the first thing to do is to remove the protective film that they have on both sides.
Next, place the bracelets on the mat in the exact location of the grid mat on Cricut design space; use the number of the grid as orientation.
Finally, put some tape over them so they do not move, but keep in mind where the designs are going to be so that it does not interfere; Remove the blade you have in the Cricut maker and put the engraving tip on it. Load the mat and hit the go button.
Once the Cricut maker is done with the job, look at them closely and if they are good let’s finish these on bracelets.
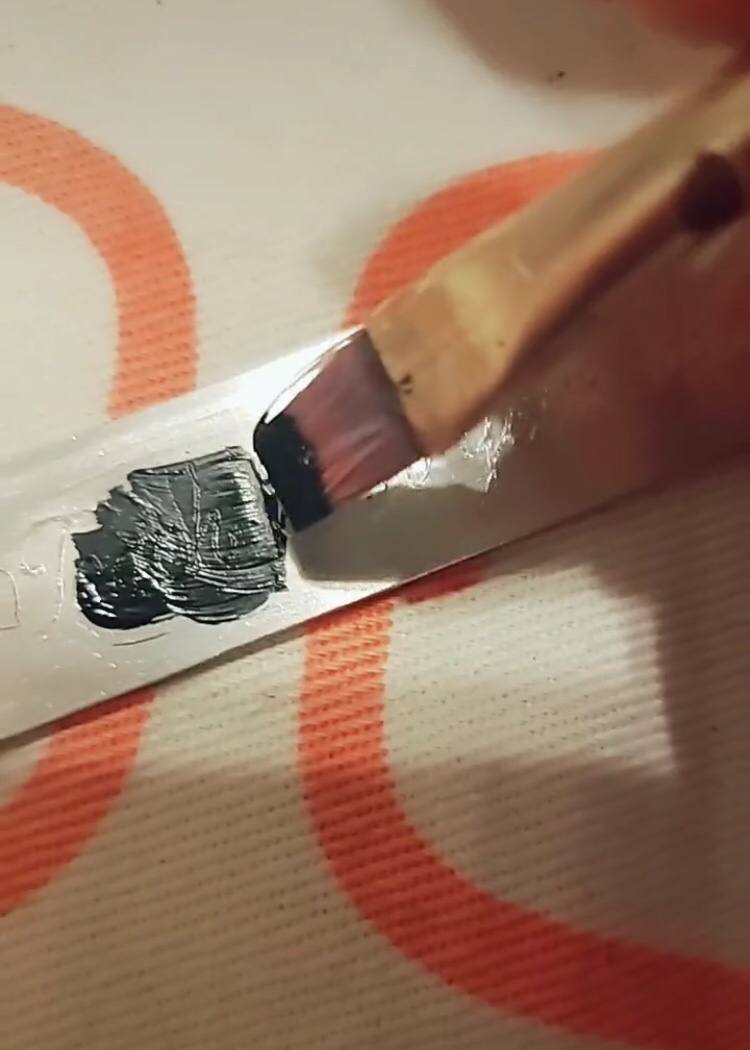
First of all, add some stamp enamel over the word and brush it on; and let it dry for one to three minutes; and let it dry for one to three minutes. Once the time is up wipe off all the excess and you will have that black on your engraving.
Now it is time to bend them, put the metal on the lip that will hold it and make sure it is face up and just push the bracelet down; and then repeat that on the opposite side and now you have a cuff bracelet; you can use the tweezers to get the perfect round bracelet shape.
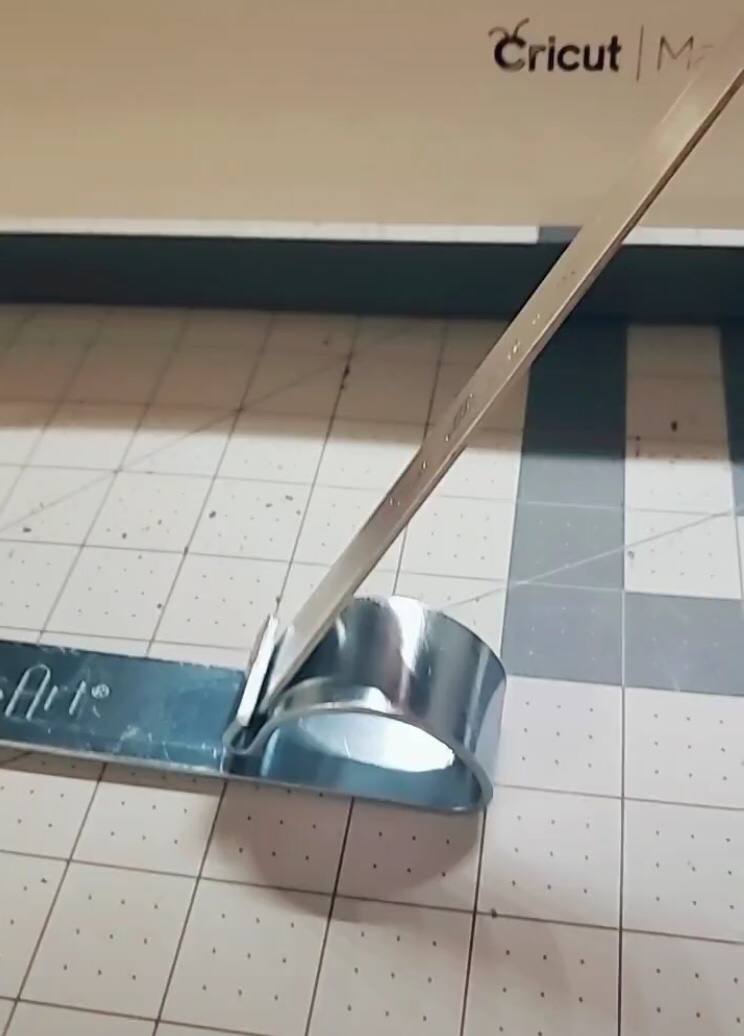
For different wrist sizes, these are super easy to bend so you can bend them out and reshape if needed.
Easy and wonderful, isn’t it? this tutorial on engraved bracelets with Cricut is truly a treasure. Let me know your comments below!