Cutting and Crafting
Dome candy Holders Tutorial with Cricut
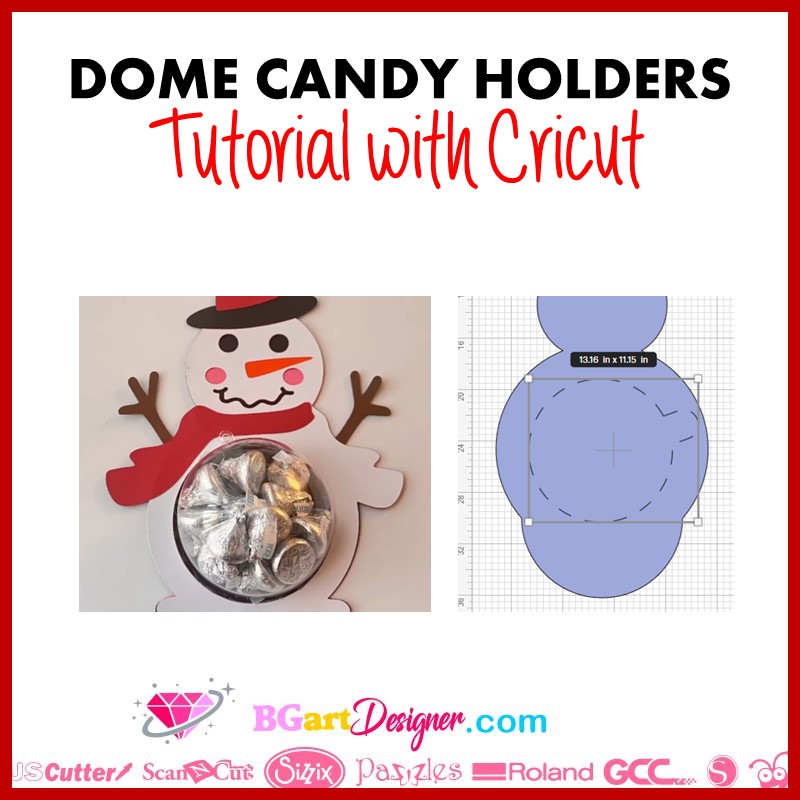
Create Dome candy holders with a Cricut machine. It is a great and easy gift for Christmas, birthdays or any holiday! Try to make these candy holders dome and surprise everyone!
Supplies Needed
- Fillable ornament balls
- Cardstock
- Foam tape
- Cutting Machine
- Candies
First of all, create the design of the piece. It needs to contain at least two layers, because the idea of this project is to put one half of an ornament and put some candy inside. For the design of the piece it is also important that the upper layer has a hole the size of the ornament circumference. Find HERE some awesome designs to decorate the piece or to create it!
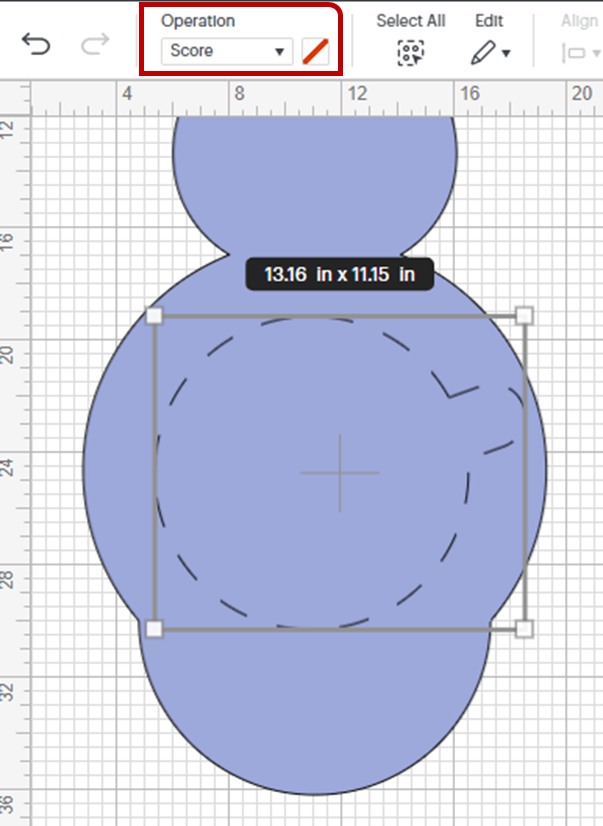
It is possible to create a character. Add hands to simulate that it is carrying the dome, or simply create a shape. For the base layer create a dotted circle. For that, insert a circle with the size of the dome; select it and click “Score” on the operation settings. So to don’t ruin the Dome candy holders created with a Cricut at the time of picking up the candies, just pull up the removable circle and voila!
Cut out the design using a cutting machine, it can be a Cricut machine, a Silhoutte Cameo or a Brother ScanNcut! You can also Check HERE the different cutting machines.
Assembling the Dome candy holder
Once we have all the pieces, it’s time to start assembling! Take the dome and flip it over to put some candy inside. After that, get some foam tape and the base layer of the piece. The foam tape here is optional, it is to create an elevation perspective, but you can just use glue. Add foam tape or glue to adhere the base layer, placing small pieces around it.
After that, place the dome with the candies on top of the base layer, making sure it is centered. Finally, carefully place the top layer, pressing down a little so that it adheres properly. Another way to do it, is to add some foam tape only around the hole of the circle to create a relief, and add to the rest of the piece glue.
The dome won’t fall off because it has a little tab to glue the two pieces of the ornament together, but since we’re only going to use one side, make sure the tab is covered with the top layer and that’s it!