Cutting and Crafting
Easy steps for convert an image to SVG
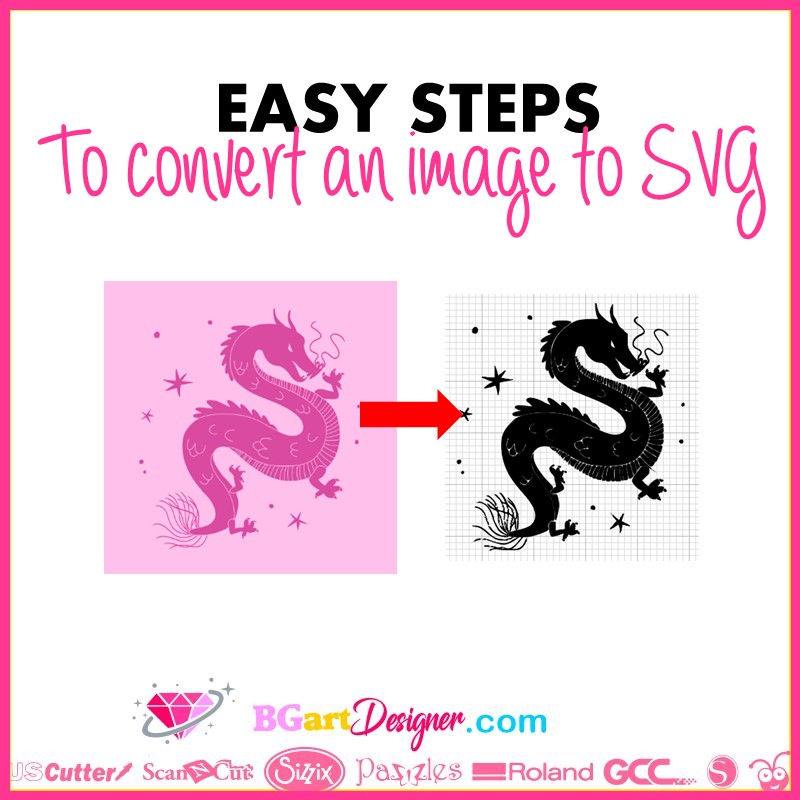
Easily convert an image to SVG to work with any Cricut and cutting machine!
When working with a cutting machine it is much easier to use an SVG image instead of using the image in another format. This is because programs like Cricut Design Space and Slihouetthe Studio work better with them.
In BGArtDesigner there are tons of lovely SVG designs that can be easily used, but what if you want to use a specific image? Well, in this post will be the step by step process on how to convert an image to SVG!
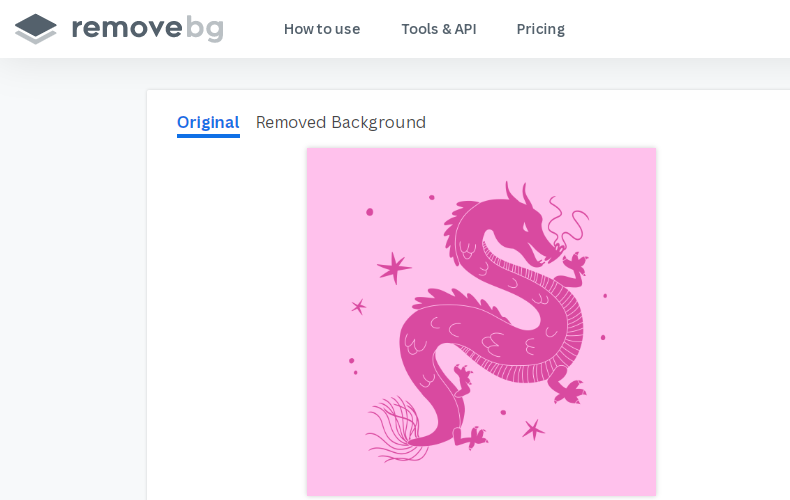
Removing background
First of all, find the image, it can be on Google by typing what you want in the search bar. Then click on the image and save it to the desktop or any folder of choice. After that, open a new page in Google browser and go to www.remove.bg. This website is perfect for removing the background of the images, and it is easy to use.
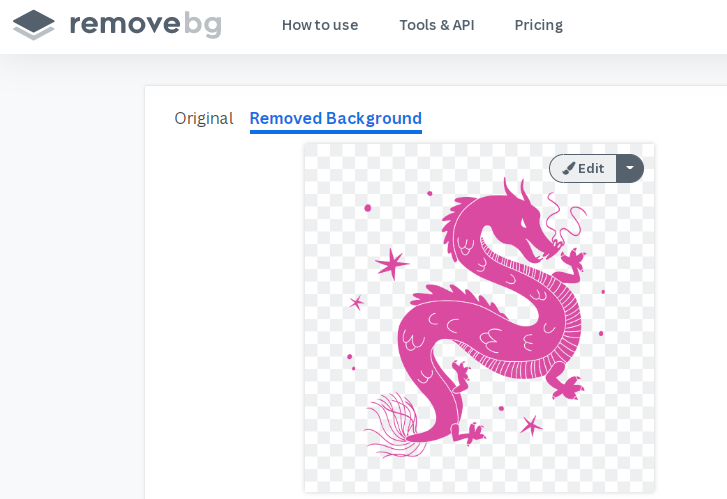
Once remove.bg is open click “Upload image” and find the saved image. Then wait until the website remove the background from it. Finally, click on “Download” to save the image, again it can be in a folder or on the desktop.
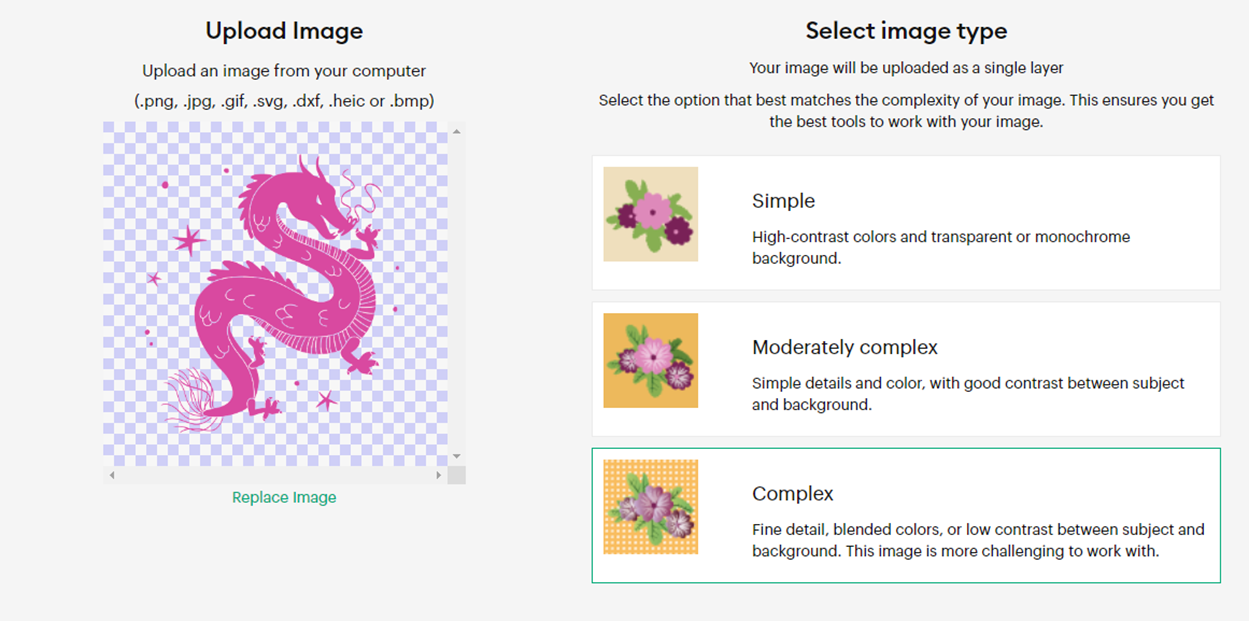
Working on Cricut Design Space
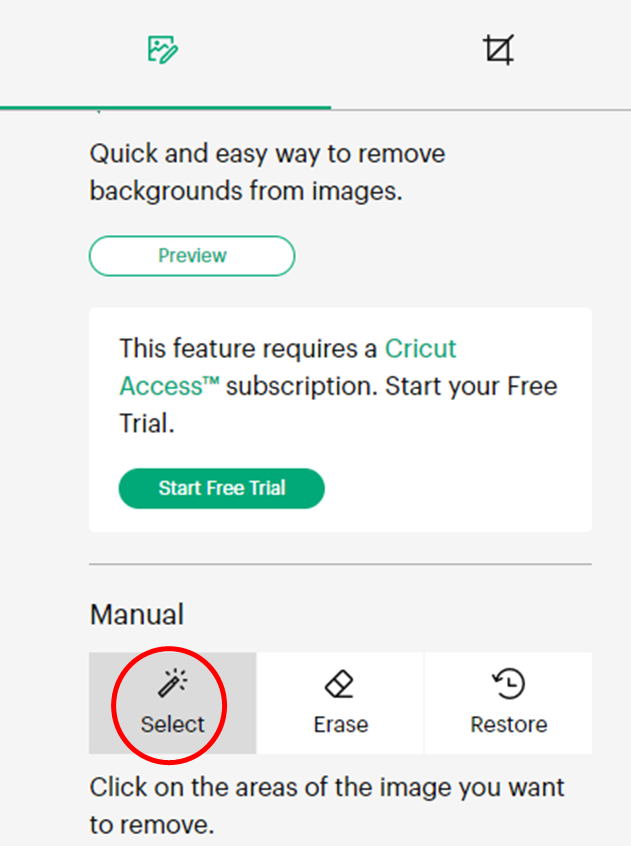
Now, open Cricut Design Space, and upload the image we removed the background from before. Click on it, and select “Complex image” then clean it up if needed. This is in case there are some spots that still has a color background, it is possible to remove it at Cricut design space. For that, go to the manual settings, click “Select”, and start removing the color spots.
After that, click on “Apply and continue” and select the ” cut image” format. Finally, save the image and insert it into the Cricut Design Space canvas and it is ready! The image will now work as an SVG design, perfectly compatible with Cricut machines.