Cutting and Crafting
DIY Cardstock cutouts larger than Cricut mat
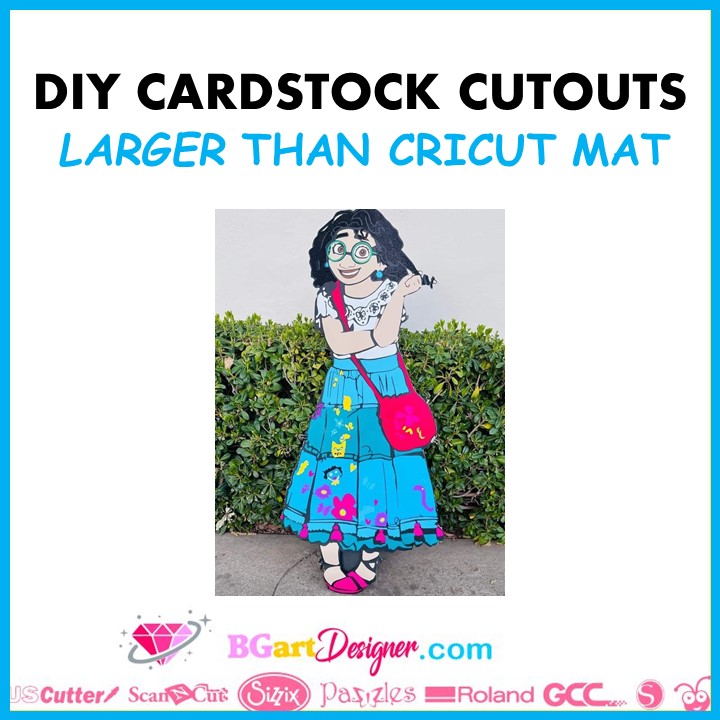
Make really big, super fun characters to decorate for parties or children’s rooms. It is possible to cut larger images on a Cricut cutting machine! Even though the largest cutting mat you can buy and use is 12 by 24 inches, you can certainly do cardstock cutouts larger than the Cricut mat!
Supplies needed
- Cardstock
- Cutting machine
- Cutting mat
- Tape
- Spray adhesive
- Tacky glue
Consider two things when choosing the paper
- the larger the paper, the less work you will have to do.
- The heavier the card stock, the more durable the cutout will be.
Optional supplies
- Foam core
- Craft knife
Tips when choosing the image
First, find a design HERE or create one. Be sure to select a design suitable for this technique, they are the ones that are mostly solid with extra layers and with a large solid background.
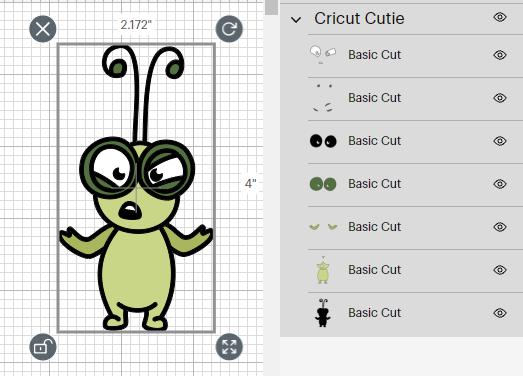
Next, prepare the image for cutting, reduce the canvas size, so as to have more space to work with, and size the image. For this also keep in mind the maximum size to cut on each Cricut mat.
- For the 12 by 12 mat the largest size it will cut is 11.5 by 11.5 inches.
- For the 12 by 24 mat the largest size it will cut is11,5 by 23,5 inches
Therefore, when sizing the image, as a recommendation, do so in 12-inch increments to ensure that the image fits correctly on the mat.
Technique for making a larger cutout
It’s time to slice everything to make the image fit the mat on the Cricut mat. The trick here is to cut the image into pieces to put them back together at the end.
To do this go to Cricut design space, upload the image you are going to use, and then insert a square with the size of the mat. Duplicate the mat template and cover the entire image with as many mat templates as needed.
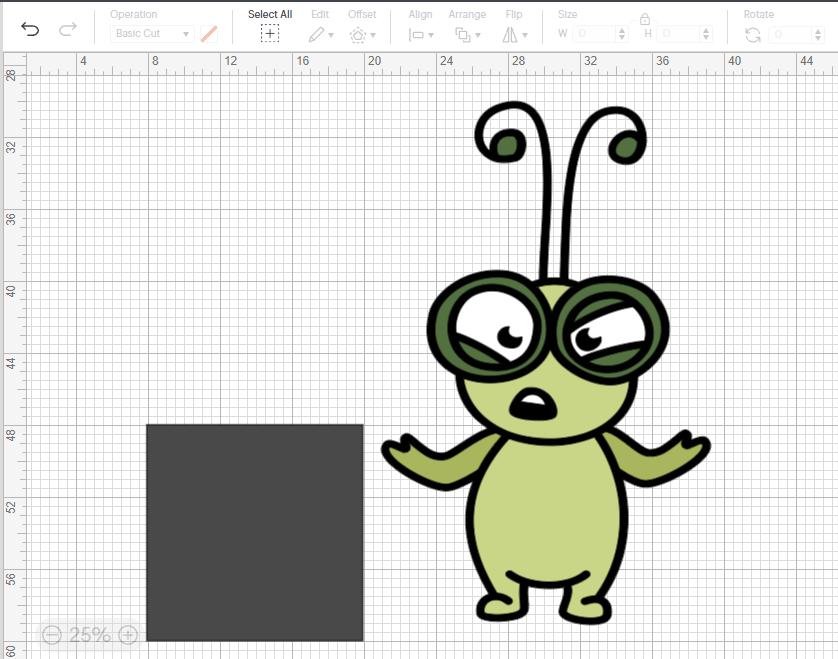
Line up the templates and make sure they are right next to each other, with no gap in the middle and no overlapping. This way you will have a set of mats to use as a template as well. Then duplicate the set of mats so as to not re-create them.
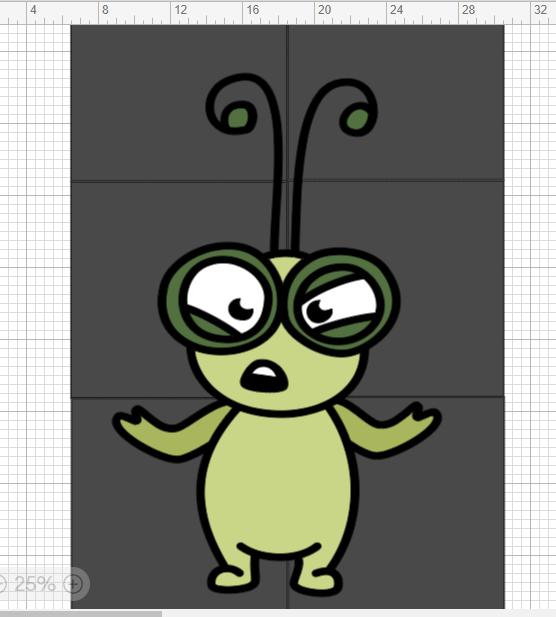
Ungroup the image layers and separate them. Take the parts of the image that are too large to fit on a single mat and slice them up. The goal is to turn them into mat sized pieces. Once you have the layers that are too large separated from the others, let’s place them on top of the mat set created earlier. Make sure the entire mat set fits the layer completely.
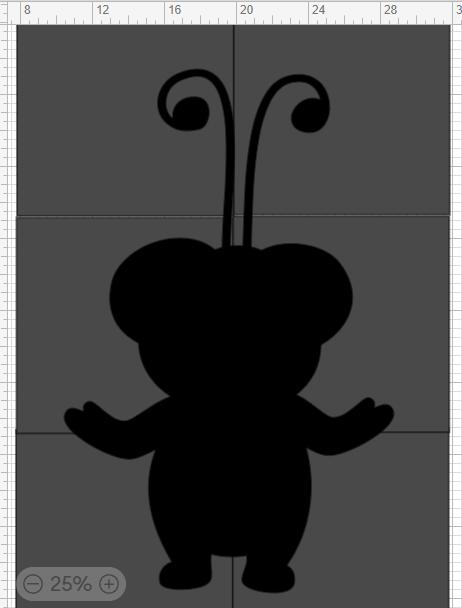
Slicing process
Now it’s time to slice the layers to create the cardstock cutout that is larger than a Cricut mat. The slice tool works by taking two shapes to create a new shape. To do this you just select two elements at the same time. In this project, they will be the square mat template and the large layer.
To select the two shapes at the same time, click on one shape first, and then, keeping the shift on the keyboard, click on the other shape. Finally, click on “slice” in the low settings on the right, and after that, remove the remnants of the mat template, below the slice image there will be remnants too, don’t forget to remove those.
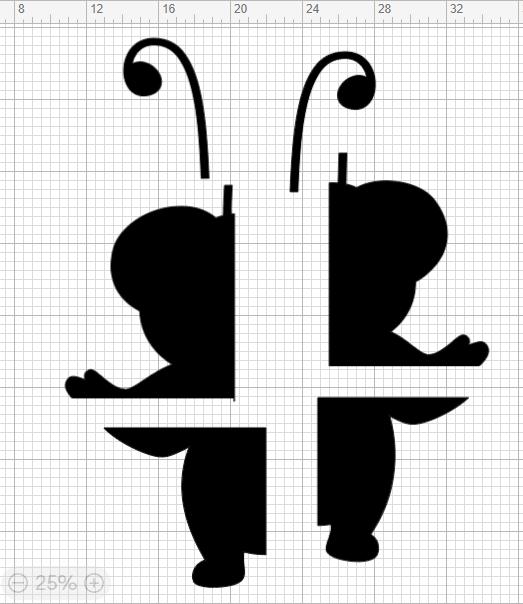
If we get it right when we send it to cut, Cricut design space will not show the incompatible image window and will send the design to the cut setting. In case of not having a paper that fits the size of the mat or the size of the image, because it is smaller, then slice the image to the size of the paper or put two pieces of paper side by side on the mat.
If the mat is not sticky, tape the undersides of the two sheets of paper together before placing them on the mat. Finally, click “Continue” and make sure to cut the correct material.
If you have difficulties using the slice tool, it is because you have more than two layers selected.
Assembling the cardstock cutout
Once all the cardstock pieces have been cut, it is recommended that you consult the images on the Cricut design space screen of the one you cut, to use as a guide when assembling, to place the pieces in the right place.
First, organize the sliced pieces and tape them together. Put the tape on the back of each piece to secure it. After that, start joining all the layers together. As a recommendation, start with the bottom layer. Use a thin coat of tacky glue on the back of each subsequent layer to attach them together. And the cardstock cutout larger than a Cricut mat its done!
Making the stand
This step is optional, but worth it if you want the cardstock to stand on its own. Take the foam core and place the cardstock cutout on top. Start tracing the edge of the cardstock cutout with a pencil. Then, using a craft knife, cut along the inside of the pencil line.
You can’t cut the foam core on your Cricut because it is too thick.
If the piece of foam core is too small, simply trace the edge of the cardstock in parts and then tape them together. Finally, glue the cardboard to the foam core using a spray adhesive as a recommendation
After that, cut a strip of foam core about 80% of the height of the cardstock size and also score an additional 4 inches on that strip. Do not cut that part all the way through, just fold over that scoring section.
Turn over the cardstock cutout with the foam core glued on. Align the bottom of the backing with the bottom of the cutout. Fold the scoring section under and then glue that scoring section to the back of the cardstock cutout and it will stand on its own!
The cool thing about this cardstock cutout larger than the Cricut mat, is that people usually look at these larger cutouts from quite far away, so they can’t see the line on the paper or the small imperfections if you didn’t line it up exactly. Let me know your comments below!
